The Ultimate Guide to Renter-Friendly Smart Home Setups
Living in an apartment or rental property doesn't mean you have to sacrifice the convenience, security, and energy efficiency of a modern smart home. Historically, renters were locked out of the smart home revolution due to strict lease agreements prohibiting drilling holes, hardwiring new electrical circuits, or replacing existing fixtures. Today, the market has shifted dramatically. A new generation of non-destructive, battery-operated, and retrofit-friendly devices allows DIY installers and tenants to build robust automation workflows without risking their security deposits.
This comprehensive guide covers hands-on installation strategies, specific product recommendations, and network configurations tailored specifically for apartment dwellers. Whether you are dealing with thin walls, concrete barriers, or strict landlord policies, you can create a fully integrated smart ecosystem that moves with you when your lease ends.
Smart Lighting: Illuminating Without the Hardwiring
Apartment lighting is notoriously difficult to upgrade. Most rentals feature standard builder-grade fixtures, and many older buildings lack the neutral wires required for hardwired smart switches. Fortunately, smart bulbs and LED strips offer a zero-drill alternative that completely transforms the ambiance of your space.
Smart Bulbs vs. Smart Plugs
For overhead fixtures and lamps, you have two primary renter-friendly routes:
- Smart Bulbs (Philips Hue, LIFX, Govee): These replace your existing bulbs and connect via Wi-Fi, Bluetooth, or a dedicated hub (like the Hue Bridge). They offer millions of colors and tunable whites. Installation constraint: The wall switch must remain 'on' for the bulb to stay connected to the network. This can be frustrating in shared households.
- Smart Plugs (Kasa, Wyze, Aqara): If your apartment relies heavily on floor and table lamps, smart plugs are the superior choice. You plug your 'dumb' lamp into the smart plug, leaving the bulb and wall switch untouched. This is highly reliable and costs significantly less per fixture.
LED Strips and Tension Rods
LED light strips are fantastic for adding indirect lighting behind TVs or under kitchen cabinets. However, the adhesive backing on these strips can peel paint or leave a sticky residue on rental cabinets. The Renter Hack: Purchase aluminum LED channels with diffusers. Instead of sticking the LED strip directly to your cabinets, adhere the aluminum channel using heavy-duty 3M Command Strips (ensure you check the weight rating, usually 3-5 lbs per strip). Alternatively, use tension rods inside window frames or room dividers and wrap RGBWW LED strips around them for dramatic, damage-free accent lighting.
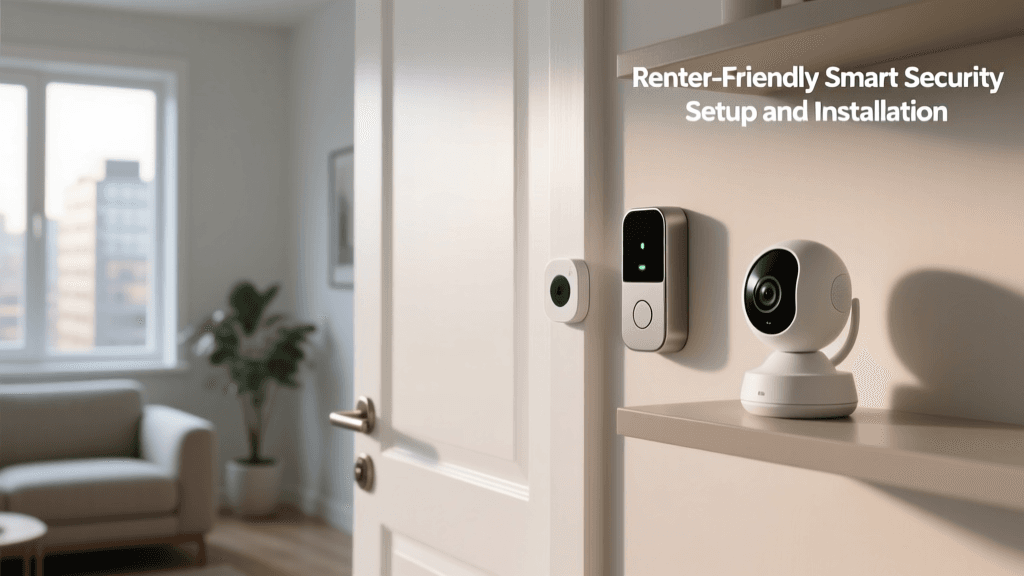
No-Drill Security and Monitoring
Security is a top priority for apartment dwellers, especially those in ground-floor units or high-traffic buildings. Traditional security cameras require drilling into siding or doorframes, which is a major lease violation. Here is how to secure your perimeter non-destructively.
The Peephole Camera Solution
The Ring Peephole Cam is arguably the greatest security innovation for renters. It replaces the standard optical peephole on your apartment door without requiring any new holes. Installation Steps:
- Unscrew the interior plate of your existing peephole.
- Remove the exterior barrel and keep it safe.
- Insert the Ring Peephole Cam barrel through the existing hole.
- Attach the interior battery housing and sync it to your Wi-Fi.
When your lease ends, simply reverse the process, reinstall the original optical peephole, and take the camera with you.
Indoor Cameras and Adhesive Sensors
For indoor monitoring, shelf placement is key. The Wyze Cam v3 and Blink Mini feature compact, weighted bases that sit perfectly on bookshelves or kitchen counters, providing a wide field of view of your entryway. For door and window sensors, avoid the included screws. Instead, use 3M Command Poster Strips or Gorilla Removable Mounting Tape. These adhesives are strong enough to hold lightweight magnetic sensors but will peel off cleanly when you apply heat from a hairdryer during move-out.
Smart Locks: Access Control That Respects Your Lease
Replacing your apartment's deadbolt is usually a violation of your lease, and landlords are hesitant to approve new hardware due to fire code and master key concerns. Retrofit smart locks solve this problem entirely.
The Retrofit Advantage: August Wi-Fi Smart Lock
The August Wi-Fi Smart Lock (4th Gen) installs entirely on the interior side of your door. It replaces your existing thumb-turn while leaving the exterior deadbolt and keyhole completely untouched. This means your landlord's master key still works, satisfying lease requirements, while you gain smartphone control, auto-unlock via geofencing, and temporary guest access.
Pro Tip: Always photograph your apartment's original hardware and wiring before removing anything. Store all original screws, faceplates, and deadbolts in a labeled Ziploc bag taped to the back of your smart device's packaging. This guarantees you won't lose the pieces needed to restore the apartment to its original condition.
Renter-Friendly Smart Lock Comparison
| Smart Lock Model | Retrofit Friendly? | Wi-Fi Built-In | Battery Life | Estimated Price |
|---|---|---|---|---|
| August Wi-Fi (4th Gen) | Yes (Interior Only) | Yes | 3-5 Months | $180 - $230 |
| Yale Assure Lock 2 | No (Full Replace) | Optional Module | 1-2 Years | $250 - $300 |
| Level Lock+ | No (Full Replace) | No (HomeKit) | 1+ Year | $300 - $350 |
Note: If you opt for a full-replace lock like the Yale or Level, you must get written permission from your landlord, and you must keep the original deadbolt in a safe place to reinstall upon moving out.
Climate Control and Indoor Air Quality
Apartments are notorious for poor ventilation and inconsistent HVAC systems. Upgrading your climate control can improve comfort and reduce utility bills, but it requires careful handling of existing wiring.
Smart Thermostats in Rentals
According to the Department of Energy, smart thermostats can significantly reduce heating and cooling costs by learning your schedule and adjusting temperatures automatically. The Ecobee SmartThermostat Premium is an excellent choice for renters because it includes a room sensor, allowing you to prioritize the temperature of your living room or bedroom rather than the hallway where the thermostat is usually located.
The C-Wire Challenge: Many older apartment buildings lack a common wire (C-wire) to provide continuous power to smart thermostats. If your apartment's HVAC closet lacks a C-wire, you can use an Ecobee Power Extender Kit (PEK). The PEK wires into the HVAC control board inside the closet, utilizing existing wires to deliver power without running new cables through the walls. Always turn off the breaker before opening the HVAC control board, and take a photo of the original wiring configuration.
Monitoring Air Quality
Rental units, especially older ones, can suffer from poor ventilation, leading to high CO2 levels, VOCs, and humidity. The Environmental Protection Agency notes that indoor air can be significantly more polluted than outdoor air. The Airthings View Plus is a freestanding, battery-operated air quality monitor that tracks radon, PM2.5, CO2, and humidity. It requires zero installation—simply place it on a desk or mount it to the wall using the included magnetic adhesive plate. You can set up automations to trigger a smart plug connected to a HEPA air purifier whenever PM2.5 levels rise above safe thresholds.
Network Infrastructure for Concrete and Lath Walls
A smart home is only as good as its network. Many apartment complexes are built with concrete, cinderblock, or metal lath walls that act as Faraday cages, destroying Wi-Fi signals. Furthermore, you cannot run Ethernet cables through the walls to connect access points.
Mesh Wi-Fi Without the Wires
To overcome apartment signal dead zones, invest in a wireless mesh system like the eero 6+ or TP-Link Deco XE75. These systems use a dedicated wireless backhaul to communicate with each other, eliminating the need for hardwired Ethernet connections between nodes. Placement Strategy: Place the primary node connected to your modem in a central, elevated location. Place the secondary node halfway between the primary node and the dead zone (e.g., the bedroom or home office). Avoid placing nodes inside metal entertainment centers or behind large appliances, as these will block the signal.
Securing Your Network
Living in a high-density building means your Wi-Fi network is surrounded by dozens of others, making it a potential target for interference or unauthorized access. The Cybersecurity and Infrastructure Security Agency (CISA) strongly recommends isolating smart home devices on a separate network. Most modern mesh routers offer a 'Guest Network' or 'IoT Network' feature. Connect all your smart bulbs, plugs, and cameras to this isolated network. If a cheap smart plug is compromised, the attacker cannot pivot to your personal laptop or smartphone on the main network.
Apartment-Specific Automation Workflows
Automation in an apartment requires a different mindset than a sprawling suburban home. You must consider shared walls, thin doors, and communal spaces.
The 'Quiet Hours' Routine
In an apartment, noise travels. Automating your home to respect 'Quiet Hours' is essential for good neighborly relations. Create a routine in your smart home hub (Apple HomeKit, Google Home, or Amazon Alexa) that triggers at 10:00 PM:
- Lighting: Transition all smart bulbs to a warm, dim 20% brightness.
- Audio: Lower the volume of your smart speaker or soundbar to a maximum of 15%.
- Appliances: Delay the start of smart washing machines or dishwashers until 8:00 AM the following morning to prevent vibration noise from traveling through the floorboards.
- Locks: Auto-lock the front door and arm your indoor security cameras.
Geofencing for Shared Spaces
If you live with roommates, geofencing (triggering actions based on your phone's location) can be tricky. You don't want the lights to turn off when you leave if your roommate is still on the couch. Configure your hub to use 'Presence Logic' rather than simple triggers. For example, in Apple HomeKit, set the 'Turn Off Lights' automation to only execute when everyone has left the geofence radius, rather than when anyone leaves.
The Move-Out Checklist: Packing and Resetting
When your lease is up, efficiency is key. Follow this checklist to ensure you get your full security deposit back and your smart home is ready for the next location.
- Factory Reset All Devices: Before packing, factory reset your hubs, cameras, and locks. This removes them from your cloud accounts and ensures the next tenant cannot accidentally connect to your network.
- Remove Adhesives Safely: Never pull Command Strips straight out. Stretch them slowly and parallel to the wall to release the adhesive without tearing the drywall paper.
- Restore Original Hardware: Reinstall the original peephole, deadbolt thumb-turn, and thermostat faceplate using the Ziploc bags of hardware you saved on day one.
- Patch and Paint (If Necessary): If you drilled any holes for TV mounts or heavy shelves, use a lightweight spackle to fill them. Many leases allow small nail holes, but it's always safer to leave the walls pristine.
- Update Your Network Profile: Once you move into your new apartment, update your Wi-Fi SSID and password to match your old network. This brilliant trick allows all your smart bulbs, plugs, and cameras to reconnect automatically without having to re-pair dozens of devices one by one.
Conclusion
Building a smart home in a rental property is entirely feasible with the right strategy and hardware. By focusing on retrofit locks, non-destructive mounting solutions, and wireless mesh networks, you can enjoy the full benefits of home automation without violating your lease. The key to success lies in meticulous planning, respecting the original property condition, and choosing devices designed for portability. Your smart home should be an asset that moves with you, adapting seamlessly to whatever space you call home next.