Introduction to Your First Smart Home Setup
Embarking on your first smart home setup is an exciting journey that promises unparalleled convenience, enhanced security, and improved energy efficiency. However, the difference between a frustratingly fragmented collection of gadgets and a seamlessly automated home lies entirely in the foundation you build on day one. Many beginners make the critical mistake of buying random smart devices without considering the underlying network infrastructure or the central hub required to tie them together. According to the Connectivity Standards Alliance, the recent rollout of the Matter standard has unified device communication, but a robust local network remains the non-negotiable backbone of any reliable smart home.
This comprehensive guide will walk you through the essential steps of setting up your first smart home. We will cover how to bulletproof your home network, select and configure the right central hub, understand basic wiring for smart switches, and create your first automation workflows. Whether you are outfitting a single apartment or a multi-story house, these foundational steps will ensure your devices respond instantly and reliably.
Step 1: Building a Bulletproof Smart Home Network
Your Wi-Fi network is the central nervous system of your smart home. Standard ISP-provided routers are generally designed to handle a handful of laptops and smartphones, not fifty or more smart bulbs, plugs, and sensors. When you overload a standard router with Internet of Things (IoT) devices, you will experience dropped connections, delayed responses, and network crashes.
Why Mesh Wi-Fi is Essential
For a smart home, a Mesh Wi-Fi system is highly recommended. Unlike a single router that blasts a signal from one location, a mesh system uses multiple nodes placed throughout your home to create a seamless, unified blanket of coverage. This eliminates dead zones in basements, garages, and backyards where smart security cameras and outdoor lighting are typically installed. Look for Wi-Fi 6 (802.11ax) mesh systems, such as the Eero 6 or TP-Link Deco X55, as they feature OFDMA technology, which is specifically designed to handle multiple low-bandwidth IoT devices simultaneously without clogging the network.
According to the Wi-Fi Alliance, certified EasyMesh networks allow for multi-vendor interoperability and intelligent steering, ensuring your smart devices connect to the strongest node automatically.
Separating Your IoT Devices
Most smart home devices, particularly smart plugs, basic bulbs, and sensors, operate exclusively on the 2.4GHz Wi-Fi band. This band offers superior range and wall penetration compared to 5GHz, but it is more susceptible to interference and congestion. To secure your network and improve performance, create a dedicated 'Guest' or 'IoT' SSID specifically for your smart devices. This isolates them from your primary network where your personal computers and banking data reside, adding a crucial layer of cybersecurity.
Step 2: Understanding Smart Home Protocols
Before purchasing devices, you must understand the wireless languages they speak. Relying solely on Wi-Fi for every device will quickly crash your router. Instead, modern smart homes utilize a mix of protocols:
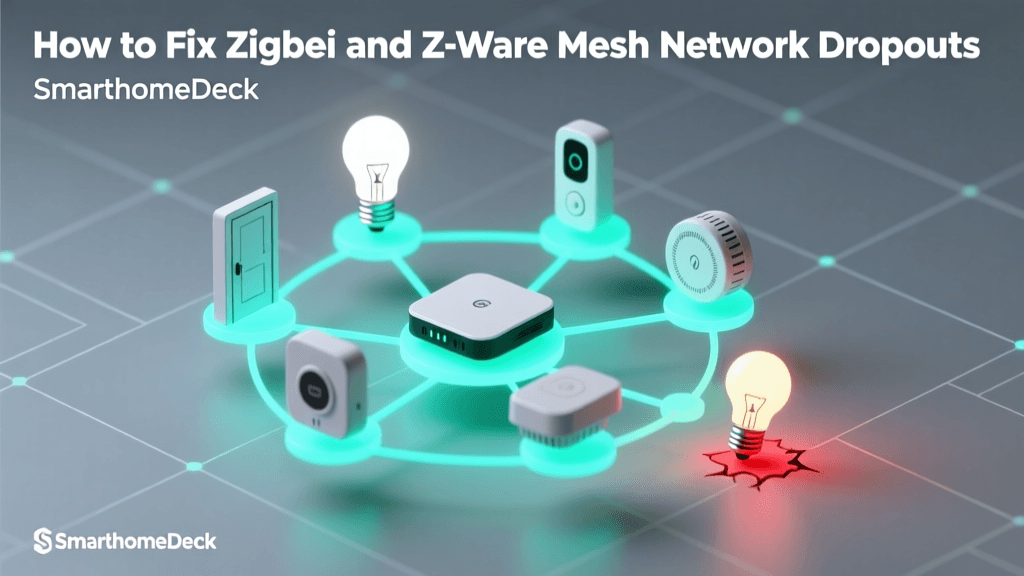
- Zigbee & Z-Wave: Low-power, mesh networking protocols. Each plugged-in device acts as a repeater, strengthening the network. Ideal for sensors and locks.
- Thread: A newer, IP-based mesh protocol that is incredibly fast and reliable. It forms the backbone of the new Matter standard.
- Wi-Fi: High bandwidth, high power consumption. Best reserved for cameras, smart displays, and appliances.
- Bluetooth LE: Short-range, primarily used for initial device provisioning and localized mesh lighting.
Step 3: Choosing and Configuring Your Central Hub
A smart hub acts as the translator and brain of your home. It connects to your router via Ethernet and communicates with Zigbee, Z-Wave, and Thread devices locally, meaning your automations will still run even if your internet connection goes down. Local processing is vastly superior to cloud-based processing in terms of speed and privacy.
Comparison of popular smart home hubs based on local device capacity and average retail price
Top Hub Recommendations for Beginners
If you want a plug-and-play experience with excellent voice control, the Apple HomePod Mini or the Amazon Echo Show 8 (3rd Gen) are fantastic starting points. Both act as Thread Border Routers and Zigbee hubs. However, if you prioritize privacy, local execution, and advanced automation logic without relying on cloud servers, the Home Assistant Green ($99) is the undisputed champion for DIY enthusiasts. It requires zero command-line knowledge to set up and supports virtually every smart home brand in existence.
Step 4: Wiring Basics for Smart Switches
While smart bulbs are easy to install, smart wall switches offer a more permanent and reliable solution for home lighting. Installing a smart switch requires basic electrical knowledge and strict adherence to safety protocols.
SAFETY WARNING: Always turn off the power at the main circuit breaker before opening any electrical box. Use a non-contact voltage tester to verify that the wires are completely dead before touching them.
Identifying Your Wires
Most smart switches require a Neutral wire to stay powered on even when the light is turned off. In the US, neutral wires are typically white (or grouped in a bundle of white wires in the back of the box). You will also need to identify the Line (hot power from the breaker, usually black) and the Load (the wire leading to the light fixture). If your home was built before the 1980s, you may not have a neutral wire in your switch boxes. In that case, you must purchase specific 'No-Neutral' smart switches, such as the Lutron Caseta line, which bypass the need for a neutral wire by leaking a tiny amount of current through the bulb.
Step 5: Adding Your First Smart Devices
Once your network and hub are configured, it is time to add devices. Start small and expand room by room. Here is a recommended starter kit for a living room and entryway:
- Smart Lighting: Philips Hue White and Color Ambiance bulbs. They use Zigbee via the Hue Bridge, keeping Wi-Fi traffic low. Cost: ~$50 per bulb.
- Smart Plugs: Kasa Smart Plugs (EP25). Great for controlling 'dumb' lamps and coffee makers. Ensure your hub supports their specific integration or use their native app. Cost: ~$15 each.
- Door/Window Sensors: Aqara Door and Window Sensor P2 (Matter over Thread). Instant notifications and perfect for triggering entryway lights. Cost: ~$30.
- Smart Thermostat: Ecobee SmartThermostat Premium. According to the U.S. Department of Energy, smart thermostats can significantly reduce heating and cooling costs by learning your schedule and adjusting temperatures automatically when you are away.
Step 6: Creating Basic Automation Workflows
The true magic of a smart home is automation—devices reacting to your life without you needing to open an app or shout a voice command. A basic automation consists of a Trigger (the event that starts the action) and an Action (what the devices do).
Essential Beginner Automations
1. The 'Arriving Home' Geofence:
Trigger: Your smartphone crosses the virtual geofence perimeter around your house.
Action: Turn on the entryway lights, set the thermostat to your preferred comfort level, and unlock the front door (if you have a smart lock).
2. The 'Motion-Activated' Hallway:
Trigger: Aqara motion sensor detects movement in the hallway.
Condition: Only run between 10:00 PM and 6:00 AM.
Action: Turn on hallway smart bulbs to 15% brightness (warm white) to guide you to the bathroom without blinding you.
Troubleshooting Common Setup Issues
Even with meticulous planning, you will encounter hiccups. Below is a troubleshooting table for the most common installation and setup issues faced by DIY smart home enthusiasts.
| Issue | Probable Cause | Solution |
|---|---|---|
| Device fails to pair to Wi-Fi | Attempting to connect a 2.4GHz-only device to a combined 2.4/5GHz SSID. | Separate your router's bands or create a dedicated 2.4GHz IoT network for pairing. |
| Smart switch flickers or won't turn on | Missing neutral wire or incompatible LED bulbs. | Verify neutral wire presence. Install a bypass resistor if using low-wattage LEDs. |
| Zigbee devices dropping offline | Signal interference from Wi-Fi routers or USB 3.0 drives. | Move the Zigbee hub away from the router and use a USB extension cable for the dongle. |
| Automations executing with a delay | Cloud-dependent processing or poor Wi-Fi signal at the device location. | Switch to local-processing hubs (Home Assistant/Hubitat) and add mesh repeaters. |
Conclusion: Securing and Maintaining Your Smart Home
Setting up your first smart home is a highly rewarding project that increases your property's value and daily comfort. By prioritizing a robust mesh network, choosing a local-processing hub, and understanding the underlying protocols and wiring requirements, you avoid the pitfalls that plague most beginner setups. Remember that maintenance is just as important as installation. Regularly check for firmware updates on your hub and devices, as manufacturers frequently release patches that improve stability and security. Embrace the learning curve, start with a single room, and gradually expand your automated ecosystem as your confidence grows.