The Walled Garden Dilemma in Modern Smart Homes
Setting up a smart home in a mixed-device household often feels like navigating a geopolitical landscape. You might have an iPhone user who demands Apple HomeKit compatibility, an Android user who relies on Google Home routines, and a central living room equipped with Amazon Echo devices. Historically, these three major ecosystems—Apple, Google, and Amazon—have operated as walled gardens, each demanding its own proprietary hub, app, and network infrastructure. This fragmentation leads to a cluttered, unreliable, and frustrating user experience where devices cannot communicate with one another natively.
While the Connectivity Standards Alliance has introduced the Matter protocol to bridge these gaps at the device level, the reality of today's smart home market is that thousands of legacy and proprietary devices still rely on cloud-based, ecosystem-specific APIs. To achieve true multi-ecosystem integration, DIY installers and advanced homeowners must deploy a central orchestration layer. Home Assistant has emerged as the undisputed champion of this space, offering a local-first, open-source platform capable of bridging Apple, Amazon, and Google into a single, cohesive automation engine.
In this comprehensive installation and setup guide, we will walk through the hardware selection, network preparation, and step-by-step configuration required to turn Home Assistant into the ultimate multi-ecosystem bridge. By the end of this guide, your HomeKit-only smart locks will be triggerable via Alexa voice commands, and your Google Nest thermostats will be controllable from your Apple Watch.
Choosing Your Bridge Hardware
Before diving into software configuration, you must select the physical hardware that will host your Home Assistant instance. Because this device will act as the central nervous system for your entire multi-ecosystem setup, reliability and processing power are paramount. You are not just running a simple script; you are managing local polling, cloud API webhooks, Thread border routing, and real-time state synchronization across dozens of devices.
Below is a comparison of the most popular hardware choices for a multi-ecosystem bridge:
| Hardware Platform | Estimated Cost | Setup Difficulty | Pros | Cons | Best For |
|---|---|---|---|---|---|
| Home Assistant Green | $99 | Very Low | Plug-and-play, official support, silent, low power | Limited expansion ports, no local AI acceleration | Beginners and reliable set-and-forget bridges |
| Raspberry Pi 5 (8GB) | $80 - $120 | Medium | Massive community support, low cost, GPIO pins | Requires separate SSD for reliability, runs hot | DIY tinkerers and budget-conscious builders |
| Intel N100 Mini PC | $150 - $200 | Low-Medium | x86 architecture, highly reliable, supports Docker | Larger physical footprint, requires external power brick | Power users running multiple add-ons and databases |
For a dedicated multi-ecosystem bridge where stability is the primary goal, the Home Assistant Green or an Intel N100 Mini PC equipped with an NVMe SSD are the top recommendations. MicroSD cards used in older Raspberry Pi setups are notorious for data corruption when subjected to the constant read/write cycles of Home Assistant's database logging.
Network Preparation: The Secret to Multi-Ecosystem Success
The most common point of failure in multi-ecosystem integration is not the software configuration, but the underlying local area network (LAN). Apple HomeKit, Google Cast, and Amazon Alexa all rely heavily on mDNS (Multicast DNS) and SSDP (Simple Service Discovery Protocol) to discover devices on your network. If your router is blocking multicast traffic, your bridge will fail to see your devices.
Optimizing Router Settings
- Disable IGMP Snooping: On many consumer routers (especially Asus and older TP-Link models), IGMP snooping inadvertently drops mDNS packets. Disable this feature in your LAN settings to ensure discovery broadcasts reach Home Assistant.
- mDNS Reflectors for VLANs: If you run a segmented network (e.g., an IoT VLAN separate from your primary devices VLAN), you must enable an mDNS reflector or repeater (like Avahi) on your router or firewall (such as pfSense or UniFi). Without this, Home Assistant on the IoT VLAN cannot be discovered by your Apple TV or Google Nest Hub on the main VLAN.
- Static IP Assignment: Reserve a static IP address for your Home Assistant hardware in your router's DHCP settings. A changing IP address will break local API callbacks from Amazon Alexa and Google Home.
Base Installation and Initial Onboarding
Once your hardware is connected to your network via Ethernet (Wi-Fi is highly discouraged for a central bridge due to latency and multicast issues), follow these initial setup steps:
- Download the appropriate Home Assistant OS image from the official documentation for your specific hardware.
- Use a tool like BalenaEtcher to flash the image onto your internal drive or external SSD.
- Boot the device and wait approximately 5 to 10 minutes for the initial partition expansion and service startup.
- Access the web interface by navigating to
http://homeassistant.local:8123from a computer on the same network. - Create your administrator account, set your home location (crucial for sun-based automations and presence detection), and select your local time zone.
At this stage, you have a blank canvas. The next steps involve configuring the specific bridges that will allow external ecosystems to 'see' and control your internal smart home devices.
Bridging Amazon Alexa and Google Home via the Cloud
Unlike Apple HomeKit, which supports local network discovery via the HomeKit Accessory Protocol (HAP), Amazon Alexa and Google Home primarily rely on cloud-to-cloud communication for custom smart home skills. To expose your Home Assistant entities to Alexa and Google, you need a secure, encrypted tunnel from your local network to the internet.
Setting Up Nabu Casa (Home Assistant Cloud)
While it is technically possible to set up a manual reverse proxy using DuckDNS, Nginx, and Let's Encrypt, the official Nabu Casa subscription service ($6.50/month) is overwhelmingly recommended for multi-ecosystem setups. It provides a zero-configuration, highly secure remote connection that directly funds the core development of Home Assistant.
- Navigate to Settings > Home Assistant Cloud and create an account.
- Enable the Alexa integration. You will be prompted to link your Home Assistant Cloud account via the Alexa app on your smartphone (under 'Skills & Games').
- Enable the Google Assistant integration. Open the Google Home app, select 'Add Device', and choose 'Works with Google' to link your Nabu Casa credentials.
Filtering Exposed Entities
By default, Home Assistant will attempt to expose every single entity to the cloud, which can lead to cluttered device lists and privacy concerns. You must configure your configuration.yaml to filter what gets sent to Amazon and Google.
cloud:
  alexa:
    filter:
      include_domains:
        - light
        - switch
        - lock
        - climate
      exclude_entities:
        - light.guest_room_testing
  google_actions:
    filter:
      include_domains:
        - light
        - switch
        - cover
        - climate
This configuration ensures that only essential, actionable devices are exposed to voice assistants, keeping your multi-ecosystem voice commands fast and accurate.
Integrating Apple HomeKit: The Local Bridge
Apple HomeKit is unique because it supports local network control via the HomeKit Accessory Protocol. This means your iPhone and Apple TV can communicate directly with Home Assistant over your LAN without ever touching an external cloud server, resulting in sub-50ms latency and enhanced privacy.
The official Home Assistant HomeKit Bridge documentation provides extensive guidance, but the core setup involves adding the integration via the UI and configuring the bridge mode.
Configuration Steps
- Go to Settings > Devices & Services > Add Integration and search for 'HomeKit Bridge'.
- Choose Bridge mode. This creates a single virtual accessory in Apple Home that acts as a gateway for all sub-devices, preventing your Apple Home app from being flooded with individual accessory pairing codes.
- Select the domains you wish to expose (e.g., Lights, Locks, Media Players, Sensors).
- Home Assistant will generate a QR code and an 8-digit pairing code.
- Open the Apple Home app on your iOS device, select 'Add Accessory', and scan the QR code presented on your Home Assistant dashboard.
Pro Tip for iOS Users: If you are running Home Assistant in a Docker container or a virtual machine, ensure that the network mode is set to 'Host' or that mDNS (port 5353 UDP) is properly forwarded to the container. Apple devices rely entirely on mDNS to locate the HomeKit Bridge on the local network.
Visualizing Ecosystem Device Distribution
When designing your multi-ecosystem bridge, it helps to understand how devices typically cluster around specific platforms based on their native strengths. The chart below illustrates a typical device distribution in a mixed-ecosystem household before a central bridge is implemented.
As the data suggests, Apple HomeKit dominates in lighting and secure entry (locks), while Google Home is heavily favored for entertainment casting and complex sensor arrays. Amazon Alexa often bridges the gap in security cameras and third-party smart plugs. By using Home Assistant as the central hub, you can expose an Alexa-exclusive security camera to your Apple HomeKit dashboard, or allow a Google Nest thermostat to trigger HomeKit-native Philips Hue lighting based on occupancy.
Advanced Cross-Ecosystem Automations
The true power of multi-ecosystem integration is not just about control; it is about automation. Once Home Assistant has ingested the states of your Alexa, Google, and Apple devices, you can create workflows that cross the boundaries of the walled gardens.
Example Workflow: The Universal Goodnight Routine
Imagine a scenario where you want to trigger a 'Goodnight' routine. You want the flexibility to trigger this via an Apple Watch complication, an Alexa bedside Echo, or a Google Home voice command.
- Create a Virtual Switch: In Home Assistant, create a helper entity (Toggle) named
input_boolean.goodnight_routine. - Expose to All Ecosystems: Ensure this virtual switch is exposed to HomeKit, Alexa, and Google via your Nabu Casa and HomeKit Bridge configurations.
- Build the Automation: In Home Assistant Automations, set the trigger to 'State changes to On' for
input_boolean.goodnight_routine. - Define Cross-Platform Actions:
- Lock the Yale smart lock (Native HomeKit).
- Turn off the Kasa smart plugs (Native Alexa/TP-Link).
- Set the Ecobee thermostat to 68°F (Native Google/HomeKit).
- Arm the Ring Alarm system (Native Alexa).
Now, regardless of which voice assistant or smart display a family member interacts with, the exact same comprehensive, multi-brand automation executes locally and instantly.
Troubleshooting Common Integration Hurdles
Even with meticulous setup, multi-ecosystem bridges can encounter friction. Here are the most common issues and their solutions:
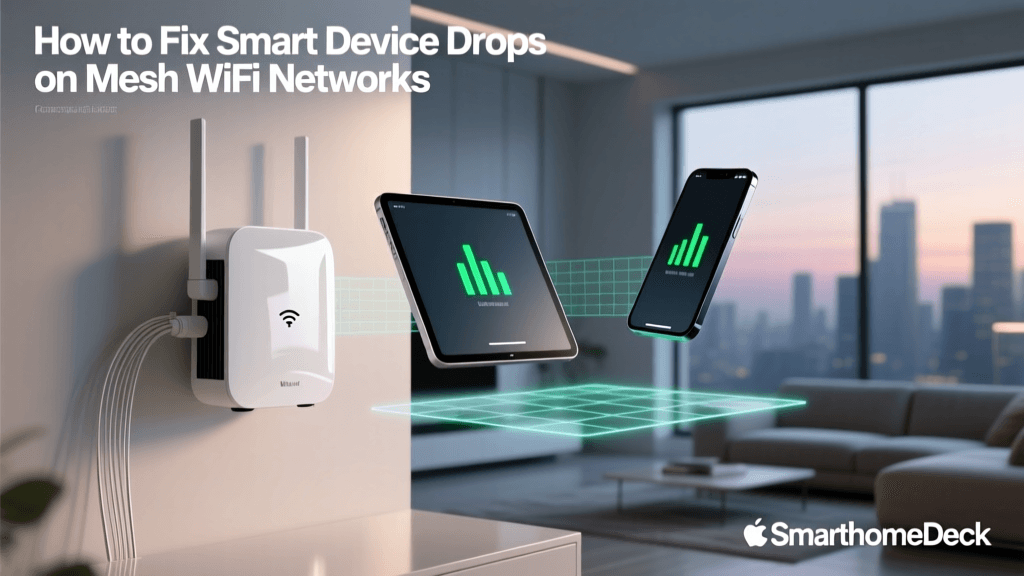
1. HomeKit Shows 'No Response'
This is almost always a network multicast issue. If you recently rebooted your router or updated your mesh Wi-Fi firmware, mDNS broadcasts may have been blocked. Restart the HomeKit Bridge integration within Home Assistant (Settings > Devices & Services > HomeKit Bridge > three dots > Reload) to force a fresh mDNS broadcast to your Apple devices.
2. Alexa State Synchronization Delays
If you turn on a light via a physical switch, but Alexa still reports the light as 'off', your device integration in Home Assistant might be relying on cloud polling rather than local push. Ensure you are using integrations that support local push (like Zigbee2MQTT, Z-Wave JS, or local LAN APIs) rather than cloud-based polling APIs. Alexa only updates its state when Home Assistant pushes a state change to the Nabu Casa cloud webhook.
3. Matter and Thread Border Router Conflicts
If you are integrating Matter-over-Thread devices (like Nanoleaf bulbs or Eve sensors), be aware that Apple TV 4K, Google Nest Hub Gen 2, and Amazon Echo Gen 4 all act as Thread Border Routers. They can sometimes form competing Thread networks. To stabilize your Thread mesh, designate one primary ecosystem's border router as the leader, and ensure your Home Assistant SkyConnect or Connect ZBT-1 dongle is configured to route through the same mesh credentials.
Conclusion: Achieving Smart Home Harmony
Setting up a multi-ecosystem bridge using Home Assistant transforms a fragmented, frustrating collection of smart devices into a unified, intelligent home. By carefully selecting reliable x86 or official hardware, optimizing your local network for multicast traffic, and leveraging both local protocols (HomeKit) and secure cloud tunnels (Nabu Casa for Alexa and Google), you future-proof your home against the shifting tides of tech industry alliances. Whether your household prefers Siri, Alexa, or the Google Assistant, the underlying automation engine will deliver instant, reliable, and private control over every connected device in your home.