How to Choose and Work With Smart Home Installation Companies
Transforming your house into a fully automated smart home is an exciting journey, but it can quickly become overwhelming if you attempt to tackle a whole-home integration alone. While DIY setups are great for single-room solutions, achieving a truly seamless, reliable, and invisible smart home experience often requires the expertise of professional smart home installation companies. These certified integrators bring together complex networks, high-end audio-video systems, automated shading, and advanced security into one unified interface.
In this comprehensive guide, we will walk you through the exact process of finding, vetting, and collaborating with professional smart home installers. Whether you are building a new home from the ground up or retrofitting an existing property, this step-by-step blueprint will ensure your investment is protected and your home automation dreams become a reality.
Project Overview
Difficulty Level: Low for the homeowner (preparation and management); High for the technical execution (handled by professionals).
Estimated Time: 2 to 8 weeks (from initial consultation and design to final installation and handover, depending on project scope).
Tools & Preparation Checklist
While the installation company will bring all the necessary technical tools, wiring equipment, and hardware, you will need a few "preparation tools" to ensure the project runs smoothly:
- Floor Plans: Digital or physical blueprints of your home, including electrical layouts if available.
- Device Wishlist: A comprehensive list of desired features, such as smart lighting systems, motorized shades, and smart security cameras.
- Network Audit: A current list of your internet speeds, router models, and existing mesh Wi-Fi nodes.
- Budget Tracker: A spreadsheet to track quotes, hardware costs, labor fees, and ongoing service agreements.
- Access Clearances: Ensure attics, crawl spaces, and electrical panels are accessible for the installation crew.
Step 1: Assessing Your Smart Home Needs & Goals
Before you start calling installation companies, you must define the scope of your project. Professional integrators specialize in creating tailored experiences, and they will need a clear understanding of your lifestyle to design an effective system. Start by conducting a room-by-room audit of your home and identifying the specific problems you want automation to solve.
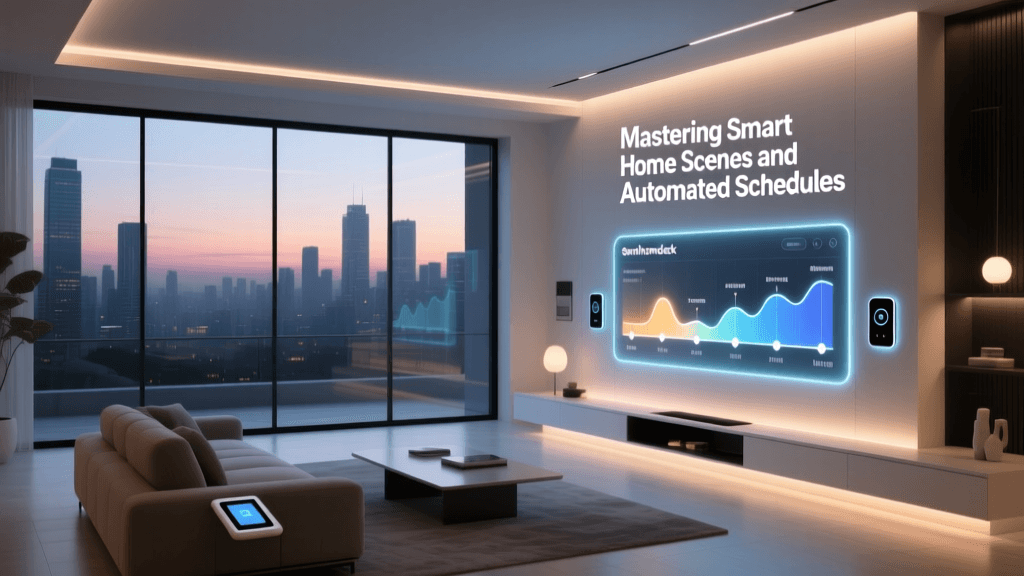
Consider how you interact with your space daily. Do you want a "Good Morning" scene that slowly raises the motorized shades, turns on the kitchen lights to 50%, and starts your coffee maker? Are you looking for robust smart security systems that automatically lock doors and arm cameras when the last person leaves the house? Perhaps your primary goal is a high-fidelity multi-room audio system or a dedicated home theater. Documenting these use cases will help the installer recommend the right ecosystem.
It is also crucial to understand the difference between consumer-grade "plug & play" devices and professional-grade automation. Consumer devices often rely on cloud processing and disparate apps, which can lead to latency and reliability issues. Professional smart home installation companies typically work with hardwired, locally processed systems like Control4, Crestron, Savant, or Lutron. These systems utilize dedicated smart home hubs and controllers that operate independently of the cloud, ensuring your lights and security systems work even if your internet connection goes down.
Finally, evaluate your home's infrastructure. If you are in the pre-construction or renovation phase, you have the luxury of running low-voltage wiring everywhere. If you are retrofitting an existing home, your installer will need to rely on wireless protocols or specialized retrofit modules. Knowing your home's physical constraints upfront will save time during the consultation phase.
Step 2: Researching & Vetting Smart Home Installation Companies
Not all electricians or AV technicians are qualified to design and program a comprehensive smart home. You need a certified custom integrator. The gold standard for finding reputable professionals is the CEDIA (Custom Electronic Design & Installation Association) directory. CEDIA-certified integrators adhere to strict industry standards, undergo continuous training, and follow best practices for cable management, network design, and system programming.
When compiling a list of 3 to 5 local companies, look for those who specialize in the specific brands you are interested in. For example, if you want Lutron RadioRA or Ketra lighting, ensure the company is a certified Lutron dealer. Once you have your shortlist, schedule in-home consultations. This is your opportunity to interview them and gauge their communication style, as you will be working closely with them for weeks or even months.
During the consultation, ask the following critical questions:
- Do you use subcontractors or in-house technicians? In-house teams generally provide more consistent quality and accountability.
- What is your network design philosophy? A true smart home relies on a robust enterprise-grade network. If they do not prioritize mesh Wi-Fi networks, hardwired access points, and VLANs (Virtual Local Area Networks) to isolate IoT devices, they may not be equipped for modern smart home demands.
- Do you offer remote monitoring and support? Top-tier companies offer proactive support, meaning they can often reboot a frozen router or fix a software bug remotely before you even notice an issue.
- What does your post-installation service agreement look like? Smart homes require occasional firmware updates and maintenance. Understand their hourly rates for post-warranty support and whether they offer annual maintenance contracts.
After the consultations, request detailed proposals. A professional quote should be broken down into hardware, labor, programming, and project management. Avoid companies that give vague, lump-sum estimates, as this often leads to change-order disputes later in the project.
Step 3: Preparing Your Home for Installation Day
Once you have selected your integrator and signed the contract, the preparation phase begins. The installation company will handle the technical ordering and staging, but you must prepare the physical environment to ensure the crew can work efficiently and safely.
First, address the electrical and network infrastructure. If your home is older, your electrical panel may need an upgrade to handle the additional circuits required for smart lighting panels, AV racks, and outdoor equipment. Coordinate with a licensed electrician (often recommended by your smart home installer) to ensure your panel is up to code. Additionally, verify that your internet service provider (ISP) delivers the bandwidth required for your home. A house full of 4K security cameras and streaming devices requires a high-speed, low-latency connection.
Next, clear the physical workspaces. Installation teams will need access to attics, basements, crawl spaces, and utility closets to run low-voltage cabling (such as Cat6 and speaker wire). Remove fragile items, clear out shelves in utility areas, and ensure pathways are free of obstacles. If you are retrofitting a finished home, discuss dust mitigation strategies with the project manager. Professional crews will use drop cloths and HEPA-filtered vacuums, but moving your valuables out of the way provides an extra layer of protection.
Finally, establish a central location for the "brain" of your smart home. This is typically an AV rack or a structured wiring enclosure. This area needs to be well-ventilated, as smart home hubs, network switches, and amplifiers generate significant heat. Ensure the space has dedicated cooling or adequate airflow to prevent thermal throttling and equipment failure.
Step 4: Managing the Installation & Post-Setup Handover
Installation day (or week, depending on the scale of the project) is when the physical labor takes place. The crew will run wires, mount keypads, install smart thermostats, and build out the central equipment rack. As the homeowner, your role during this phase is to be available for quick decisions but to let the professionals execute the plan outlined in the design documents.
The most critical phase of the entire project is the final walkthrough and handover. Do not sign off on the final invoice until you have thoroughly tested every single system. Walk through the house with the lead programmer and test every lighting scene, motorized shade, and audio zone. Trigger the security alarms, check the camera feeds on your mobile device, and ensure the voice control integrations are responding accurately.
During the handover, the integrator should provide you with a comprehensive "Homeowner's Manual" for your specific system. This documentation must include:
- Network Topology Map: A diagram showing how all devices connect to the network.
- Admin Credentials: You must own the master accounts for your system. Ensure the installer transfers all administrative rights, Wi-Fi passwords, and cloud portal access to you.
- Hardware Schedule: A list of every device installed, including model numbers, serial numbers, and MAC addresses.
- Warranty Documentation: Clear outlines of what is covered by the manufacturer versus what is covered by the installer's labor warranty.
Once the physical handover is complete, schedule a "living test" period. Live with the system for two weeks and note any friction points. Perhaps a motion sensor is too sensitive, or a lighting scene is too bright for late-night use. Professional companies expect a callback period to fine-tune these preferences and will adjust the programming accordingly.
Troubleshooting Post-Installation Issues
Even with professional installation, complex smart homes can occasionally experience hiccups. Knowing how to troubleshoot basic issues can save you a costly service call and get your home back online quickly.
Network Congestion & Device Dropouts
If multiple wireless devices (like Zigbee or Z-Wave sensors) are dropping off the network, the issue is often mesh congestion or interference. Ensure that your smart home hub is centrally located and not tucked inside a metal enclosure. If the problem persists, contact your integrator to add a hardwired repeater or adjust the wireless channels to avoid interference from your primary Wi-Fi network.
Scenes Not Triggering Correctly
If a "Goodnight" scene fails to lock the front door or turn off the garage lights, the issue is usually a failed condition logic in the programming. Check the mobile app to see if a specific device is reporting an "offline" or "error" state. If a single device fails to report its status, the entire automated scene may halt. Rebooting the specific device or its local controller usually resolves the communication loop.
AV Rack Overheating
If your home theater or multi-room audio system suddenly shuts down or becomes unresponsive, thermal protection may have triggered. Check the equipment rack to ensure the cooling fans are operational and that the intake vents are not blocked by dust. If the rack is in a closed closet, ensure the exhaust system is actively venting hot air out of the room.
IP Address Conflicts
If a smart thermostat or security camera stops responding after a router reboot, it may have been assigned an IP address that conflicts with another device on the network. Professional installers should assign static IP addresses or DHCP reservations to all critical smart home hardware. If you suspect an IP conflict, log into your network controller and verify that the IoT VLAN is correctly assigning reserved addresses.
Frequently Asked Questions
How much does a professional smart home installation cost?
The cost varies wildly based on the scope of the project. A basic retrofit focusing on smart lighting, a video doorbell, and a unified remote for the living room might start around $5,000 to $10,000. A comprehensive, whole-home integration featuring enterprise networking, automated shading, multi-room audio, and high-end security in a large property can easily range from $50,000 to well over $250,000. Always allocate an additional 10% to 15% of your hardware budget for professional programming and labor.
Can I mix DIY brands with professional installation systems?
While it is technically possible to integrate some consumer brands into a professional ecosystem using third-party drivers, it is generally discouraged. Consumer devices rely on cloud-based APIs that can change without notice, breaking your automation. Professional integrators prefer hardwired, locally controlled devices that guarantee long-term reliability and instant response times. If you have existing DIY devices, discuss their compatibility with your integrator during the design phase.
Do I need to hire a smart home company if I am building a new home?
Absolutely. The most critical phase of smart home integration is the pre-wire stage, which happens before the drywall goes up. A professional integrator will work alongside your architect and general contractor to ensure that low-voltage wiring, conduit, and backing blocks are placed exactly where they need to be. Retrofitting a home after the walls are closed is significantly more expensive and limits your hardware options.
What happens if the installation company goes out of business?
This is why system ownership and documentation are vital. If you hold the master administrative rights, network maps, and source code (for systems that allow it), another certified dealer can take over the maintenance of your system. Always ensure your contract stipulates that you, the homeowner, own the system' programming files and licenses upon final payment.
Will my smart home become obsolete in a few years?
A well-designed smart home focuses on robust infrastructure rather than fleeting gadgets. By investing in high-quality low-voltage wiring (like Cat6a and dedicated speaker wire) and a centralized, modular equipment rack, you future-proof your home. Even if the specific processors or touchscreens become outdated in a decade, the underlying wiring remains, allowing a new integrator to simply swap out the "brains" without tearing open your walls.