Melbourne’s unpredictable weather, unique housing stock, and tech-savvy population make it one of Australia’s most exciting cities for smart home adoption. Whether you own a heritage Victorian terrace in Fitzroy, a modern apartment in Southbank, or a sprawling family home in the eastern suburbs, transforming your property into a connected smart home is more accessible than ever. This comprehensive guide walks you through every stage of smart home installation in Melbourne, from initial planning and product selection to final configuration and ongoing maintenance.
By the end of this article, you will have a clear roadmap for creating a fully integrated smart home tailored to Melbourne’s climate, lifestyle, and infrastructure. We cover lighting, climate control, security, entertainment, and voice automation — all with actionable steps you can follow today.
Difficulty Level: Intermediate
Estimated Time: 1–3 full days (depending on home size and system complexity)
Cost Range: $800–$5,000+ AUD (varies based on devices and scope)
Best Season to Install: Autumn or Spring (mild weather makes wiring and outdoor device setup more comfortable)
Tools and Products You Will Need for Your Melbourne Smart Home Installation
Before you begin any physical installation work, gather the right tools and products. Having everything on hand prevents frustrating mid-project trips to the hardware store and keeps your installation timeline on track. Below is a comprehensive checklist organised by category.
Essential Tools
- Power drill and drill bit set — for mounting hubs, cameras, and smart switches
- Phillips and flathead screwdrivers — various sizes for faceplates and mounting brackets
- Voltage tester or multimeter — critical for safely working with existing electrical wiring
- Wire strippers and electrical tape — for any hardwired smart switch or thermostat installations
- Stud finder — ensures secure mounting of heavier devices like smart displays and outdoor cameras
- Smartphone or tablet — required for device pairing, app configuration, and firmware updates
- Wi-Fi signal analyser app — helps identify dead zones in your Melbourne home before placing devices
- Ladder — for reaching ceiling-mounted sensors, outdoor cameras, and high-placed smoke alarms
- Cable management kit — zip ties, cable channels, and clips for a clean, professional finish
- Label maker or masking tape — label every cable and switch for future troubleshooting
Core Smart Home Products
- Smart home hub or bridge — such as Samsung SmartThings, Hubitat Elevation, or a dedicated Home Assistant server
- Smart speaker or display — Google Nest Hub, Amazon Echo, or Apple HomePod for voice control
- Mesh Wi-Fi system — Google Nest Wifi, TP-Link Deco, or Eero to ensure full-home coverage
- Smart lighting — Philips Hue, LIFX, or TP-Link Kasa smart bulbs and switches
- Smart thermostat — Google Nest Thermostat, Ecobee, or Sensibo for ducted air conditioning control
- Smart security cameras — Ring, Arlo, or Eufy cameras rated for outdoor use in Australian conditions
- Smart door lock — Yale, Schlage, or August with Bluetooth and Wi-Fi connectivity
- Smart smoke alarms — Google Nest Protect (ensure compliance with Victorian building regulations)
- Smart blinds or curtain motors — SwitchBot, IKEA Fyrtur, or Somfy for automated window treatments
- Smart power strips and plugs — for controlling legacy appliances and monitoring energy usage
For a deeper look at which products work best together, check out our guide on choosing the best smart home hub and our smart lighting comparison for Australian homes.
Step 1: Assess Your Melbourne Home and Plan Your Smart Home Layout
Every successful smart home installation begins with a thorough assessment of your property. Melbourne’s housing stock is incredibly diverse — from solid-brick Edwardian homes with thick walls that block Wi-Fi signals to lightweight modern builds with open floor plans. Understanding your home’s construction, layout, and existing infrastructure is the foundation of a reliable smart home system.
Map Your Home’s Wi-Fi Coverage
Start by downloading a Wi-Fi analyser app such as WiFiman or NetSpot on your smartphone. Walk through every room of your home, including the garage, backyard, and any alfresco entertaining areas. Record the signal strength in each location. Melbourne homes with double-brick or bluestone walls — common in inner-city suburbs like Richmond, Collingwood, and Carlton — often suffer from significant signal degradation between rooms.
Create a simple floor plan sketch and mark the following:
- Your current router location and the signal strength radiating from it
- Rooms or areas with weak or no Wi-Fi signal (dead zones)
- Locations where you plan to install smart devices
- Power outlet positions near planned device locations
- Existing light switch positions and whether they have neutral wires (important for many smart switches)
Identify Your Electrical Infrastructure
Australian homes use 230V/50Hz electrical systems with Type I power outlets. Many older Melbourne homes, particularly those built before the 1970s, may have outdated wiring that lacks a neutral wire at light switch positions. This is a critical detail because most hardwired smart light switches require a neutral wire to function properly.
To check for a neutral wire:
- Turn off the circuit breaker for the light switch you want to inspect
- Use your voltage tester to confirm the power is off
- Remove the switch faceplate and look for a bundle of white or blue wires connected together in the back of the wall box — this is typically the neutral
- If no neutral wire is present, you will need to use smart bulbs instead of smart switches, or hire a licensed Melbourne electrician to run a neutral wire
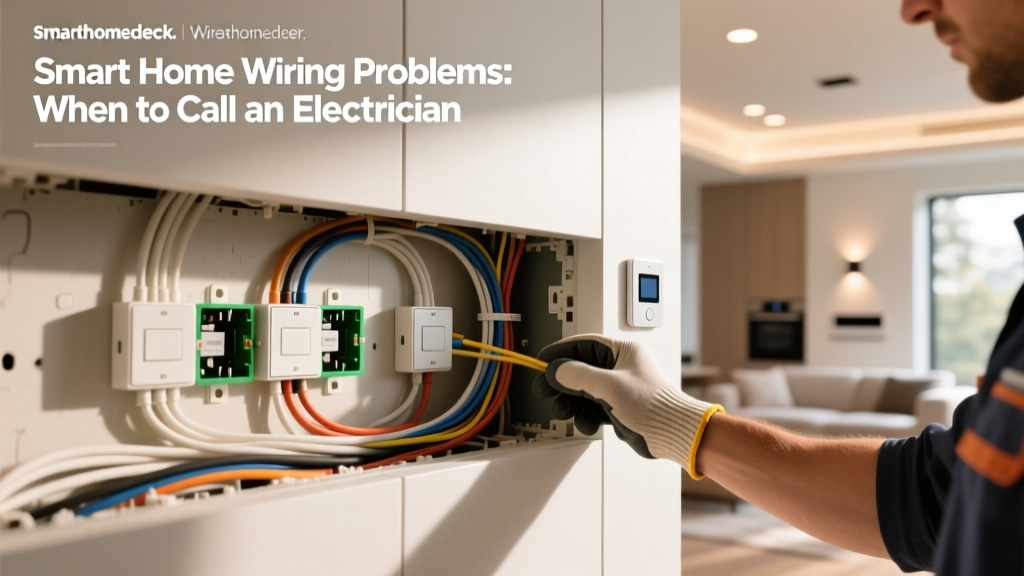
⚠️ Important: In Victoria, any electrical work that involves modifying fixed wiring must be performed or certified by a licensed electrician. Smart switch installations that require new wiring fall under this regulation. Always prioritise safety and compliance with Australian Standard AS/NZS 3000.
Define Your Smart Home Goals and Zones
Before purchasing any devices, define what you want your smart home to achieve. Group your goals into functional zones:
- Comfort and climate zone: Automated heating and cooling based on Melbourne’s famously changeable weather, smart blinds that respond to sun position
- Lighting zone: Room-by-room smart lighting with schedules, motion activation, and scene control
- Security zone: Smart locks, video doorbells, outdoor cameras, and automated lighting to simulate occupancy
- Entertainment zone: Multi-room audio, smart TV integration, and voice-controlled media playback
- Energy management zone: Smart plugs with energy monitoring, automated appliance scheduling, and solar integration if applicable
Write down your priorities and budget for each zone. This plan becomes your installation blueprint and prevents overspending on devices you do not need.
Step 2: Install and Configure Your Network Foundation
Your smart home is only as reliable as the network it runs on. With dozens of connected devices competing for bandwidth, a robust Wi-Fi network is non-negotiable. This step ensures every corner of your Melbourne home has strong, stable connectivity before you install a single smart device.
Upgrade to a Mesh Wi-Fi System
Most ISP-supplied routers struggle to cover an average Melbourne family home, especially multi-storey properties or those with brick internal walls. A mesh Wi-Fi system uses multiple nodes placed strategically throughout your home to create a single, seamless network.
Follow these steps to install your mesh system:
- Place the primary node near your NBN connection point (often the NBN box in your garage, study, or living room). Connect it via Ethernet to your NBN modem or modem-router in bridge mode.
- Position satellite nodes in areas that previously had weak signal. For a typical three-bedroom Melbourne home, two to three nodes are usually sufficient. Place nodes no more than one room apart and avoid positioning them behind thick brick or concrete walls.
- Run the setup app on your smartphone. Follow the manufacturer’s instructions to name your network (SSID) and set a strong WPA3 password.
- Create a separate IoT network if your mesh system supports it. Many smart home devices work best on a dedicated 2.4 GHz network, while your phones, laptops, and streaming devices can use the faster 5 GHz band. This separation improves security and reduces interference.
- Test coverage by walking through your home with the Wi-Fi analyser app. Ensure every planned device location has at least -65 dBm signal strength.
Configure Network Settings for Smart Home Devices
Once your mesh network is operational, optimise it for smart home use:
- Enable 2.4 GHz band: Most smart home devices (Zigbee hubs, smart plugs, budget cameras) only connect on 2.4 GHz. Ensure this band is active and has a distinct SSID if your system allows it.
- Disable AP isolation: This setting prevents devices on the same network from communicating with each other. Smart home devices need to talk to your hub and to each other, so AP isolation must be turned off on your IoT network.
- Assign static IP addresses to your smart home hub and any locally controlled devices (such as a Home Assistant server). This prevents connectivity issues caused by DHCP address changes.
- Set up DNS filtering (optional but recommended) using a service like NextDNS or Pi-hole to block telemetry and improve privacy across your smart home network.
For more detailed guidance on network setup, see our article on optimising your home network for smart devices.
Step 3: Install Smart Lighting, Climate Control, and Core Devices
With your network foundation solid, it is time to install the devices that will have the biggest daily impact on your Melbourne home. We start with lighting and climate control because these systems deliver immediate comfort and energy savings — especially important given Melbourne’s hot summers and chilly winters.
Install Smart Lighting
Smart lighting is often the entry point for most smart home installations, and for good reason: it is relatively simple to install, delivers immediate convenience, and creates the ambiance that transforms a house into a home.
Option A: Smart Bulbs (Easiest)
- Turn off the light at the wall switch
- Remove the existing bulb and screw in your smart bulb (ensure the fitting matches — most Australian homes use E27, B22, or GU10 fittings)
- Turn the wall switch back on — the smart bulb will flash or pulse to indicate it is in pairing mode
- Open the manufacturer’s app (e.g., Philips Hue, LIFX) and follow the pairing instructions
- Assign the bulb to a room and name it descriptively (e.g., “Kitchen Main Light” rather than “Bulb 7”)
Option B: Smart Switches (More Permanent)
- Turn off the circuit breaker for the light circuit
- Confirm the power is off using your voltage tester
- Remove the existing switch and disconnect the wires, noting which wire goes where (take a photo for reference)
- Connect the smart switch wires: active (brown/red), neutral (blue/white), and load (the wire going to the light fixture). If your smart switch requires an earth connection, connect it to the green/yellow earth wire
- Secure the smart switch into the wall box and attach the faceplate
- Restore power at the circuit breaker and pair the switch via its app
💡 Pro Tip: If you are installing smart bulbs, replace the wall switch with a smart switch or a smart switch cover (like the Lutron Pico or SwitchBot Bot) so that household members and guests cannot accidentally turn off the smart bulb at the wall, which cuts power and takes it offline.
Install Smart Climate Control
Melbourne is famous for experiencing “four seasons in one day,” and your smart home should adapt accordingly. Smart climate control saves energy and keeps your home comfortable without constant manual adjustments.
For homes with ducted heating and cooling:
- Choose a smart thermostat compatible with Australian ducted systems. Popular options include the Google Nest Thermostat, Ecobee SmartThermostat, and the Australian-designed Sensibo Sky for split-system air conditioners
- Turn off power to your existing thermostat at the circuit breaker
- Remove the old thermostat faceplate and photograph the wiring
- Label each wire according to its terminal marking (R, W, Y, G, C, etc.)
- Install the new smart thermostat’s baseplate, threading the labelled wires through the centre
- Connect each wire to the corresponding terminal on the new thermostat
- Attach the thermostat display, restore power, and follow the app-based setup wizard
- Configure smart schedules: set heating to activate before you wake on cold Melbourne mornings, and cooling to pre-cool your home before you arrive on hot summer afternoons
For homes with split-system air conditioners:
Use an IR blaster device like Sensibo Sky or Ambi Climate. These devices mount on a wall with a clear line of sight to your split system’s IR receiver and control it via Wi-Fi, giving you app and voice control without replacing the unit itself.
- Mount the IR blaster on a wall or shelf within line of sight of your air conditioner
- Plug it into a nearby power outlet
- Open the companion app and follow the pairing process to teach the device your air conditioner’s IR codes
- Set up temperature-based automations: for example, turn on cooling when indoor temperature exceeds 26°C during summer months
Install Smart Blinds and Window Treatments
Automated blinds are particularly valuable in Melbourne, where the sun’s intensity changes dramatically throughout the day. Smart blinds can block harsh afternoon sun in summer and open to capture warming northern light in winter.
- Measure your window recess or face-fit dimensions carefully
- Order smart blinds or retrofit motors (like SwitchBot Blind Rod or Somfy) in the correct size
- Install the mounting brackets according to the manufacturer’s instructions
- Insert the motorised blind or attach the retrofit motor to your existing blind
- Pair with your smart home hub and configure schedules based on sun position and time of day
Step 4: Install Smart Security and Outdoor Devices
Security is a top priority for many Melbourne homeowners. Smart security devices provide peace of mind whether you are at work in the CBD, holidaying on the Mornington Peninsula, or simply asleep upstairs. This step covers cameras, doorbells, locks, and outdoor sensors.
Install Smart Security Cameras
Melbourne’s climate ranges from scorching UV exposure to heavy rain, so choose outdoor cameras with an IP65 or higher weather resistance rating.
- Choose camera locations: Focus on entry points (front door, back door, garage), driveways, and any side passages. Aim for a height of 2.5–3 metres to prevent tampering while maintaining facial recognition clarity.
- Mount the camera bracket: Use your stud finder to locate a solid mounting point. For brick walls, use a masonry drill bit and wall plugs. For weatherboard or fibre-cement cladding, drill into the timber stud behind.
- Route the power cable (for wired cameras) through the wall to an internal power point, or ensure battery-powered cameras are fully charged before mounting.
- Pair the camera with its app and configure motion detection zones. Exclude public footpaths and neighbouring properties to reduce false alerts and comply with Victorian privacy laws.
- Set up recording preferences: Choose between cloud storage (usually a subscription) or local storage via an SD card or NAS device. For Australian privacy compliance, local storage is often preferred.
Install a Smart Video Doorbell
- Turn off power to your existing doorbell at the circuit breaker (if hardwiring)
- Remove the old doorbell button and disconnect the wires
- Connect the two wires to the smart doorbell’s terminals (most smart doorbells are polarity-agnostic)
- Mount the doorbell using the provided bracket and security screws
- Restore power and wait for the doorbell to boot up and connect to Wi-Fi
- Configure motion zones, notification preferences, and integrate with your smart home hub so the doorbell can trigger other automations (e.g., turning on the porch light when motion is detected after sunset)
Install a Smart Lock
- Check compatibility: most smart locks are designed for standard Australian mortice or cylindrical locksets. Measure your door thickness (typically 35–50mm) and backset (the distance from the door edge to the centre of the lock bore).
- Remove the existing lock mechanism from the interior side of the door
- Install the smart lock’s exterior assembly, threading the connecting cable through the door
- Attach the interior assembly and connect the cable
- Secure all mounting screws and test the bolt operation manually before powering on
- Install batteries, calibrate the lock via the companion app, and set up user codes for family members
- Integrate with your smart home hub to enable automations like auto-locking when the last person leaves home
🔒 Security Note: Always keep a physical backup key hidden in a secure lockbox outside your home. Smart locks can fail due to dead batteries, firmware issues, or network outages. Never rely solely on electronic access.
Install Smart Smoke and CO Alarms
In Victoria, all homes must have compliant smoke alarms installed. Smart smoke alarms like Google Nest Protect add connectivity and advanced features while meeting Australian Standard AS 3786.
- Identify required smoke alarm locations per Victorian Building Authority guidelines: every bedroom, hallway connecting bedrooms, and every level of the home
- Remove existing smoke alarms and install the smart alarm’s mounting base using the provided screws and wall plugs
- Attach the smart alarm to the base and follow the app-based setup to connect it to Wi-Fi
- Test each alarm using the test button and confirm that alerts are sent to your phone
- Link all alarms so that when one detects smoke, every alarm in the home sounds and announces the specific location of the threat
Step 5: Integrate, Automate, and Fine-Tune Your Smart Home
Installing individual devices is only half the journey. The true power of a smart home emerges when devices work together through automations, routines, and scenes. This step ties everything together into a cohesive system that anticipates your needs and responds to Melbourne’s dynamic environment.
Connect Everything to Your Central Hub
Open your chosen smart home platform (Google Home, Apple Home, Amazon Alexa, Samsung SmartThings, or Home Assistant) and add every installed device:
- Open the hub app and select “Add Device” or the “+” icon
- Choose the device brand or scan the QR code on the device or its packaging
- Follow the on-screen pairing instructions (this typically involves putting the device in pairing mode and confirming it appears in the app)
- Assign each device to a room and give it a clear, descriptive name that works well with voice commands
- Repeat for every device in your smart home
Naming conventions matter significantly. Use names like “Living Room Lamp,” “Front Door Lock,” and “Bedroom Thermostat” rather than generic labels. This makes voice commands intuitive: “Hey Google, turn off the living room lamp” is far more natural than “Hey Google, turn off device 14.”
Create Essential Automations for Melbourne Living
Here are five high-value automations tailored to Melbourne’s lifestyle and climate:
1. “Four Seasons” Climate Response
- Trigger: Indoor temperature exceeds 28°C OR drops below 16°C
- Action: Activate heating or cooling, close/open blinds based on sun position, send a notification to your phone
- Why it works in Melbourne: Temperature swings of 15°C or more within a single day are common. This automation keeps your home comfortable without manual intervention.
2. “Leaving Home” Routine
- Trigger: All family members’ phones leave the geofence radius (typically 200m from home)
- Action: Turn off all lights, lock the front door, arm security cameras, set thermostat to eco mode, close smart blinds
3. “Arriving Home” Routine
- Trigger: Any family member’s phone enters the geofence radius
- Action: Unlock the front door (if after sunset), turn on entryway and hallway lights, set thermostat to comfort mode, disarm indoor cameras
4. “Goodnight” Scene
- Trigger: Voice command (“Goodnight”) or scheduled time (e.g., 10:30 PM)
- Action: Turn off all lights except bedroom and bathroom nightlights, lock all doors, arm outdoor cameras, set thermostat to sleep temperature, close blinds
5. “Summer Storm” Response
- Trigger: Weather API reports rain or high wind in your Melbourne postcode
- Action: Close all smart blinds, retract smart awnings if installed, turn on indoor lights if it is dark, send a notification reminding you to bring in the washing
Set Up Voice Control and Multi-Room Audio
Place smart speakers or displays in high-traffic areas: kitchen, living room, and main bedroom. Configure voice match so the system recognises individual family members and provides personalised responses.
For multi-room audio, group your smart speakers in the app and create speaker zones (e.g., “Downstairs,” “Upstairs,” “Outdoor”). This allows you to play music throughout the home or restrict it to specific areas.
Test and Refine Every Automation
Spend at least one full day testing every automation you have created. Walk through each scenario manually if needed to confirm devices respond correctly. Pay attention to:
- Response latency — devices should respond within 1–3 seconds
- False triggers — adjust motion sensor sensitivity and geofence radius if automations fire incorrectly
- Edge cases — what happens during a power outage? Do devices resume their correct state when power is restored?
- Guest experience — can visitors operate basic functions (lights, locks) without needing your phone?
Troubleshooting Common Smart Home Installation Issues in Melbourne
Even the most carefully planned smart home installation will encounter hiccups. Below are the most common problems Melbourne homeowners face and exactly how to resolve them.
Problem: Smart Devices Will Not Connect to Wi-Fi
Cause: Most smart home devices only support 2.4 GHz Wi-Fi. If your router is broadcasting a combined 2.4/5 GHz network, the device may attempt to connect to the 5 GHz band and fail.
Solution:
- Log into your router settings and create a separate 2.4 GHz-only SSID (e.g., “HomeNetwork-IoT”)
- Connect your smartphone to this 2.4 GHz network before starting the device pairing process
- Move closer to the router during initial pairing, then relocate the device to its permanent position
- If the device still fails to connect, forget the network on the device (usually by holding a button for 10 seconds) and retry
Problem: Smart Switch Has No Power After Installation
Cause: Missing neutral wire or incorrect wiring connection.
Solution:
- Turn off power at the circuit breaker immediately
- Remove the smart switch and verify all wire connections are tight and correct
- Use your multimeter to check for 230V between the active and neutral wires in the wall box
- If no neutral wire is present, replace the smart switch with a no-neutral-required model (such as those using Zigbee with a bypass module) or switch to smart bulbs
- If unsure, contact a licensed Melbourne electrician — incorrect wiring is a fire hazard
Problem: Outdoor Camera Keeps Going Offline
Cause: Weak Wi-Fi signal at the camera location, or interference from brick walls common in Melbourne homes.
Solution:
- Check the camera’ reported signal strength in its app — anything below -70 dBm is unreliable
- Add a mesh Wi-Fi satellite node closer to the camera location (ideally inside the nearest window)
- If the camera supports Ethernet, use a wired connection for maximum reliability
- Consider a Wi-Fi extender rated for outdoor use, mounted under the eaves near the camera
Problem: Voice Commands Are Not Recognised
Cause: Device naming conflicts, poor microphone pickup, or network latency.
Solution:
- Ensure no two devices share the same or similar names
- Move the smart speaker away from noise sources like televisions, range hoods, and air conditioners
- Check that the smart speaker’s firmware is up to date
- In the hub app, verify that the target device is online and responding to manual (app-based) commands
- Re-link the device’s skill or integration in the voice assistant settings
Problem: Automations Trigger at the Wrong Time or Not at All
Cause: Incorrect time zone settings, geofence misconfiguration, or conflicting automations.
Solution:
- Verify that your hub’s location is set correctly to Melbourne (AEST/AEDT, UTC+10/+11)
- Check the geofence radius — too small a radius may not trigger reliably; 150–300 metres is ideal for most Melbourne suburbs
- Review all active automations for conflicts (e.g., one automation turning lights on while another turns them off at the same time)
- Check the automation log in your hub app to see if the trigger fired and what action was taken
Frequently Asked Questions About Smart Home Installation in Melbourne
Do I need a licensed electrician to install smart home devices in Melbourne?
It depends on the device. Plug-in devices like smart bulbs, smart plugs, and battery-powered cameras do not require an electrician. However, any installation that involves modifying fixed electrical wiring — such as hardwired smart switches, smart thermostats connected to your HVAC system, or hardwired doorbell cameras — should be performed or certified by a licensed electrician in accordance with Victorian electrical safety regulations. Working with fixed wiring without a licence can void your home insurance and create serious safety hazards.
Will my smart home work during an NBN outage or internet disruption?
Devices that rely on cloud services (most voice assistants, cloud-based cameras, and remote access features) will not function during an internet outage. However, if you use a local smart home hub like Home Assistant, Hubitat, or Samsung SmartThings with local processing, many automations and manual controls will continue to work. Smart bulbs can still be controlled via their physical switch (if wired correctly), and Zigbee or Z-Wave devices communicating directly with a local hub will maintain their schedules and sensor-based automations. For critical systems like security, consider a 4G backup internet connection using a mobile broadband router.
How much does a full smart home installation cost in Melbourne?
Costs vary widely based on home size, device quality, and system complexity. A basic smart home setup for a two-bedroom apartment (smart lighting, a smart speaker, a video doorbell, and a smart thermostat) typically costs between $800 and $2,000 AUD. A mid-range installation for a three-to-four-bedroom home with comprehensive lighting, security cameras, smart locks, climate control, and multi-room audio generally ranges from $2,500 to $5,000 AUD. Premium installations with motorised blinds, whole-home audio, advanced security, and professional installation can exceed $10,000 AUD. The best approach is to start with core devices and expand over time, spreading costs across multiple phases.
Which smart home platform is best for Melbourne homes?
The best platform depends on your priorities. Google Home offers the broadest device compatibility and excellent voice recognition, making it ideal for most users. Apple HomeKit provides the strongest privacy protections and seamless integration if your household uses iPhones and iPads, but it supports fewer devices. Amazon Alexa has the largest skill library and works with nearly every smart device on the market. Home Assistant is the best choice for tech-savvy users who want full local control, maximum privacy, and the ability to integrate virtually any device — though it requires more technical knowledge to set up. Many Melbourne homeowners use a combination: a local hub (Home Assistant or Hubitat) for automation and a voice assistant (Google or Alexa) for convenient voice control.
Are smart home devices compatible with Australian electrical standards and NBN?
Devices purchased from reputable Australian retailers will comply with local standards (RCM marking for electrical safety and electromagnetic compatibility). However, devices imported directly from overseas marketplaces may not meet Australian standards and could pose safety risks. Always check for the RCM compliance mark on electrical devices. Regarding NBN compatibility, smart home devices connect via your home Wi-Fi network, so they work with any NBN connection type (FTTP, FTTN, HFC, or Fixed Wireless). The key factor is your Wi-Fi coverage and internet speed — a basic NBN 50 plan provides more than enough bandwidth for a typical smart home with 30–50 connected devices.
Final Thoughts on Smart Home Installation in Melbourne
Building a smart home in Melbourne is a rewarding project that enhances comfort, security, and energy efficiency. By following this step-by-step guide — planning your layout, establishing a solid network, installing devices methodically, and creating intelligent automations — you will create a connected home that adapts to Melbourne’s unique climate and lifestyle.
Start small if you are new to smart home technology. Install smart lighting and a smart speaker in your most-used room, learn the platform, and then expand room by room. This phased approach keeps costs manageable and gives you time to learn what works best for your household.
Remember that the best smart home is one that works reliably in the background, making daily life easier without demanding constant attention. Invest in quality devices, take the time to configure automations properly, and do not hesitate to call a licensed electrician when the work involves fixed wiring.
For more smart home guides, product reviews, and installation tips tailored to Australian homes, explore our complete library at SmartHomeDeck.com. Whether you are looking for the best smart security cameras for Australian conditions or want to learn about saving energy with smart home automation, we have the resources to help you build the connected home of your dreams.