Smart Home Setup Near Me: Complete Installation Guide for Every Room
Whether you have just moved into a new home or are finally ready to upgrade your existing space, setting up a smart home can feel overwhelming. From choosing the right ecosystem to running wires and configuring automations, there is a lot to consider. This comprehensive guide walks you through every step of a professional-grade smart home installation you can tackle yourself or use as a reference when hiring a local smart home installer near you.
If you have been searching for "smart home setup near me" and wondering what the process actually involves, you are in the right place. We will cover everything from initial planning and device selection to physical installation, network configuration, and advanced automations. By the end of this guide, you will have a fully functional smart home tailored to your lifestyle.
Project Overview
Difficulty Level: Intermediate (some steps are beginner-friendly, others require basic electrical knowledge)
Estimated Time: 8–16 hours for a full-home setup (can be broken into phases over several weekends)
Cost Range: $500–$5,000+ depending on home size and device selection
Skills Required: Basic networking, smartphone proficiency, optional basic electrical wiring
Tools & Products You Will Need
Before diving into installation, gather the tools and products that will make your smart home setup smooth and efficient. Having everything on hand prevents frustrating mid-project trips to the store.
Essential Tools
- Phillips & flathead screwdrivers (multiple sizes)
- Power drill with drill bits (for mounting devices & running cables)
- Wire strippers & crimpers
- Voltage tester (non-contact)
- Level (for mounting cameras, displays, & sensors)
- Stud finder
- Fish tape or cable puller (for in-wall wiring)
- Ladder or step stool
- Label maker or masking tape (for cable management)
- Smartphone or tablet (for device configuration)
Core Smart Home Products
- Smart Hub or Bridge: The central brain of your system (e.g., Samsung SmartThings Hub, Home Assistant server, or Amazon Echo with Zigbee built in)
- Wi-Fi Router: A mesh router system rated for 50+ devices (e.g., Eero, Google Nest Wifi, or TP-Link Deco)
- Smart Speakers & Displays: Voice control interfaces placed in key rooms
- Smart Lighting: Bulbs, switches, or dimmers depending on your preference
- Smart Thermostat: For automated climate control
- Smart Locks: Keyless entry for exterior doors
- Security Cameras: Indoor & outdoor cameras for monitoring
- Smart Sensors: Motion, door/window, leak, & temperature sensors
- Smart Plugs: For controlling non-smart appliances & lamps
- Ethernet Cables: Cat6 for hardwiring stationary devices where possible
- Surge Protectors: To protect your investment from power spikes
For a detailed breakdown of the best devices to start with, check out our guide to the best smart home devices for beginners. If you want to compare ecosystems before committing, our Alexa vs Google Home vs Apple HomeKit comparison will help you decide.
Step 1: Plan Your Smart Home Ecosystem & Network Foundation
The single most important step in any smart home setup is planning. Rushing into purchases without a strategy leads to incompatible devices, spotty connectivity, and frustration. Take time to map out your goals, choose an ecosystem, and build a rock-solid network before installing a single device.
Choose Your Smart Home Ecosystem
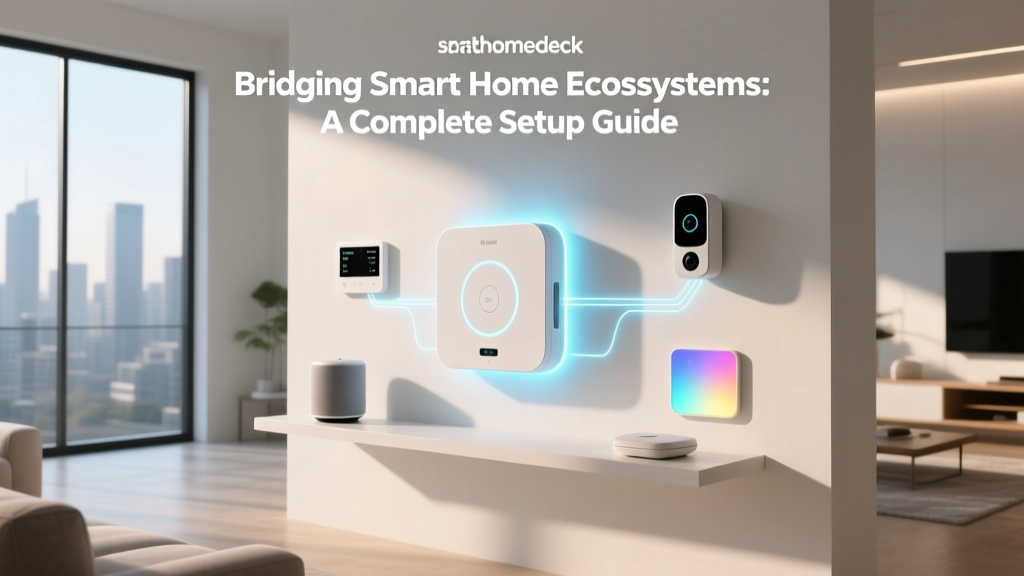
Every smart home needs a unifying platform that lets devices communicate with each other. The three major ecosystems are:
- Amazon Alexa: The widest device compatibility, affordable hardware, strong routines & skills system. Best for households that want maximum device options.
- Google Home: Superior voice recognition, excellent search integration, clean app interface. Best for households already invested in Google services.
- Apple HomeKit: Strongest privacy protections, seamless Apple device integration, secure HomeKey support. Best for households fully within the Apple ecosystem.
You can also use Matter-compatible devices to bridge ecosystems, or run a Home Assistant server for maximum flexibility and local control. If you are unsure which platform is right for your home, read our complete guide to choosing a smart home platform.
Design Your Network Infrastructure
A smart home with 30, 50, or even 100 connected devices will overwhelm a standard ISP-provided router. Your network is the backbone of your entire smart home, so invest in it first.
- Install a mesh Wi-Fi system with at least 2–3 nodes placed strategically throughout your home. Position the primary node near your modem and satellite nodes in areas with weak signal.
- Create a separate IoT network or VLAN for your smart devices. This isolates them from your personal devices (laptops, phones) for security and reduces congestion on your primary network.
- Hardwire stationary devices wherever possible. Smart TVs, desktop computers, gaming consoles, and smart hubs should use Ethernet connections to free up Wi-Fi bandwidth for mobile devices and sensors.
- Enable 2.4 GHz and 5 GHz bands and assign them clearly. Most smart home devices (bulbs, plugs, sensors) require 2.4 GHz, while bandwidth-heavy devices (cameras, streaming boxes) benefit from 5 GHz.
- Record your network details including SSID, password, and any VLAN configurations in a secure document. You will reference these constantly during setup.
Map Your Device Placement
Walk through every room in your home and create a room-by-room plan. For each room, note:
- Which smart devices you want to install
- Where power outlets & switches are located
- Where Wi-Fi signal strength is weakest
- Any obstacles like thick walls or metal framing that could interfere with wireless signals
Create a simple spreadsheet or use a floor plan app to document your plan. This becomes your installation roadmap and helps you order exactly what you need without overbuying.
Step 2: Install Your Smart Hub & Core Infrastructure Devices
With your plan in hand and your network running, it is time to install the core infrastructure that everything else will connect to. Think of this as laying the foundation before building the house.
Set Up Your Smart Hub
- Choose a central location for your hub. Ideally, this is near the center of your home, elevated (not on the floor), and away from large metal objects or appliances that could interfere with wireless signals.
- Connect the hub to your router via Ethernet if possible. A wired connection to the hub ensures reliable communication with all your Zigbee, Z-Wave, or Thread devices.
- Power on the hub and download the companion app on your smartphone.
- Create your account and follow the in-app setup wizard. This typically involves connecting to Wi-Fi, naming your home, setting your location, and inviting family members.
- Update the hub firmware immediately. Manufacturers frequently release updates that improve stability, add features, and patch security vulnerabilities.
- Enable integrations with your chosen voice assistant (Alexa, Google Assistant, or Siri) so you can control everything by voice from day one.
Configure Your Mesh Wi-Fi System
- Unbox all mesh nodes and place them in their planned locations before finalizing placement.
- Connect the primary node to your modem via Ethernet and power it on.
- Use the mesh system app to configure your network name (SSID) and password. Use a strong, unique password you have not used elsewhere.
- Add satellite nodes one at a time, following the app prompts. Most systems automatically optimize channel selection and band steering.
- Run a speed test in every room to verify coverage. If any room has weak signal, adjust node placement or add an additional node.
- Set up your IoT network or guest network for smart devices if your router supports network segmentation.
Install Smart Speakers & Displays
Smart speakers and displays serve as the voice control interfaces throughout your home. Place them strategically for maximum convenience:
- Kitchen: A smart display for timers, recipes, video calls, and controlling appliances
- Living room: A smart speaker or display for entertainment control and general commands
- Bedrooms: Small smart speakers for alarms, sleep sounds, and lights-off commands
- Entryway: A smart display to check cameras and arm security when leaving
- Home office: A smart speaker for productivity commands and music
For each device, plug it in, download the companion app, connect to Wi-Fi, assign it to the correct room in your smart home app, and link it to your hub ecosystem. Name each device clearly (e.g., "Kitchen Echo Show" rather than "Echo Show 1").
Step 3: Install Smart Lighting, Thermostats & Climate Control
Lighting and climate control are the two categories that deliver the most immediate daily value. They are also relatively straightforward to install, making them the perfect next step in your smart home setup.
Smart Lighting Installation
You have three main approaches to smart lighting, and you can mix them throughout your home:
Smart Bulbs are the easiest option. Simply screw them into existing fixtures and pair them with your hub via the manufacturer app. They are ideal for lamps, accent lighting, and fixtures you want to change color. The downside is that the physical wall switch must remain on for smart control to work.
Smart Switches & Dimmers replace your existing wall switches and provide smart control while maintaining traditional switch functionality. This is the best option for overhead lighting and multi-bulb fixtures. Installation requires basic electrical work:
- Turn off power at the circuit breaker for the switch you are replacing. Verify with a non-contact voltage tester that the power is truly off.
- Remove the existing switch by unscrewing the faceplate and mounting screws. Take a photo of the wiring before disconnecting anything.
- Identify your wires: You will typically see a line (hot) wire, a load wire, a ground wire, and possibly a neutral wire. Most smart switches require a neutral wire. If your switch box does not have one, look for smart switches specifically designed for no-neutral setups.
- Connect the smart switch following the manufacturer wiring diagram. Typically: line wire to line terminal, load wire to load terminal, neutral to neutral, and ground to ground.
- Secure the switch in the wall box, attach the faceplate, and restore power at the breaker.
- Pair the switch with your hub using the manufacturer app, then assign it to the correct room.
Smart Plugs are the simplest option for controlling lamps, fans, and small appliances. Plug them into an outlet, plug your device into the smart plug, and pair via the app. For more information, see our complete smart lighting installation guide.
Smart Thermostat Installation
A smart thermostat can reduce your energy bills by 10–23% while providing convenient scheduling and remote control. Here is how to install one:
- Check compatibility with your HVAC system. Most smart thermostats work with standard forced-air systems, heat pumps, and central AC. Check the manufacturer compatibility checker online before purchasing.
- Turn off power to your HVAC system at the breaker panel.
- Remove your old thermostat faceplate and take a clear photo of the wiring. Label each wire with the terminal it connects to (R, W, Y, G, C, etc.).
- Check for a C-wire (common wire). Most smart thermostats require a C-wire for continuous power. If you do not have one, many thermostats include a C-wire adapter kit, or you can hire an HVAC technician to run one.
- Install the mounting plate for the new thermostat, using a level to ensure it is straight. Feed the wires through the center.
- Connect each wire to the corresponding terminal on the new thermostat base. Refer to your photo and the manufacturer instructions.
- Attach the thermostat faceplate and restore power at the breaker.
- Follow the on-screen setup to connect to Wi-Fi, select your HVAC system type, and configure your schedule.
- Link the thermostat to your smart home hub and voice assistant for voice control and automations.
For a deeper dive into choosing the right model, visit our smart thermostat reviews and comparison.
Step 4: Install Smart Security Devices — Cameras, Locks & Sensors
Security is one of the most compelling reasons people invest in smart home technology. A well-designed smart security system provides peace of mind, deters intruders, and can even lower your homeowners insurance premiums.
Security Camera Installation
Indoor Cameras:
- Choose mounting locations that cover entry points, hallways, and high-traffic areas. Mount cameras at 7–9 feet high for optimal coverage.
- Plug in the camera and ensure it has a clear Wi-Fi signal at the mounting location. If signal is weak, consider a Wi-Fi extender or powerline adapter.
- Mount the camera using the included hardware. For drywall, use appropriate anchors. For studs, use wood screws directly.
- Configure the camera in the manufacturer app: set motion detection zones, recording preferences, notification settings, and cloud or local storage options.
- Adjust the camera angle using the live feed in the app until the field of view covers your target area.
Outdoor Cameras:
- Select weatherproof locations near entry doors, driveways, backyards, and garages. Ensure the camera is under an eave or overhang when possible for additional weather protection.
- Check for power access. Battery-powered cameras offer flexible placement but require periodic charging. Wired cameras provide continuous recording but need a power source or PoE (Power over Ethernet) connection.
- For wired cameras, run cable through walls or along exterior surfaces using conduit. If running cable through walls, use fish tape and drill access holes from inside. Seal all exterior penetrations with silicone caulk.
- Mount the camera using lag screws into studs or appropriate masonry anchors for brick and stucco surfaces.
- Configure motion zones to cover your property while avoiding public sidewalks and neighbor properties to reduce false alerts.
- Enable person detection and smart alerts if your camera supports AI-based filtering to minimize notifications from animals, vehicles, and wind-blown objects.
Smart Lock Installation
- Remove your existing deadbolt by unscrewing the interior thumb-turn plate and the exterior cylinder. Keep all hardware in case you need to reinstall the original lock.
- Install the new smart lock following the manufacturer template. Most smart locks use the same bore hole as a standard deadbolt, so no additional drilling is required.
- Ensure proper alignment between the latch bolt and the strike plate. The lock should extend and retract smoothly without binding. Adjust the strike plate if needed.
- Install batteries (typically 4 AA or a rechargeable pack) and power on the lock.
- Calibrate the lock through the app so it learns the fully locked and fully unlocked positions.
- Create user codes for family members and trusted visitors. Set up temporary codes for service workers or guests.
- Connect to your smart home hub for remote locking, automations (like auto-locking when you leave), and voice control.
Sensor Placement Strategy
Sensors are the unsung heroes of a smart home. They trigger automations, enhance security, and provide valuable environmental data.
- Door/window sensors: Place on all exterior doors and accessible ground-floor windows. These trigger security alerts and can automate lights when doors open.
- Motion sensors: Place in hallways, stairways, and entry areas. Use them to trigger lighting automations and security alerts when the system is armed.
- Water leak sensors: Place near water heaters, washing machines, dishwashers, under sinks, and in basements. Early leak detection can prevent thousands of dollars in damage.
- Temperature & humidity sensors: Place in rooms that tend to run hot or cold to enable zone-based climate control automations.
- Smoke & CO sensors: Place on every level and near sleeping areas as required by building codes. Smart versions send phone alerts in addition to sounding alarms.
Pair each sensor with your hub, assign it to the correct room, name it descriptively, and test it to verify reliable communication. For a complete walkthrough of sensor-based automations, see our guide to smart home sensor automations.
Step 5: Configure Automations, Routines & Advanced Integrations
The real magic of a smart home is not controlling devices individually — it is creating automations that make your home respond intelligently to your life. This is where your setup transforms from a collection of gadgets into a truly smart home.
Create Essential Routines
Start with these high-value routines that you will use every day:
Morning Routine: At your wake-up time (or when your alarm is dismissed), gradually raise smart lights to 50% brightness, start your coffee maker via a smart plug, adjust the thermostat to your daytime temperature, and read out the weather and calendar.
Leaving Home Routine: Triggered by a geofence (your phone leaving a defined area around your home) or a voice command. Turns off all lights, locks all doors, arms security cameras, sets the thermostat to eco mode, and confirms everything is secure via a notification.
Arriving Home Routine: Triggered when your phone enters the home geofence. Unlocks the front door, turns on entryway and living room lights, adjusts the thermostat to your comfort setting, and disarms the security system.
Goodnight Routine: Triggered by voice command or schedule. Locks all doors, arms the security system, turns off all lights except a dim hallway nightlight, sets the thermostat to sleep temperature, and ensures all smart plugs are off.
Movie Night Routine: Triggered by voice command. Dims living room lights to 10%, closes smart blinds, turns on the TV and soundbar via IR blaster or HDMI-CEC, and sets the thermostat slightly cooler.
Set Up Conditional Automations
Go beyond simple schedules with conditional logic:
- If motion is detected in the hallway between 11 PM and 6 AM, then turn on hallway lights to 10% brightness for 3 minutes.
- If a water leak sensor detects moisture, then send an urgent notification to all household members and shut off the smart water valve.
- If an outdoor camera detects a person after 10 PM, then turn on porch and driveway lights and send a notification with a snapshot.
- If indoor temperature exceeds 78°F and someone is home, then lower the thermostat to 72°F and close smart blinds on sun-facing windows.
- If no motion has been detected for 30 minutes, then turn off lights and electronics in that room.
Integrate Third-Party Services
Maximize your smart home by connecting it to services beyond device control:
- IFTTT (If This Then That): Connect your smart home to thousands of web services. Examples: log thermostat data to a spreadsheet, send an SMS when a door opens, or trigger lights based on weather forecasts.
- Energy monitoring: Use smart plugs with energy monitoring to track electricity usage per device and identify energy hogs.
- Smart blinds & shades: Automate based on sun position, time of day, or temperature to reduce HVAC costs.
- Irrigation controllers: Smart sprinkler systems that adjust watering based on weather forecasts and soil moisture.
- Whole-home audio: Multi-room audio systems like Sonos or built-in ceiling speakers controlled through your smart home platform.
For inspiration on advanced setups, browse our collection of smart home automation ideas for every room and lifestyle.
Troubleshooting Common Smart Home Setup Issues
Even with careful planning, you will likely encounter some issues during installation. Here are solutions to the most common problems:
Device Will Not Connect to Wi-Fi
- Verify you are connecting to the 2.4 GHz band. Most smart home devices do not support 5 GHz.
- Ensure your Wi-Fi password does not contain special characters that some devices cannot process.
- Move the device closer to the router during initial setup, then relocate it after successful pairing.
- Restart your router and try again. Routers occasionally need a reboot to accept new device connections.
- Check if your router has reached its device limit. Budget routers may cap connections at 30–50 devices.
Device Pairs but Frequently Goes Offline
- Check Wi-Fi signal strength at the device location using a Wi-Fi analyzer app on your phone.
- Add a mesh node or Wi-Fi extender closer to the device.
- For Zigbee or Z-Wave devices, add a repeater (many smart plugs serve as repeaters) between the device and the hub.
- Update the device firmware through the manufacturer app.
- Check for interference from microwaves, baby monitors, or cordless phones operating on 2.4 GHz.
Smart Switch Does Not Work After Installation
- Verify power is restored at the circuit breaker.
- Double-check all wire connections are tight and correct. Compare against your pre-installation photo.
- Confirm the switch has a neutral wire connection if required. A missing neutral is the most common cause of smart switch failures.
- Check if the switch is compatible with your bulb type (LED, incandescent, CFL). Some smart switches require a minimum wattage or specific bulb types.
- Reset the switch to factory defaults and re-pair it with your hub.
Voice Commands Are Not Working
- Confirm the device is assigned to the correct room in your smart home app.
- Check that the device is linked to your voice assistant platform (Alexa, Google, or Siri).
- Ensure you are using the exact device name when giving voice commands. Rename devices to simple, distinct names if needed.
- Re-discover devices in your voice assistant app to refresh the device list.
- Check your microphone is not muted on the smart speaker or display.
Automations Are Not Triggering
- Verify all conditions in the automation are being met. Test each sensor or trigger independently.
- Check that the automation is enabled (not paused or disabled) in your smart home app.
- Confirm geofencing has location permissions enabled on all household members' phones.
- Review automation logs if your platform supports them to identify which condition is failing.
- Simplify complex automations into smaller, chained automations for more reliable execution.
If you continue to experience issues, visit our comprehensive smart home troubleshooting guide for additional solutions and community support.
Frequently Asked Questions
How much does a professional smart home installation cost?
Professional smart home installation typically costs between $150 and $500 for basic setups (hub, a few devices, and configuration) and $1,000 to $10,000+ for comprehensive whole-home installations that include in-wall wiring, custom programming, and high-end equipment. The cost depends heavily on your home size, the number of devices, and the complexity of automations you want. Many homeowners choose a hybrid approach: DIY for simple devices like smart plugs and bulbs, and professional installation for complex items like in-wall wiring, security systems, and whole-home audio. When searching for "smart home setup near me," look for certified installers with experience in your chosen ecosystem and ask for itemized quotes.
Do I need a smart home hub or can I use Wi-Fi devices only?
You can build a functional smart home using only Wi-Fi devices, but a hub significantly improves reliability, speed, and scalability. Wi-Fi-only setups put heavy demand on your router, as every device maintains its own connection. Hubs use dedicated wireless protocols like Zigbee, Z-Wave, or Thread that create their own mesh networks, reducing Wi-Fi congestion and improving response times. Hubs also enable local processing, meaning your automations continue to work even if your internet goes down. For homes with fewer than 10 smart devices, Wi-Fi-only is manageable. For anything beyond that, a hub is strongly recommended. Many modern smart speakers have hubs built in, so you may already own one without realizing it.
Will my smart home devices work if my internet goes down?
This depends on how your system is configured. Devices controlled locally through a hub (using Zigbee, Z-Wave, Thread, or HomeKit) will continue to work for basic functions like turning lights on and off, running automations, and responding to physical switches — even without internet. However, voice commands through cloud-based assistants (Alexa, Google Assistant) will not work without an internet connection, and you will lose remote access from your phone when away from home. To maximize offline reliability, choose a hub that supports local processing (such as Home Assistant, Hubitat, or Apple HomePod), use locally-controlled protocols where possible, and keep physical switches functional as a backup. Some advanced users set up a secondary internet connection or cellular backup specifically for their smart home.
How do I ensure my smart home is secure from hackers?
Smart home security requires attention to several layers. First, use a strong, unique password for every account and enable two-factor authentication wherever available. Second, keep all device firmware updated — enable automatic updates when possible. Third, isolate your smart devices on a separate network or VLAN from your personal computers and phones. Fourth, disable remote access features you do not use, and choose devices from reputable manufacturers with a track record of security updates. Fifth, change default passwords on all devices immediately after setup. Sixth, review device permissions regularly and revoke access to apps and services you no longer use. Finally, consider a network firewall or DNS filtering service to block known malicious domains. For a detailed walkthrough, read our smart home security best practices guide.
Can I mix different brands and protocols in one smart home?
Yes, and most smart homes do exactly this. The key is using a hub or platform that supports multiple protocols. For example, a Samsung SmartThings Hub supports Zigbee, Z-Wave, and Wi-Fi devices from dozens of brands. Home Assistant supports virtually every protocol and integration available. The emerging Matter standard is also making cross-brand compatibility easier by creating a unified communication layer that works across ecosystems. When mixing brands, focus on choosing the best device for each category (best smart lock, best smart thermostat, etc.) rather than trying to buy everything from one brand. Your hub will unify them into a single, cohesive system. Just verify that each device is compatible with your chosen hub or platform before purchasing.
Ready to get started? Begin with Step 1 and work through each phase at your own pace. A smart home does not need to be built in a single weekend — the best setups are built incrementally, tested thoroughly, and refined over time. Whether you tackle this project yourself or search for a smart home setup professional near you, this guide gives you the knowledge to make informed decisions every step of the way.
For more installation guides, product reviews, and smart home tips, explore the full library at Smart Home Deck.