Smart Home Setup Service: Your Complete Installation Guide
Transforming your house into a connected smart home is one of the most rewarding upgrades you can make. Whether you are adding a few smart bulbs or building a fully integrated ecosystem with automated lighting, security cameras, smart locks, thermostats, and voice assistants, a professional smart home setup service can save you countless hours of frustration and ensure everything works seamlessly from day one.
This comprehensive guide walks you through everything you need to know about hiring and preparing for a smart home setup service, what the installation process looks like step by step, and how to make sure your investment delivers the convenience and efficiency you expect. If you are exploring other smart home installation options, this guide will help you understand what professional setup entails.
Difficulty Level: Beginner to Intermediate (when working with a professional service)
Estimated Time: 4 to 12 hours depending on home size and number of devices
Cost Range: Varies by scope — basic setups start around $200, while full-home installations can range from $1,000 to $5,000 or more
Step 1: Assess Your Smart Home Needs and Plan Your Setup
Before any installation begins, the most critical step is understanding exactly what you want your smart home to accomplish. A professional smart home setup service will typically start with a consultation, but coming prepared with your own list of priorities will streamline the entire process and help you get an accurate quote.
Define Your Smart Home Goals
Start by identifying the areas of your daily routine where automation and smart technology would provide the most value. Common goals include:
- Convenience: Voice-controlled lighting, automated blinds, and hands-free entertainment systems
- Energy Efficiency: Smart thermostats, automated lighting schedules, and energy monitoring devices
- Security: Smart locks, video doorbells, indoor and outdoor cameras, and motion sensors
- Safety: Smoke detectors, carbon monoxide sensors, water leak detectors, and smart garage door openers
- Entertainment: Multi-room audio systems, smart TVs, and integrated streaming setups
Survey Your Home's Infrastructure
Take inventory of your current home infrastructure. A professional installer will evaluate these elements, but having this information ready speeds up the process considerably:
- Wi-Fi Network: Check your router model, internet speed, and coverage areas. Most smart home devices require a stable 2.4 GHz Wi-Fi connection, and some newer devices support 5 GHz networks.
- Electrical Wiring: Smart switches and thermostats often require a neutral wire. Check your switch boxes to confirm whether neutral wires are present.
- Existing Devices: Note any smart devices you already own, including their brands and ecosystems (such as Amazon Alexa, Google Home, Apple HomeKit, or Samsung SmartThings).
- Home Layout: Larger homes or homes with thick walls may need Wi-Fi extenders, mesh networks, or dedicated smart home hubs to ensure reliable connectivity in every room.
Choose Your Ecosystem
One of the most important decisions you will make is which smart home ecosystem will serve as the foundation for your setup. Your installer can guide you through this choice, but understanding the major platforms helps you make an informed decision:
- Amazon Alexa: Broadest device compatibility, excellent voice recognition, and widely available at various price points
- Google Home: Superior search integration, natural language processing, and strong multi-room audio support
- Apple HomeKit: Strong privacy protections, seamless integration with Apple devices, and a curated selection of compatible accessories
- Samsung SmartThings: Excellent hub-based automation, strong sensor support, and broad protocol compatibility including Zigbee and Z-Wave
For a deeper comparison of platforms and devices, check out our smart home guides section where we break down ecosystem compatibility in detail.
Step 2: Prepare Your Home for Professional Installation
Once you have selected a smart home setup service and scheduled your installation date, proper preparation ensures the process goes smoothly and efficiently. A well-prepared home can cut installation time in half and prevent costly delays.
Upgrade Your Network Infrastructure
The backbone of any smart home is a robust network. Before your installer arrives, address these networking essentials:
- Internet Speed: Ensure your plan provides at least 25 Mbps download speed for a basic smart home, or 100+ Mbps for homes with multiple cameras, streaming devices, and heavy automation.
- Mesh Wi-Fi System: For homes over 1,500 square feet, consider installing a mesh Wi-Fi system to eliminate dead zones. Popular options include systems from Eero, Google Nest Wifi, and TP-Link Deco.
- Guest Network: Set up a separate guest network or IoT network for your smart devices. This improves security by isolating smart home traffic from your personal devices and computers.
- Ethernet Backhaul: If possible, run Ethernet cables to key locations where hubs, cameras, or access points will be installed. Wired connections are always more reliable than wireless ones.
Clear Access to Installation Points
Your installer will need clear access to several areas throughout your home. Prepare the following spaces:
- Clear furniture and obstacles away from light switches, outlets, and thermostat locations
- Ensure the area around your electrical panel is accessible
- Remove items from shelves or walls where cameras, sensors, or smart displays will be mounted
- Provide access to your router and modem area
- Clear pathways to the attic or crawl space if wiring work is needed
Gather Account Information
Your installer will need access to various accounts and credentials to complete the setup. Prepare the following:
- Wi-Fi network name and password
- Accounts for your chosen ecosystem (Amazon, Google, Apple, or Samsung)
- Accounts for any third-party services (Ring, Nest, Philips Hue, etc.)
- Your internet service provider account details in case network adjustments are needed
Never share passwords in plain text or over unsecured channels. Most professional installers will set up accounts with you present or use temporary credentials that you change after installation.
Step 3: The Professional Installation Process
Understanding what happens during the actual installation helps you set realistic expectations and know what questions to ask. A professional smart home setup service typically follows a structured process that ensures every device is properly installed, configured, and tested.
Network Configuration and Hub Setup
The installation begins with establishing a solid network foundation. Your technician will:
- Test Wi-Fi signal strength in every room where devices will be installed
- Position and configure mesh nodes or access points for optimal coverage
- Set up your smart home hub or bridge (such as a SmartThings Hub, Hue Bridge, or HomePod)
- Configure network segmentation to separate IoT devices from personal devices
- Update firmware on all networking equipment to the latest stable version
Device Installation and Wiring
Physical installation of devices is the most labor-intensive part of the process. Depending on your setup, this may include:
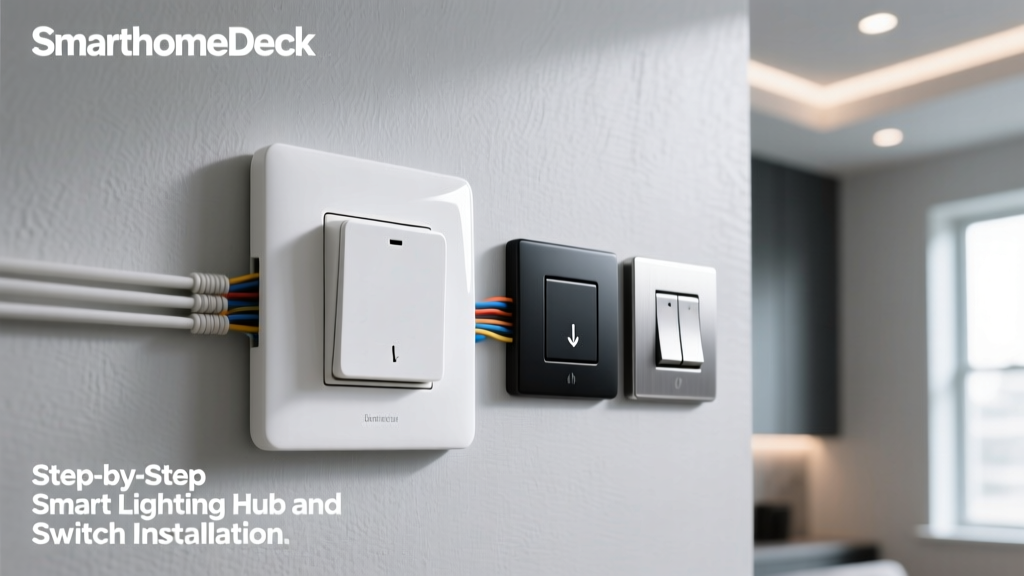
- Smart Switches and Dimmers: Your installer will turn off power at the breaker, remove existing switches, verify wiring compatibility, connect the new smart switches, and test each one. This typically takes 15 to 30 minutes per switch.
- Smart Thermostats: Installation involves removing your old thermostat, labeling wires, installing the new baseplate, connecting wires to the correct terminals, and powering on the unit. Most smart thermostat installations take 30 to 60 minutes.
- Security Cameras: Wired cameras require running cables through walls or along surfaces, mounting brackets, and connecting to power and network. Wireless cameras are simpler but still require proper positioning and mounting. Each camera typically takes 30 to 90 minutes.
- Smart Locks: Installation involves removing your existing deadbolt, installing the smart lock hardware, calibrating the bolt position, and testing all entry methods. Expect 30 to 60 minutes per lock.
- Sensors: Motion sensors, door and window sensors, and environmental sensors are typically battery-powered and mount with adhesive strips or screws. These are among the quickest devices to install, usually taking 5 to 15 minutes each.
- Smart Blinds and Shades: Motorized window treatments require precise measurement, bracket installation, and motor calibration. These installations can take 45 to 90 minutes per window.
If you are considering a DIY approach for some of these devices before calling in a professional, our installation guides cover many of these projects in detail.
Software Configuration and Integration
Once all devices are physically installed, the real magic happens during software configuration. Your installer will:
- Connect each device to your Wi-Fi network or smart home hub
- Update device firmware to the latest version
- Name and organize devices by room and type within your smart home app
- Configure device-specific settings such as motion sensitivity for cameras, temperature ranges for thermostats, and brightness levels for smart lights
- Set up voice assistant integration so you can control devices with voice commands
- Create automation routines and scenes based on your preferences
Step 4: Automation, Routines, and Scene Configuration
The true power of a smart home lies not in individual devices but in how they work together. A professional setup service will configure automations and routines that make your home respond intelligently to your lifestyle.
Essential Automations to Configure
Work with your installer to set up these foundational automations:
- Morning Routine: Lights gradually brighten, thermostat adjusts to your preferred daytime temperature, coffee maker starts, and blinds open at your wake-up time
- Leaving Home: All lights turn off, thermostat switches to eco mode, doors lock automatically, security cameras activate, and garage door closes
- Arriving Home: Entryway lights turn on, thermostat resumes comfort settings, security system disarms, and your favorite music starts playing
- Goodnight Routine: All lights turn off except designated nightlights, doors lock, thermostat adjusts for sleeping, cameras switch to night mode, and white noise machines activate
- Vacation Mode: Lights follow randomized schedules to simulate occupancy, all entry points are monitored, and you receive alerts for any unusual activity
Advanced Scene Configuration
Beyond basic automations, your installer can create custom scenes that adjust multiple devices simultaneously:
- Movie Night: Lights dim to 10 percent, blinds close, TV turns on to your streaming app, and surround sound activates
- Dinner Party: Dining room lights set to warm 70 percent brightness, multi-room audio plays background music at low volume, and thermostat adjusts for the extra body heat from guests
- Work From Home: Office lights set to cool white at full brightness, notification sounds are muted on smart speakers, and thermostat maintains a comfortable temperature in your office zone
Testing and Quality Assurance
A thorough smart home setup service includes comprehensive testing of every device and automation:
- Each device is tested individually to confirm it responds to app controls and voice commands
- Every automation is triggered manually to verify correct behavior
- Network stability is tested under load with all devices connected simultaneously
- Backup and recovery procedures are documented in case of power outages or network failures
- Response times are measured to ensure automations execute within acceptable timeframes
Step 5: Post-Installation Support and Maintenance
Your smart home is a living system that requires ongoing attention to remain reliable and secure. Understanding post-installation maintenance helps you protect your investment and keep everything running smoothly.
Documentation and Handoff
A professional installer should provide comprehensive documentation including:
- A complete device inventory with model numbers, locations, and firmware versions
- Network diagram showing how all devices connect and communicate
- Account credentials and recovery information stored securely
- Written instructions for common tasks like adding new devices, modifying automations, and resetting devices
- Warranty information for all installed products and labor
Ongoing Maintenance Best Practices
Keep your smart home running at peak performance with these maintenance habits:
- Firmware Updates: Check for and install firmware updates monthly. Most devices offer automatic updates, but it is wise to verify they are being applied successfully.
- Battery Replacement: Battery-powered sensors and locks typically need new batteries every 6 to 12 months. Set calendar reminders to check and replace them proactively.
- Network Health: Periodically reboot your router and mesh nodes. Monitor connected device counts and remove any devices you no longer use.
- Security Audits: Review device permissions, update passwords quarterly, and remove access for anyone who no longer needs it.
- Automation Review: Revisit your automations seasonally to adjust schedules for changing daylight hours, temperature preferences, and lifestyle changes.
For product recommendations that are known for reliability and easy maintenance, browse our smart home product reviews to find devices that stand the test of time.
Tools and Products Needed for a Smart Home Setup
Whether your installer provides these or you want to have them on hand, here is a comprehensive list of tools and products commonly needed during a smart home installation:
Tools
- Phillips and flathead screwdrivers (multiple sizes)
- Voltage tester or non-contact voltage detector
- Wire strippers and wire nuts
- Power drill with assorted bits
- Level for mounting cameras, displays, and brackets
- Stud finder for secure wall mounting
- Fish tape for running wires through walls
- Ladder or step stool for high-mounted devices
- Smartphone or tablet for device configuration and testing
- Label maker for organizing wires and cables
Products and Equipment
- Smart home hub or bridge (Samsung SmartThings, Hubitat, or ecosystem-specific hub)
- Mesh Wi-Fi system (Eero, Google Nest Wifi, TP-Link Deco, or Netgear Orbi)
- Smart switches and dimmers compatible with your chosen ecosystem
- Smart thermostat (Ecobee, Nest, or Honeywell Home)
- Smart locks (August, Yale, Schlage, or Ultraloq)
- Security cameras and video doorbell (Ring, Arlo, Wyze, or Google Nest)
- Motion sensors, door and window contact sensors
- Smart plugs for lamps and appliances that lack built-in smart features
- Smart speaker or display for voice control in key rooms
- Ethernet cables for wired connections where possible
- Surge protectors and UPS battery backup for hubs and networking equipment
- Mounting hardware, brackets, and adhesive strips
Troubleshooting Common Smart Home Installation Issues
Even with professional installation, smart home systems can encounter issues. Here are the most common problems and their solutions:
Device Won't Connect to Wi-Fi
This is the most frequent issue during and after installation. Try these steps:
- Verify the device is within range of your Wi-Fi router or mesh node
- Confirm you are connecting to the correct frequency band — most smart devices require 2.4 GHz
- Check that your Wi-Fi password is entered correctly, paying attention to case sensitivity
- Restart the device and your router
- Reduce the number of connected devices on your network if you are near your router's limit
- Move the device closer to the router during initial setup, then relocate it once connected
Automations Not Triggering
When automations fail to execute as expected:
- Verify that all trigger conditions are being met — check sensor placement and sensitivity settings
- Confirm that the hub or device running the automation is powered on and connected
- Check for conflicting automations that may be overriding your intended behavior
- Review time zone settings on your hub and devices to ensure time-based triggers fire correctly
- Test each device in the automation individually to isolate the failing component
Voice Commands Not Working
If your voice assistant is not responding correctly:
- Ensure the smart speaker or display is connected to the same network as your devices
- Verify that device names in your smart home app match what you are saying in voice commands
- Check that the skill or integration for each device brand is enabled in your voice assistant app
- Re-link your smart home account to the voice assistant if connections have been disrupted
- Reduce background noise that may interfere with voice recognition
Smart Switch or Dimmer Not Responding
Wired smart devices can present unique challenges:
- Check your circuit breaker to ensure power is flowing to the switch
- Verify the neutral wire connection is secure — many smart switches require a neutral wire to function
- For dimmers, confirm that your light bulbs are dimmable and compatible with the switch
- Reset the switch by turning off power at the breaker for 30 seconds, then restoring it
- Check for firmware updates that may address known issues with your switch model
Camera Feed Lagging or Disconnecting
Security cameras require consistent bandwidth and connectivity:
- Test your upload speed — cameras need at least 2 Mbps upload per camera for HD streaming
- Move the camera closer to your Wi-Fi access point or add a mesh node nearby
- Reduce the streaming resolution if bandwidth is limited
- Check for physical obstructions like metal siding or thick masonry walls that block signals
- Consider a wired Ethernet connection or power-over-Ethernet adapter for critical cameras
Frequently Asked Questions
How much does a professional smart home setup service cost?
The cost of a smart home setup service varies widely based on the scope of your project. A basic setup covering a smart speaker, a few smart bulbs, a smart plug, and basic configuration typically costs between $150 and $300 for labor alone. A mid-range installation with smart switches throughout the home, a smart thermostat, a video doorbell, and several automations generally ranges from $500 to $1,500 for professional labor. Full-home installations with comprehensive security systems, multi-room audio, motorized shades, and advanced automation can cost $2,000 to $5,000 or more for labor. These estimates do not include the cost of the devices themselves. Always request a detailed quote that separates labor costs from product costs so you understand exactly what you are paying for.
How long does a smart home installation take?
Installation time depends on the number and complexity of devices being installed. A basic setup with a handful of devices can be completed in 2 to 4 hours. A standard whole-home installation covering lighting, climate control, and security typically takes 6 to 10 hours and may be split across two days. Complex installations involving in-wall wiring, multi-zone audio, motorized window treatments, and extensive automation programming can take 2 to 4 days. Your installer should provide a time estimate during the consultation phase based on your specific device list and home layout. Factors that can extend installation time include older homes with outdated wiring, poor Wi-Fi coverage requiring additional network equipment, and custom automation requests that require extensive testing.
Can I add more devices to my smart home after the initial installation?
Absolutely. One of the greatest advantages of a professionally installed smart home is that it creates a solid foundation that is easy to expand. Your installer should set up your system with scalability in mind, ensuring your network can handle additional devices and your hub has capacity for more connections. Adding new devices after installation is typically straightforward — you simply follow the manufacturer's pairing process and add the new device to your existing automations. For complex additions like new wired switches or additional cameras, you may want to schedule a follow-up visit with your installer. Many smart home setup services offer discounted rates for return customers adding to their existing systems.
What happens to my smart home if the internet goes down?
Most smart homes continue to function at a basic level during internet outages, though some features will be limited. Devices controlled by a local hub (such as SmartThings or Hubitat) will continue to execute automations and respond to physical switches even without internet access. However, voice control through cloud-based assistants like Alexa or Google Assistant will be unavailable until the connection is restored. Cloud-dependent devices like some security cameras may stop recording or sending alerts during outages. To minimize disruption, consider installing a UPS battery backup for your router and modem, which can keep your network running during brief power outages. For extended reliability, ask your installer about local processing hubs that do not rely on cloud connectivity for core automations.
Is a smart home setup service worth the cost compared to DIY installation?
Whether a professional setup service is worth the investment depends on several factors including your technical comfort level, the complexity of your planned setup, and the value you place on your time. DIY installation works well for simple setups involving smart plugs, battery-powered sensors, and basic smart speakers. However, professional installation becomes increasingly valuable for projects involving electrical work like smart switches and thermostats, in-wall wiring for cameras or speakers, complex automation programming, and multi-ecosystem integration. A professional installer brings expertise in device compatibility, optimal placement, network configuration, and troubleshooting that most homeowners lack. They also typically offer warranties on their work and can identify potential issues before they become problems. For most homeowners planning a comprehensive smart home with more than 10 devices, the time savings, reduced frustration, and professional results make the service cost a worthwhile investment. Check out our smart home guides for more information on deciding between professional and DIY installation approaches.