The Smart Thermostat Installation Reality Check
Upgrading to a smart thermostat is widely considered one of the most impactful and accessible smart home improvements you can make. According to the U.S. Environmental Protection Agency's ENERGY STAR program, certified smart thermostats can save homeowners an average of 8% on heating and cooling bills annually. However, the gap between unboxing the device and actually enjoying those savings is bridged by one major hurdle: installation difficulty. At SmartHomeDeck, we don't just test the sleek touchscreens and AI-driven scheduling algorithms; we put these devices on the wall in real-world environments to evaluate the physical wiring, app onboarding, and first-setup friction.
In this comprehensive installation report, we are dissecting the setup difficulty of the three most popular smart thermostats on the market: the Ecobee Smart Thermostat Premium, the Google Nest Learning Thermostat, and the Honeywell Home T9. We will break down the dreaded C-wire dilemma, physical mounting challenges, and the software configuration process to help you determine which model is best suited for your DIY skill level.
The C-Wire Dilemma: Do You Really Need One?
Before we evaluate specific models, we must address the elephant in the HVAC closet: the Common Wire, or 'C-wire'. Traditional thermostats only require power when they are actively calling for heat or cooling, drawing it directly from the heating system. Smart thermostats, however, require continuous power to run Wi-Fi radios, vibrant LCD screens, and background sensors.
The C-wire provides a continuous 24V AC power stream from your HVAC control board to the thermostat. If your home was built before 2010, there is a high probability that your thermostat wall cavity lacks a C-wire. According to the U.S. Department of Energy, proper wiring is essential not just for device functionality, but to prevent damage to your HVAC system's control board. Attempting to run a high-draw smart device without adequate power can lead to 'power stealing'—a method where the thermostat briefly pulses the HVAC circuit to charge its internal battery, which can cause modern gas valves to chatter, click, or fail prematurely.
Physical Installation & Mounting Difficulty
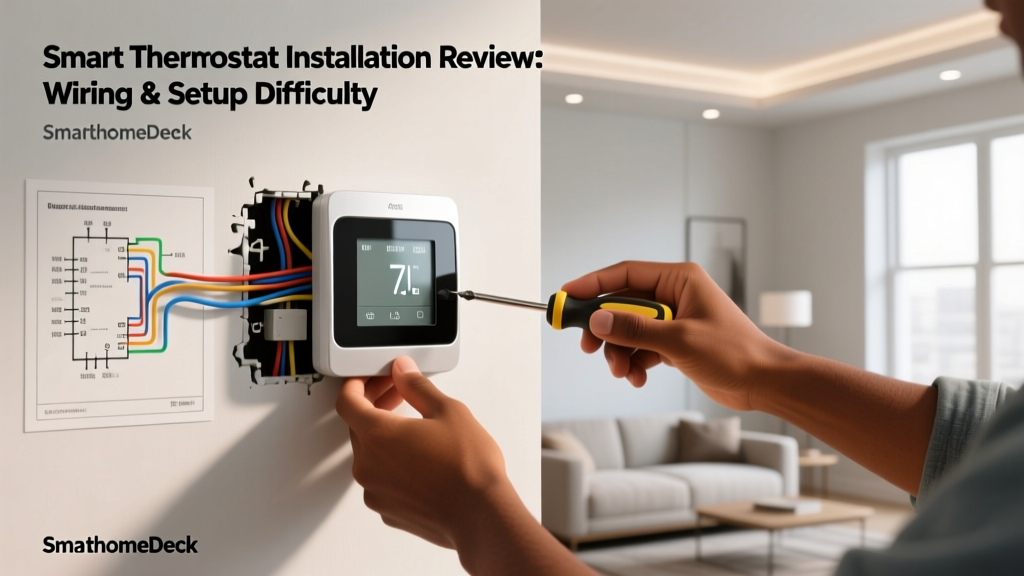
The physical act of removing your old thermostat, labeling wires, and mounting the new backplate is where most DIYers experience the highest anxiety. Here is how the top three contenders handle the physical setup.
Ecobee Smart Thermostat Premium: The PEK Lifesaver
Ecobee takes the most pragmatic approach to the C-wire issue. Inside the box of the Ecobee Smart Thermostat Premium, you will find a Power Extender Kit (PEK). If you lack a C-wire, the PEK allows you to repurpose an unused wire (like a G or Y2 wire) at your HVAC control board to deliver continuous power to the thermostat.
The Installation Reality: If you have a C-wire, the Ecobee setup takes about 20 minutes. The backplate is exceptionally large, which is a massive advantage for retrofitting; it easily covers the unsightly paint gaps and drywall damage left behind by older, rectangular Honeywell or White-Rodgers units. However, if you must use the PEK, the installation difficulty spikes. You will need to open your furnace or air handler control panel, locate the wiring harness, and plug the PEK module directly into the board. While Ecobee provides a step-by-step video guide in their app, working inside the HVAC control board is intimidating for beginners and requires strict adherence to safety protocols (turning off the breaker!).
Google Nest Learning Thermostat: The Power Stealing Gamble
Google markets the Nest Learning Thermostat as a device that 'works without a C-wire in most homes.' This is achieved through power stealing (or power pulsing). The Nest charges its internal lithium-ion battery by briefly completing the circuit with your heating or cooling system when it is not actively running.
The Installation Reality: Physically mounting the Nest is a mixed bag. The iconic circular design is beautiful, but its footprint is small. It will almost certainly not cover the rectangular paint outline of your old thermostat, requiring you to patch and paint the wall before mounting. Regarding the C-wire, while the Nest might turn on without one, our real-world testing in homes with high-efficiency furnaces and modern HVAC control boards showed frequent 'low battery' warnings and Wi-Fi disconnects. For a reliable setup, we strongly recommend purchasing the separate Nest Power Connector or running a new C-wire, adding unexpected cost and time to your first setup.
Honeywell Home T9: The Wall-Plug Adapter Approach
Honeywell approaches the power problem with a hardware workaround that doesn't require you to touch your furnace control board. The T9 includes a C-Wire Adapter that plugs into a standard 120V wall outlet near your thermostat and injects the 24V power into the thermostat wires via a small, inline transformer.
The Installation Reality: This makes the T9 the safest option for users who are terrified of opening their HVAC panel. The physical mounting is straightforward, and the backplate is generously sized to hide old wall damage. The trade-off is aesthetic: you will have a visible wire running from your thermostat down the wall to a bulky power brick plugged into your nearest outlet. If you have an outlet hidden behind furniture or inside a wall cavity, this is a brilliant solution; otherwise, it compromises the clean look of a smart home upgrade.
Average First-Setup Time by Brand and Wiring Condition
App Onboarding & Wi-Fi Configuration
Once the wires are connected and the faceplate snaps onto the wall, the digital setup begins. This phase involves Wi-Fi pairing, firmware updates, and HVAC system configuration.
- Ecobee: Ecobee shines here. The backplate features a QR code that you scan with your smartphone camera, instantly launching the app and pulling up your specific wiring configuration. The app uses a conversational, chat-like interface to ask you about your HVAC equipment (e.g., 'Do you have a heat pump or conventional system?'). The Wi-Fi handshake is fast, and firmware updates are handled seamlessly in the background.
- Nest: Google leverages Bluetooth Low Energy (BLE) for the Nest setup. When you open the Google Home app, it automatically detects the unconfigured Nest on the wall. The handoff from phone to thermostat is incredibly smooth, feeling more like setting up a premium smartphone than an HVAC component. However, configuring complex systems like dual-fuel or multi-stage heating can be buried deep in the app's 'Pro Settings' menu, requiring some technical know-how.
- Honeywell: The Resideo (Honeywell) app experience is the most dated of the three. Wi-Fi pairing often requires putting the thermostat into 'AP Mode' (creating its own Wi-Fi network), connecting your phone to it, and then passing your home network credentials. It is a clunky process that frequently times out on modern dual-band mesh routers, leading to frustrating troubleshooting loops.
Detailed Setup Comparison Table
| Feature | Ecobee Premium | Nest Learning | Honeywell T9 |
|---|---|---|---|
| Backplate Size | Large (Covers old paint) | Small (Exposes old paint) | Large (Covers old paint) |
| No C-Wire Solution | PEK (Requires furnace wiring) | Power Stealing (Unreliable) | Wall-Plug Adapter (Visible wire) |
| App Pairing Method | QR Code Scan | Bluetooth Auto-Detect | Manual AP Mode / Code |
| Wire Labeling Kit | Excellent (Pre-printed tags) | Good (Sticker roll) | Adequate (Basic stickers) |
| Setup Difficulty (1-10) | 6 (Without C-wire) | 4 (With C-wire) | 3 (Using wall adapter) |
Smart Sensors and Secondary Setup
A smart thermostat is only as good as the data it receives, which is why remote room sensors are critical for multi-story homes. The first-setup process doesn't end at the wall unit; it extends to pairing these secondary devices.
Ecobee includes a SmartSensor in the box. These sensors detect both temperature and occupancy. Pairing them is as simple as pulling the battery tab; the thermostat automatically detects them and prompts you to name the room. Nest's sensors are sold separately and only measure temperature (relying on the main thermostat for occupancy via its built-in radar). Pairing Nest sensors requires navigating the app's device settings and manually initiating a scan. Honeywell's T9 supports both battery-operated and hardwired plug-in sensors, offering great flexibility, though the app pairing process can occasionally require multiple attempts to recognize the sensor's unique ID.
Pro-Tip from the SmartHomeDeck Lab: Never trust the color of the wires coming out of your wall. A previous homeowner or an HVAC technician in a hurry may have used a blue wire for 'Y' (cooling) instead of 'C' (common). Always label the wires based on the terminal they are connected to on your old thermostat backplate before you remove a single screw.
Expert Tips for a Flawless First Setup
To minimize your installation difficulty and avoid the most common pitfalls we see in our testing lab, follow these actionable steps before you even open the new product box:
- Kill the Power at the Breaker: Do not rely on the HVAC system's local switch. Go to your main electrical panel and flip the breaker for your furnace and air handler. Use a non-contact voltage tester to confirm the wires at the wall are dead.
- Check the Drain Pan Switch: Many modern AC systems have a float switch on the condensate drain pan that cuts power to the thermostat if a clog is detected. If your new smart thermostat won't turn on after installation, check this switch before assuming you wired it incorrectly.
- Take a 'Before' Photo: Take a clear, well-lit photograph of your old thermostat's wiring. Ensure the terminal letters (R, W, Y, G, C) are legible. This is your ultimate fallback if the included wire labels fall off.
- Prepare for Firmware Updates: Smart thermostats often ship with factory firmware that is months or years old. Expect the device to reboot 2-3 times during the first hour as it downloads security patches and feature updates over Wi-Fi. Do not interrupt the power during this phase.
Final Deck Scores: Ease of Use & Installation
When evaluating these devices through the SmartHomeDeck scoring rubric, installation difficulty heavily influences the 'Ease-of-Use' and 'Compatibility' dimensions.
- Ecobee Smart Thermostat Premium: Performance: 9.5 | Value: 8 | Compatibility: 9 | Ease-of-Use: 8.5 | Features: 10. The inclusion of the PEK and the QR-code app onboarding make it the most universally compatible and guided setup, provided you are comfortable opening your HVAC panel.
- Google Nest Learning Thermostat: Performance: 9 | Value: 7.5 | Compatibility: 7 | Ease-of-Use: 7 | Features: 8.5. The Bluetooth app setup is magical, but the reliance on power stealing and the small backplate severely penalize its Compatibility and Ease-of-Use scores for retrofit installations.
- Honeywell Home T9: Performance: 8.5 | Value: 8.5 | Compatibility: 8.5 | Ease-of-Use: 7.5 | Features: 8. The wall-plug adapter is a brilliant, low-stress workaround for C-wire anxiety, making physical installation incredibly easy, even if the software experience feels a generation behind.
Ultimately, if you want the smoothest software experience and don't mind patching drywall, the Nest is a joy to configure. If you want to cover up old wall damage and guarantee reliable power without relying on power-stealing tricks, the Ecobee Premium is the undisputed champion of the smart thermostat installation process.