Smart Apartment Starter Guide: Build Your Connected Home Room by Room
Living in an apartment doesn't mean you have to miss out on the convenience, security, and energy savings of a smart home. In fact, apartments are often the perfect testing ground for smart home technology. Smaller spaces mean fewer devices, simpler setups, and faster results — all without the complexity of wiring a whole house.
Whether you're renting a studio or own a two-bedroom condo, this guide walks you through every room with practical recommendations, budget tiers, and renter-friendly installation tips. We've designed each section so you can start small and scale up over time, picking the devices and automations that matter most to your daily life.
If you're brand new to smart home technology, check out our smart home basics guide to understand the core ecosystems and protocols before diving in. Otherwise, let's get started room by room.
Why Apartments Are Ideal for Smart Home Setups
Before we jump into specific rooms, it's worth understanding why apartment living actually gives you some advantages when building a smart home:
- Smaller coverage areas mean fewer devices are needed for lighting, climate, and security — saving you money upfront.
- Simpler Wi-Fi demands since most apartments can be covered by a single router or mesh node, reducing network headaches.
- Renter-friendly options abound today, with most modern smart devices designed for easy installation and removal without damaging walls or fixtures.
- Lower energy bills are immediately noticeable when you automate lights, thermostats, and plugs in a compact space.
- Portability — most apartment-friendly devices can move with you when you relocate, protecting your investment.
The key is choosing devices that don't require permanent installation, hardwiring, or structural modifications. Throughout this guide, we'll highlight renter-friendly alternatives for every category. For a broader look at what's available, browse our complete device directory.
Budget Tiers: Starter, Mid-Range & Pro Setups
Every room in this guide includes three budget tiers so you can match recommendations to your wallet. Here's what each tier represents:
Starter Tier ($50–$150 per room)
Entry-level smart devices that deliver immediate value. Think smart plugs, basic smart bulbs, and affordable sensors. Perfect if you're testing the waters or working with a tight budget. These devices typically connect via Wi-Fi or Bluetooth and don't require a hub.
Mid-Range Tier ($150–$400 per room)
A more complete experience with higher-quality devices, better integration, and expanded automation capabilities. This tier often includes a smart speaker or hub, premium bulbs or switches, and dedicated sensors. You'll notice smoother performance and more reliable connectivity at this level.
Pro Tier ($400–$800+ per room)
The full experience with premium devices, advanced automations, and professional-grade reliability. Pro setups often feature smart displays, motorized shades, high-end speakers, and multi-sensor arrays. This tier is for those who want their apartment to feel truly futuristic.
You don't have to outfit every room at the same tier. A common strategy is to invest in a Pro setup for high-traffic areas like the living room while keeping bedrooms and bathrooms at the Starter level. Mix and match based on how you actually use each space.
The Living Room: Your Smart Home Command Center
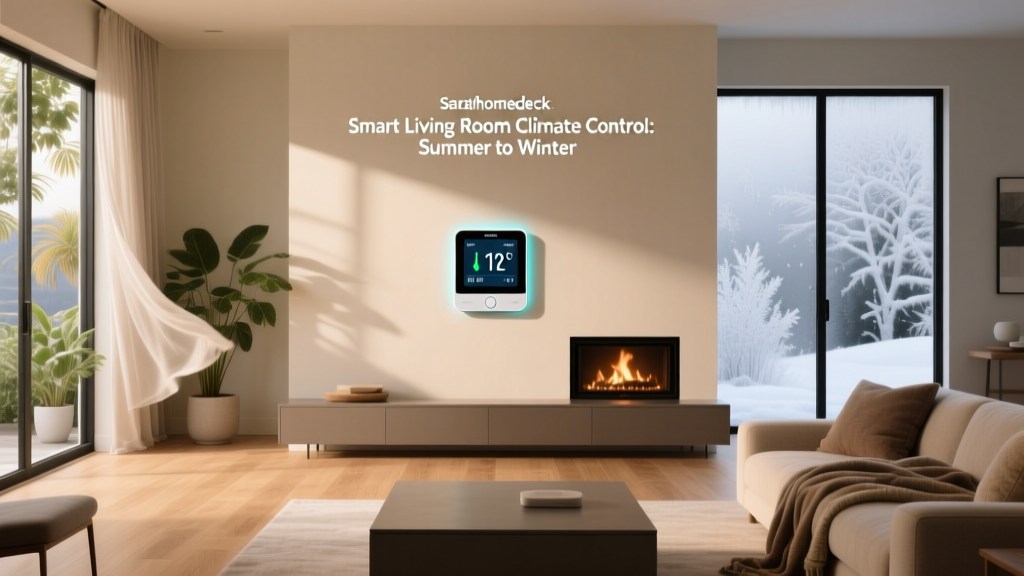
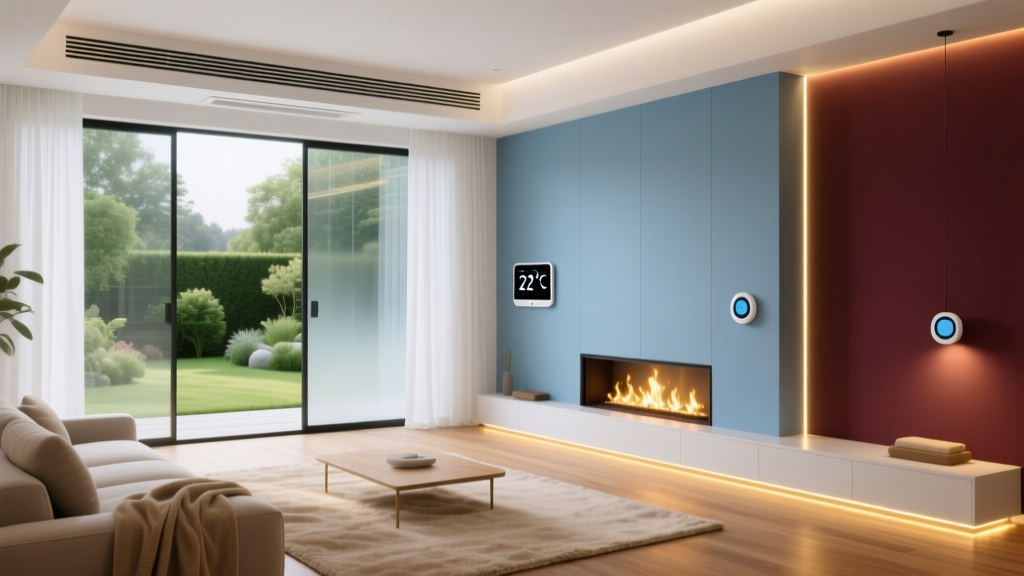
The living room is where most people spend their evenings, entertain guests, and relax. It's also the natural hub of any smart home — the place where your voice assistant lives, where entertainment gets automated, and where lighting sets the mood for everything from movie nights to dinner parties.
Living Room Budget Breakdown
| Category | Starter ($80–$150) | Mid-Range ($200–$400) | Pro ($500–$800) |
|---|---|---|---|
| Smart Speaker/Display | Smart speaker (basic) | Smart display (10-inch) | Premium smart display + secondary speaker |
| Lighting | 2–3 smart bulbs | Smart light strip + 4 color bulbs | Smart switch + accent strips + floor lamp |
| Entertainment | Smart plug for TV/media | Streaming stick + IR blaster | Universal remote hub + soundbar integration |
| Climate & Air | Smart plug for fan/heater | Smart thermostat (if permitted) | Smart thermostat + air purifier integration |
Recommended Devices for the Living Room
Start with a smart speaker or smart display. This becomes the voice-controlled brain of your apartment. Place it centrally so it can hear commands from the couch, kitchen pass-through, or hallway. A smart display adds visual feedback — weather, video calls, camera feeds, and recipe displays — that a speaker-only device can't match. Read our best smart displays review for top picks.
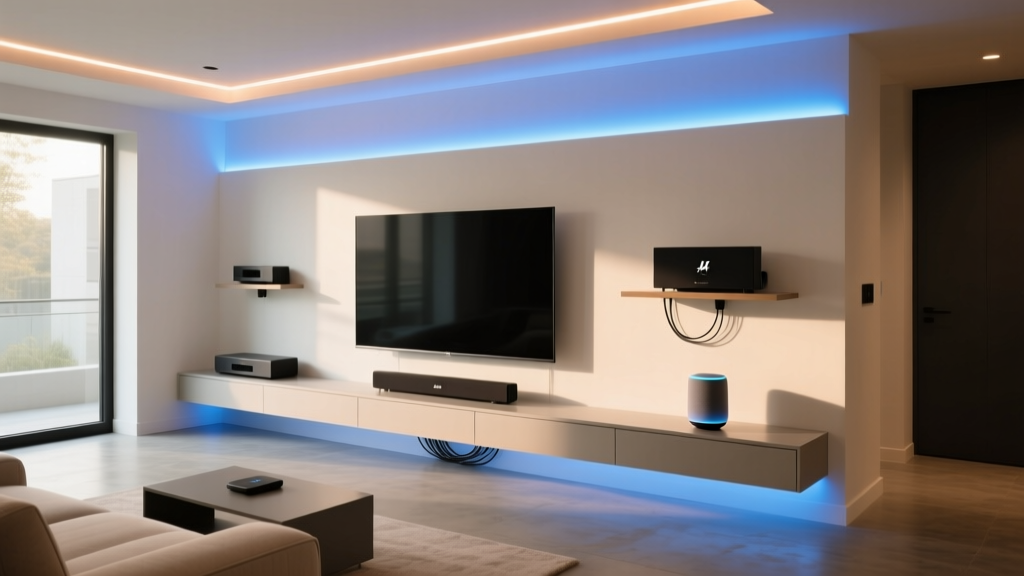
For lighting, smart bulbs are the easiest starting point for renters since they screw into existing fixtures and require zero tools. Use warm-white bulbs for ambient lighting and color-capable bulbs for accent spots behind the TV or in shelving units. A smart light strip behind your TV creates bias lighting that reduces eye strain and looks stunning during movies. Check our smart light bulb roundup for detailed comparisons.
For entertainment control, a smart plug can turn your TV or media center on and off via voice or schedule. If you want deeper control — switching inputs, adjusting volume, launching apps — consider an IR blaster that bridges your existing remote-controlled devices into your smart home ecosystem.
Installation Tips for Renters
The living room usually has the most visible devices, so cable management matters. Use adhesive cable clips (removable with heat) to route cords behind furniture. If your lease prohibits wall-mounted TVs, a floor-standing TV mount or a tension-rod mount can give you that floating look without a single screw. Smart plugs should be placed behind furniture where they're hidden but still accessible for resets.
Automation Routines to Set Up
- Movie Mode: Dim lights to 10%, turn on the TV via smart plug, close smart blinds (if installed), and set the thermostat one degree cooler. Trigger with a single voice command.
- Good Morning: Gradually brighten living room lights over 15 minutes, start your coffee maker (via smart plug), and read out your calendar and weather forecast through the smart speaker.
- Away Mode: Turn off all living room devices, randomize a light to simulate occupancy, and arm any connected security sensors.
- Party Mode: Set accent lights to a color cycle, adjust volume on connected speakers, and dim overhead lighting to create atmosphere.
Design Considerations
Smart devices should enhance your living room's aesthetic, not clutter it. Choose a smart display that complements your decor — many now come in fabric finishes and neutral tones. Hide smart plugs and hubs inside media cabinets or behind books on a shelf. Use smart light strips to highlight architectural features like crown molding or built-in shelving rather than running them in visible lines along walls.
The Bedroom: Sleep-Optimized Smart Comfort
Your bedroom is where smart home technology can have the most personal impact. Better sleep, gentler wake-ups, and effortless control of your environment without leaving bed — these are the upgrades that make daily life noticeably better.
Bedroom Budget Breakdown
| Category | Starter ($50–$120) | Mid-Range ($150–$300) | Pro ($400–$700) |
|---|---|---|---|
| Lighting | 2 warm-white smart bulbs | Color bulbs + bedside light strip | Full fixture smart switch + circadian lighting |
| Sound & Sleep | Smart plug for white noise machine | Smart speaker with sleep sounds | Dedicated sleep sound machine + smart speaker |
| Climate | Smart plug for fan | Smart thermostat + temperature sensor | Smart AC controller + air quality monitor |
| Convenience | Bedside smart plug for phone charger | Wireless charging pad + smart alarm | Smart bed integration + motorized blackout shades |
Recommended Devices for the Bedroom
The bedroom's most impactful upgrade is smart lighting tuned to your circadian rhythm. During the evening, bulbs should shift to warm, dim tones that encourage melatonin production. In the morning, they should gradually brighten with cooler, daylight tones that help you wake naturally. Most major smart bulb brands support this through their scheduling features. Our smart bulb guide covers which models handle circadian scheduling best.
A small smart speaker on the nightstand replaces your alarm clock, white noise machine, and phone-as-last-thing-you-see-at-night habit. Set it to play sleep sounds, meditations, or audiobooks with a sleep timer. In the morning, it can gently wake you with a sunrise alarm routine that brightens your smart bulbs before the audio alarm sounds.
For climate control, a temperature sensor placed near the bed gives you accurate readings of where you actually sleep — not where the thermostat happens to be mounted in the hallway. Pair it with a smart plug controlling a fan or portable AC unit to maintain your ideal sleep temperature automatically.
If your budget allows, motorized blackout shades are a game-changer for shift workers, light-sensitive sleepers, or anyone whose bedroom faces east. Many renter-friendly models use tension rods or adhesive mounting brackets that leave no damage.
Installation Tips for Renters
Bedrooms are typically the easiest rooms to upgrade since they involve fewer fixtures and simpler layouts. Replace bedside lamp bulbs with smart bulbs, add a smart plug to your fan or white noise machine, and mount a small smart speaker on the nightstand. For window treatments, look for inside-mount smart blinds that use spring tension or adhesive brackets — these install in minutes and remove cleanly.
Keep a small wireless button or smart switch near the bed so you can trigger your bedtime routine without speaking a voice command (which might wake a partner). These battery-powered buttons use adhesive backing and can be stuck to the nightstand or headboard.
Automation Routines to Set Up
- Bedtime: Turn off all apartment lights except a dim hallway nightlight, lock the smart lock, set the thermostat to your sleep temperature, start white noise, and arm motion sensors. Trigger with a single voice command or bedside button press.
- Sunrise Wake: Gradually brighten bedroom lights from 0% to 50% over 30 minutes before your alarm, shift color temperature from warm to cool, and start a gentle audio alarm through the smart speaker.
- Nap Mode: Close smart blinds, set a 25-minute timer, lower the thermostat by one degree, and start white noise.
- Nightlight: When the motion sensor detects movement between midnight and 5 AM, turn on a very dim warm light at 5% brightness — just enough to navigate to the bathroom without fully waking up.
Design Considerations
The bedroom should feel calm and uncluttered. Avoid devices with bright status LEDs facing the bed — many smart speakers and plugs have LED indicators that can be distracting in a dark room. Look for devices with adjustable or disableable LEDs, or use a small piece of electrical tape as a quick fix. Choose warm-toned smart bulbs (2200K–2700K range) for bedside lamps to maintain a relaxing atmosphere.
The Kitchen: Smart Cooking & Efficiency
The kitchen is a high-activity zone where smart home devices can save time, reduce waste, and make cooking more enjoyable. Even in a small apartment kitchen, a few well-chosen devices can transform your daily meal prep routine.
Kitchen Budget Breakdown
| Category | Starter ($60–$130) | Mid-Range ($150–$350) | Pro ($400–$750) |
|---|---|---|---|
| Smart Display | Compact smart speaker | 10-inch smart display | Premium display with under-cabinet mount |
| Appliances | 2–3 smart plugs | Smart coffee maker + smart plug array | Smart appliances + connected sous vide |
| Lighting | Under-cabinet LED strip (smart plug) | Smart under-cabinet lighting kit | Tunable white under-cabinet + accent lighting |
| Safety | Smart smoke/CO detector | Smart smoke detector + leak sensor | Full safety suite + smart gas shutoff (if permitted) |
Recommended Devices for the Kitchen
A smart display mounted under a cabinet or placed on the counter is arguably the most useful smart device in any kitchen. Use it to follow recipes hands-free, set multiple timers by voice, add items to your grocery list, watch videos while cooking, and video-call family. The kitchen is where voice control truly shines because your hands are often wet, messy, or occupied. Browse our smart display reviews to find the right size for your counter space.
Smart plugs are incredibly versatile in the kitchen. Connect your coffee maker so it starts brewing when your morning alarm goes off. Plug in a slow cooker and turn it on remotely when you're heading home from work. Connect a countertop dishwasher or electric kettle for voice-activated convenience. Just make sure any appliance connected to a smart plug is one that safely operates when power is restored — some appliances require a manual button press to start, which is actually a safety feature.
Under-cabinet lighting is one of the highest-impact upgrades you can make in an apartment kitchen. A smart LED strip mounted under your upper cabinets provides excellent task lighting for food prep and doubles as ambient lighting in the evening. Use adhesive-backed strips that peel off cleanly when you move out.
For safety, a smart smoke and carbon monoxide detector sends alerts to your phone even when you're not home. If your apartment has an older, builder-grade detector, replacing it with a smart model (and keeping the original to reinstall when you move out) is a wise investment. Add a water leak sensor under the sink to catch drips before they become damage — and before you lose your security deposit.
Installation Tips for Renters
Kitchen installations require careful attention to moisture and heat. Keep smart speakers and displays at least three feet from the stove to avoid grease buildup. Use silicone-based adhesive mounts for under-cabinet lighting strips — they hold better in humid environments and still remove cleanly. If your apartment has a range hood with a built-in light, you can often replace the bulb with a smart bulb for integrated control.
For smart plugs in the kitchen, consider models with energy monitoring so you can track how much electricity your countertop appliances use. This data can help identify energy hogs and justify upgrading to more efficient models over time. Our smart plug comparison breaks down which models offer the best energy monitoring features.
Automation Routines to Set Up
- Morning Coffee: Triggered by your wake-up routine, the smart plug turns on your coffee maker at the same time your bedroom lights begin their sunrise sequence.
- Cooking Mode: Brighten under-cabinet lights to 100%, start a smart speaker playlist or podcast, and set the living room lights to a complementary ambient level.
- Dinner Timer Cascade: When you set a cooking timer by voice, the smart display shows a countdown, and when it finishes, a notification is sent to the living room speaker so you can hear it from anywhere in the apartment.
- Kitchen Cleanup: Dim under-cabinet lights to 30% after 9 PM, turn on the dishwasher (if smart-enabled), and set a reminder to take out the trash on collection night.
Design Considerations
Counter space is precious in apartment kitchens. Choose compact devices and mount displays under cabinets when possible to free up workspace. Route cables along the backsplash using paintable adhesive cable channels. Select devices with finishes that match your kitchen hardware — many smart displays now come in stainless steel, matte black, and white options to blend with modern appliance packages.
The Bathroom: Smart Comfort in a Compact Space
Bathrooms are often overlooked in smart home planning, but they offer unique opportunities for automation. From leak prevention to comfort upgrades, a few small additions can make this space significantly more functional.
Bathroom Budget Breakdown
| Category | Starter ($40–$90) | Mid-Range ($100–$250) | Pro ($300–$600) |
|---|---|---|---|
| Lighting | Motion-sensor nightlight | Smart vanity bulbs + motion sensor | Tunable lighting with circadian scheduling |
| Comfort | Smart plug for heated towel rack | Smart plug for heated mat + towel rack | Smart mirror with integrated lighting & defog |
| Safety | Leak sensor under sink | Leak sensors (sink + toilet + shower) | Full leak array + smart water shutoff valve |
| Ventilation | Smart plug for fan | Humidity sensor + smart fan control | Automated ventilation with air quality monitoring |
Recommended Devices for the Bathroom
The single most important smart device for any apartment bathroom is a water leak sensor. Place one under the sink, one near the toilet base, and one near the shower threshold. Water damage is the number one cause of security deposit disputes, and catching a leak early can save you thousands of dollars. Our water leak sensor guide covers the most reliable models with instant phone notifications.
A motion-sensor nightlight is a simple, affordable upgrade that makes midnight bathroom trips safer and less disruptive. Choose a model with a warm, dim glow that won't fully wake you. Battery-powered options require no wiring and can be stuck to the baseboard with adhesive.
If your bathroom has an exhaust fan on a standard switch, a smart plug (if the fan plugs into an outlet) or a humidity sensor paired with your smart home system can automate ventilation. Run the fan for 20 minutes after a shower is detected (via humidity spike) to prevent mold and mildew — a common problem in apartments with poor ventilation.
For a luxury touch, a smart plug connected to a heated towel rack means warm towels every morning. Schedule it to turn on 30 minutes before your usual shower time and off an hour later. It uses minimal electricity but feels incredibly indulgent.
Installation Tips for Renters
Bathrooms are humid environments, so choose devices rated for moisture exposure. Battery-powered sensors are preferable to wired options since they avoid electrical work entirely. Use waterproof adhesive mounts for any device near the shower or sink. Never install smart devices inside the shower enclosure or anywhere they could be directly splashed unless they carry an appropriate IP rating.
If your bathroom light fixture uses standard bulbs, swapping in a smart bulb gives you motion-activated lighting, dimming, and scheduling without touching the electrical wiring. Just make sure the smart bulb is rated for enclosed fixtures if your bathroom uses a globe-style cover.
Automation Routines to Set Up
- Morning Prep: Turn on vanity lights to 80% cool white at your wake time, start the heated towel rack, and begin the exhaust fan if humidity is above 60%.
- Post-Shower Ventilation: When the humidity sensor detects a spike above 70%, automatically run the exhaust fan for 25 minutes, then shut it off.
- Nightlight Mode: Between 10 PM and 6 AM, the motion sensor triggers a dim warm light at 5% brightness — enough to see but not enough to disrupt sleep.
- Leak Alert: If any leak sensor detects moisture, immediately send a high-priority notification to your phone and announce it through your smart speaker if you're home.
The Entryway & Hallway: Security & First Impressions
Your apartment's entryway serves two critical functions: it's your first line of security and the transition zone between the outside world and your personal space. Smart devices here should focus on access control, package monitoring, and creating a welcoming arrival experience.
Entryway Budget Breakdown
| Category | Starter ($60–$140) | Mid-Range ($150–$350) | Pro ($400–$700) |
|---|---|---|---|
| Security | Door/window sensor | Smart lock (if permitted) + door sensor | Smart lock + video doorbell + indoor camera |
| Lighting | Smart bulb in entry fixture | Motion-activated smart lighting | Tunable entry lighting + accent fixtures |
| Convenience | Smart plug for entryway lamp | Smart lock + key hook sensor | Full arrival automation suite |
Recommended Devices for the Entryway
A door/window contact sensor is the most affordable security upgrade you can make. Stick one on your front door and receive an instant alert whenever it opens — whether you're home or away. These sensors are battery-powered, use adhesive backing, and take less than two minutes to install. They also enable powerful automations like turning on lights when you arrive home or triggering an alarm routine when the door opens while you're away.
If your lease allows it, a smart lock replaces your existing deadbolt and lets you lock/unlock from your phone, grant temporary access codes to guests or dog walkers, and automatically lock behind you when you leave. Before purchasing, confirm with your landlord — many are open to smart locks since they actually improve property security, but you should always get written permission. Keep the original lock stored safely so you can reinstall it when you move out. Read our smart lock buyer's guide for renter-friendly options.
For apartments where a smart lock isn't permitted, a video doorbell is the next best security upgrade. Many models are battery-powered and mount with adhesive or a single screw into the door frame. You'll see who's at the door, receive package delivery alerts, and get recordings of any activity. Check your building's policies first — some apartment complexes have rules about exterior-facing cameras.
Motion-activated lighting in the entryway means you never fumble for a light switch with your hands full of groceries. A smart bulb paired with a door sensor creates an instant "lights on when you walk in" experience that feels luxurious every single time.
Installation Tips for Renters
Entryway installations need to be clean and reversible. Door sensors use 3M adhesive strips that remove without residue. If you install a smart lock, photograph the original lock configuration before removing it so you can reinstall it exactly as it was. For video doorbells, look for no-drill mounting plates that attach to the door frame with heavy-duty adhesive.
If your apartment has a shared hallway, be respectful of neighbors when placing cameras or bright smart lights. Aim cameras at your own door only, and set entryway lights to a brightness level that doesn't spill into the common area.
Automation Routines to Set Up
- Arrival: When the door sensor triggers (or your phone enters the geofence), turn on entryway lights, adjust the thermostat to your home temperature, and start a welcome playlist if it's after 5 PM.
- Departure: When you lock the smart lock (or press a departure button), turn off all lights, set the thermostat to eco mode, arm security sensors, and start a robot vacuum cycle.
- Package Alert: When the video doorbell detects a person lingering at your door for more than 15 seconds, send a notification with a live video feed to your phone.
- Guest Access: Generate a temporary door code valid for a specific time window, and receive a notification when it's used and when the guest leaves.
Whole-Apartment Automation: Tying It All Together
Once you've set up individual rooms, the real magic happens when you connect everything into unified routines that span your entire apartment. This is where a smart home transitions from a collection of gadgets into a truly integrated system.
Choosing a Hub or Ecosystem
For apartment dwellers, we recommend choosing a single ecosystem as your primary platform — whether that's a voice assistant, a dedicated smart home hub, or a phone-based platform. Consistency matters more than having the absolute best device in every category. When all your devices speak the same language, automations become simpler, reliability improves, and troubleshooting is far less frustrating.
Our ecosystem comparison guide breaks down the pros and cons of each major platform to help you decide. The most important factor is choosing devices that are compatible with your chosen ecosystem before you buy them.
Essential Whole-Apartment Routines
- Good Morning: Bedroom lights simulate sunrise, coffee maker starts, bathroom heated towel rack turns on, thermostat adjusts to daytime temperature, and the smart speaker reads your daily briefing.
- Leaving Home: All lights turn off, thermostat drops to eco mode, smart lock engages, security sensors arm, robot vacuum starts, and you receive a confirmation notification.
- Coming Home: Entryway and hallway lights turn on, thermostat returns to comfort setting, security sensors disarm, and your favorite playlist starts in the living room.
- Good Night: All lights turn off except bathroom nightlight, doors lock, thermostat drops to sleep temperature, bedroom white noise starts, and you receive a "all secure" confirmation.
- Vacation Mode: Randomize lights across multiple rooms on varying schedules, maintain eco temperature, increase security sensor sensitivity, and send daily status summaries to your phone.
Network Considerations for Apartments
A reliable Wi-Fi network is the backbone of any smart home. Most apartments can be served by a single high-quality router, but the number of connected devices adds up quickly. A typical smart apartment might have 20–40 connected devices between bulbs, plugs, sensors, speakers, and appliances.
If you notice devices dropping offline or responding slowly, consider upgrading to a router that supports more simultaneous connections. Some ISPs provide routers that handle fewer than 20 devices well. A mesh system is usually overkill for apartments under 1,200 square feet, but a quality standalone router with good device management makes a significant difference. For a deep dive into networking, read our network setup guide.
Renter-Specific Tips: Protecting Your Deposit & Staying Lease-Compliant
Being a renter doesn't limit your smart home ambitions as much as you might think, but it does require some strategic thinking. Here are the key principles to follow:
The "Reversibility Rule"
Every modification you make should be fully reversible. Before installing anything, ask yourself: "Can I restore this to its original state in under 30 minutes with basic tools?" If the answer is yes, you're probably fine. If it requires patching drywall, rewiring electrical, or modifying plumbing, get written landlord approval first or find an alternative approach.
Keep All Original Parts
When you replace a light switch, lock, or thermostat, store the original part in a labeled bag or box. When you move out, reinstall the originals and take your smart devices with you. This protects your security deposit and means your smart home investment travels with you to your next apartment.
Document Everything
Take photos before and after every installation. This protects you if a landlord claims you caused damage that was actually pre-existing. It also helps you remember exactly how things were configured when it's time to reverse the installation.
Communicate With Your Landlord
Many landlords are receptive to smart home upgrades — especially security devices like smart locks and leak detectors — because they protect the property. Frame your request in terms of benefits to the building: "I'd like to install a smart leak detector under the sink to catch any water issues early, and a smart lock so I never accidentally leave the door unlocked." You might be surprised how often the answer is yes.
Adhesive Is Your Best Friend
Modern smart home accessories are designed with renters in mind. Command strips, 3M adhesive mounts, tension rods, and magnetic mounts can secure sensors, cameras, light strips, and even small shelves without a single nail. Always test adhesive products on an inconspicuous area first, and follow the manufacturer's removal instructions (usually involving heat from a hair dryer) to avoid paint damage.
Frequently Asked Questions
Can I install smart home devices in a rental apartment without my landlord's permission?
Most smart home devices — including smart bulbs, smart plugs, sensors, battery-powered cameras, and smart speakers — require no permanent installation and don't need landlord approval. They plug into existing outlets, screw into existing light fixtures, or attach with removable adhesive. However, devices that replace existing fixtures (smart locks, hardwired thermostats, wired doorbells) technically modify the property and should be discussed with your landlord first. Always check your lease agreement for specific clauses about modifications, and when in doubt, ask. Many landlords appreciate upgrades that improve security or prevent water damage.
How many smart devices can my apartment Wi-Fi handle?
Most modern routers provided by ISPs can handle 25–40 connected devices simultaneously, which is sufficient for a typical smart apartment. If you plan to install more than 30 devices (including phones, laptops, and streaming devices), consider upgrading to a router rated for higher device counts. Smart bulbs and sensors that use Zigbee or Z-Wave protocols connect through a hub rather than directly to Wi-Fi, which reduces the load on your router. This is one reason many enthusiasts prefer hub-based ecosystems for larger setups — the hub manages its own mesh network of low-power devices while only using a single Wi-Fi connection back to your router.
What's the best smart home ecosystem for apartment living?
The best ecosystem depends on your existing devices and preferences. If you use an iPhone and value privacy, a major phone-based platform offers tight integration and strong data protections. If you want the widest device compatibility and the most voice assistant features, the leading voice-first ecosystems have the largest libraries of compatible products. For apartment dwellers specifically, we recommend choosing the ecosystem that matches the devices you already own — your phone, laptop, and streaming services — rather than switching everything at once. Start with one ecosystem, build confidence, and expand gradually. Our ecosystem guide provides a detailed comparison to help you decide.
Will smart home devices work when my internet goes down?
Most cloud-dependent smart devices lose remote access and voice control when your internet goes down, but many retain local functionality. Smart bulbs will still respond to physical light switches, smart plugs will continue supplying power, and hub-based systems with local processing can often maintain scheduled automations without internet. To maximize offline reliability, choose devices that support local processing through a hub rather than relying entirely on cloud servers. Additionally, keeping a few manual controls (physical switches, manual lock keys) ensures you're never completely locked out of basic functions during an outage.
How much does a full smart apartment setup cost?
A basic smart apartment setup covering essential devices across all rooms typically costs between $400 and $800. This includes smart bulbs in key fixtures, a smart speaker, a few smart plugs, door and window sensors, a leak sensor, and a smart nightlight. A mid-range setup with better integration, more rooms covered, and premium devices runs between $1,000 and $2,500. A full Pro-tier apartment with motorized shades, smart locks, video doorbells, whole-apartment audio, and advanced climate control can reach $4,000 to $7,000. The beauty of smart home technology is that you can start at any budget and add devices incrementally — there's no need to invest everything at once. Begin with the room you use most and expand from there.
Final Thoughts: Start Small, Scale Smart
Building a smart apartment is a journey, not a one-time purchase. The most successful setups start with a few carefully chosen devices, grow through experimentation, and eventually become a seamless part of daily life that you can't imagine living without.
Begin with the living room or bedroom — wherever you spend the most time — and choose two or three devices from the Starter tier. Live with them for a few weeks, discover which automations you actually use, and then expand to the next room. This approach prevents overwhelm, spreads costs over time, and ensures every device you buy earns its place in your home.
Remember that the best smart home is one that works reliably, respects your privacy, and genuinely makes your life easier. Technology should serve your routines, not the other way around. Start simple, iterate often, and enjoy the process of building a home that responds to you.
Ready to start shopping? Browse our complete device directory, read our in-depth reviews, or explore our setup guides for specific product categories. Your smart apartment journey starts with a single smart plug — and it only gets better from there.