The Ultimate Smart Home Recording Studio: Soundproofing, Climate Control & Equipment Integration
Building a recording studio in a smart home environment requires balancing two fundamentally opposed concepts: acoustic isolation and wireless connectivity. A traditional studio is essentially a sealed vault, heavily insulated, decoupled, and treated to keep outside noise out and internal sound pristine. A smart home, conversely, relies on a web of radio frequencies, automated sensors, and climate systems to maintain comfort and convenience. Merging these two worlds into a cohesive smart home recording studio requires careful planning, specialized gear, and a deep understanding of both acoustic physics and network topology.
In this comprehensive room-by-room guide, we will explore how to design, build, and automate a recording space that serves musicians, podcasters, and voice-over artists. From managing the noise floor of your HVAC system to automating your lighting and power sequences via MIDI, this guide covers everything you need to create a professional-grade creative sanctuary. For more general advice on setting up your workspace, check out our smart home office setup guide.
Budget Tiers: Starter, Mid, & Pro Studio Setups
Before diving into the technical specifics of acoustics and automation, it is essential to establish a budget framework. A smart studio can be scaled to fit a bedroom producer's corner or a commercial facility. Here is how the technology stacks up across three distinct budget tiers.
Starter Tier: The Bedroom Producer
The starter tier focuses on maximizing a multi-purpose room without permanent structural changes. The goal here is to introduce smart convenience while maintaining a low noise floor for vocal and acoustic recordings.
- Climate: Use a smart IR blaster to control a standalone, ultra-quiet mini-split AC unit or a smart window AC. Pair this with a basic smart plug connected to a quiet desktop air purifier to manage dust.
- Lighting: Smart LED strips behind the desk and monitor to reduce eye strain during late-night mixing sessions, controlled via voice or smartphone.
- Power: A high-quality surge protector paired with a smart switch to hard-cut power to studio monitors and audio interfaces when not in use, preventing idle power draw and protecting against surges.
- Acoustics: Heavy, manually drawn velvet curtains and strategically placed foam or fiberglass absorption panels.
Mid Tier: The Dedicated Project Studio
The mid tier is for the dedicated creator who has a spare room or converted garage. This setup introduces integrated smart home ecosystems and advanced environmental controls.
- Climate: A premium smart thermostat with remote room sensors to monitor temperature and humidity, ensuring wood instruments remain stable. Integration with a smart humidifier/dehumidifier combo.
- Lighting: High-CRI (Color Rendering Index) smart bulbs in overhead fixtures for accurate video recording, paired with motorized smart blackout shades to eliminate screen glare and external light leaks.
- Power: A rack-mounted smart PDU (Power Distribution Unit) that allows for sequential power-up of audio gear to prevent speaker pops and manage ground loops.
- Acoustics: Motorized acoustic curtains and smart window inserts that seal automatically when the 'Recording' scene is triggered.
Pro Tier: The Commercial Smart Studio
The pro tier spares no expense, integrating architectural acoustics with enterprise-level smart building management systems.
- Climate: A dedicated, baffled HVAC system with smart dampers that automatically seal the studio vents when the microphones are armed, completely eliminating duct-borne noise.
- Lighting: DMX-controlled studio lighting bridged to the smart home hub, allowing for complex, time-coded lighting scenes that sync with video playback.
- Power: Double-conversion online UPS systems with network management cards, integrated into the smart home dashboard to alert the engineer of power anomalies or battery degradation.
- Acoustics: Motorized acoustic diffusers that physically alter the room's reverberation time (RT60) on the fly, controlled via a tablet or MIDI surface.
Acoustic Treatment & Smart Soundproofing Solutions
It is crucial to understand the difference between soundproofing (blocking sound from entering or leaving the room) and acoustic treatment (managing how sound behaves inside the room). Smart home technology cannot replace the laws of physics regarding mass and decoupling, but it can significantly enhance your acoustic environment through automation and motorized treatments.
Smart Soundproofing & Isolation
True soundproofing requires structural changes: floating floors, decoupled walls, and mass-loaded vinyl (MLV). However, weak points in any studio are typically the doors and windows. Modern smart home tech offers innovative solutions here.
- Motorized Acoustic Curtains: Heavy velvet or fiberglass curtains are excellent for absorbing high frequencies and dampening low-end flutter. By mounting these on smart motorized tracks, you can program them to close automatically when your 'Recording' automation routine triggers, instantly darkening the room and adding a layer of mass to the windows.
- Smart Door Seals: While automatic door bottoms (drop seals) are traditionally mechanical, high-end studios utilize pneumatic or motorized door seals that engage when the studio's smart occupancy sensor detects a session has begun, ensuring an airtight acoustic seal.
- Active Noise Cancellation (ANC) Concepts: While whole-room ANC is still in its infancy, smart isolation booths equipped with internal ANC emitters are becoming popular for voice-over work, allowing creators to record pristine audio even in noisy smart homes.
Dynamic Acoustic Treatment
A room that sounds great for tracking a vocal might sound too 'dead' for mixing or recording an acoustic guitar. This is where dynamic acoustic treatment comes into play.
- Motorized Diffusers: Some high-end studios install motorized wooden diffusers on the rear wall. Using a smart home hub, you can rotate these panels to expose either a flat, absorptive surface or a highly diffusive surface, changing the room's decay time with the press of a button.
- Variable Bass Traps: Advanced membrane traps can be adjusted via motorized tensioners to target specific low-frequency room modes, allowing the engineer to tune the room's low-end response based on the genre of music being mixed.
Climate Control & Air Quality for Gear & Comfort
Climate control in a recording studio is arguably the most challenging aspect of smart home integration. The primary enemy of audio recording is the noise floor, and standard HVAC systems are incredibly loud. Furthermore, expensive analog gear, vintage synthesizers, and acoustic instruments are highly sensitive to temperature fluctuations and humidity. For a deep dive into selecting the right thermostat, read our smart thermostat buying guide.
Managing the HVAC Noise Floor
Every room has a Noise Criteria (NC) rating. A professional studio control room should aim for an NC-15 or NC-20 rating, which is virtually silent. Standard forced-air systems easily push NC-35 or higher, which will be picked up by sensitive condenser microphones.
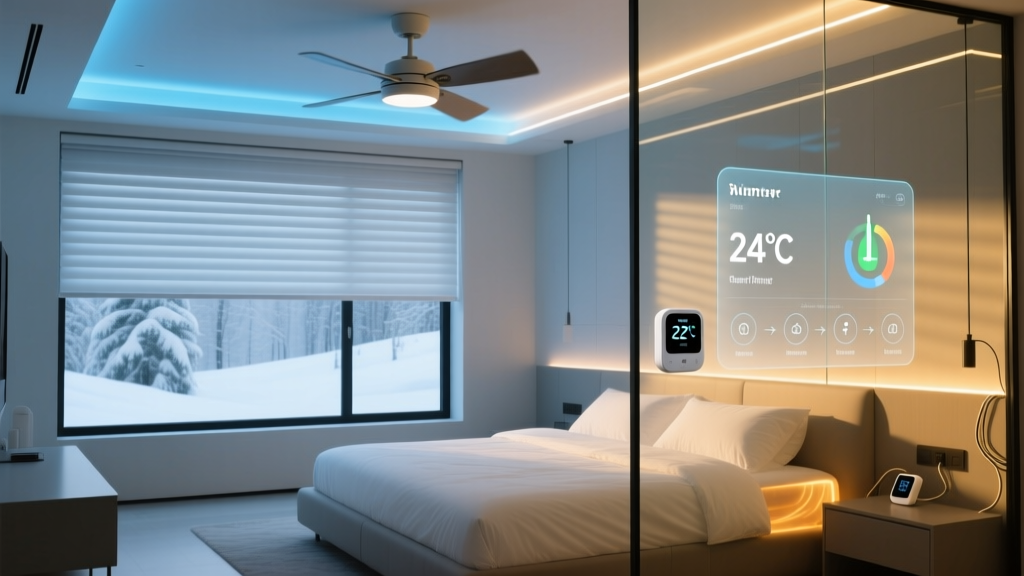
- The Pre-Cool/Pre-Heat Routine: The most effective smart home strategy for studios is the 'Pre-Conditioning' routine. Using a smart thermostat like the Ecobee (check out our Ecobee smart thermostat review), you can set a schedule that aggressively cools or heats the room 30 minutes before your typical studio session. Once the session begins, the automation triggers the HVAC blower to turn off completely, leaving you in a perfectly climate-controlled, silent room for the duration of the take.
- Smart Dampers & Baffles: If you have a multi-zone smart HVAC system, you can install smart dampers in the ductwork leading to the studio. When the 'Recording' scene is activated, the damper closes, stopping airflow noise. To prevent pressure buildup in the ducts, the system must be designed with a bypass damper or variable-speed blower motor.
- Mini-Split Integration: Ductless mini-splits are the gold standard for studios due to their quiet operation. While many lack native Wi-Fi, using a smart IR blaster or a dedicated smart mini-split controller allows you to integrate the unit into your broader smart home ecosystem, scheduling it to run on its quietest fan speed during sessions.
Humidity & Air Quality
Acoustic guitars, grand pianos, and vintage drum shells require a stable relative humidity (RH) level, typically between 40% and 50%. Fluctuations cause wood to swell, crack, or warp, ruining intonation and tone.
- Smart Humidistats: Pair a smart plug with a high-capacity humidifier and dehumidifier. Using a standalone Zigbee or Z-Wave humidity sensor placed near your instrument collection, you can create an automation that toggles the appropriate device to maintain a strict 45% RH.
- Smart Air Purifiers: Analog synthesizers, tube amplifiers, and studio PCs generate static charge and heat, which attracts dust. Dust buildup on potentiometers causes scratching sounds, and dust in PC fans increases noise. A smart air purifier with a laser particulate sensor will automatically ramp up its fan speed when the studio door opens and closes, scrubbing the air before settling back to a silent, low-fan mode during recording.
Smart Lighting & Power Management for Studios
Lighting sets the mood for creativity and is essential if your studio doubles as a streaming or podcasting space. Power management, on the other hand, is critical for protecting your investment and ensuring a clean audio signal. For more on illuminating your creative space, see our smart lighting for creators guide.
Lighting for Audio & Video
When recording video for YouTube, social media, or remote session collaboration, the quality of your light is just as important as the quality of your audio.
- High CRI Smart Bulbs: Standard smart bulbs often have a low Color Rendering Index (CRI), making skin tones look sickly on camera. Invest in high-CRI smart bulbs (95+ CRI) that allow you to adjust both color temperature (from warm 2700K to daylight 5600K) and intensity. Brands like Philips Hue offer excellent ecosystem integration; read our Philips Hue review for more details.
- Glare Reduction: Studio monitors and computer screens reflect easily. Motorized smart blackout shades are essential to block out inconsistent natural sunlight, allowing you to maintain a controlled, consistent lighting environment that won't cause visual fatigue during 10-hour mixing sessions.
- Mood & Focus Scenes: Use smart LED strips behind your acoustic panels and desk to create bias lighting. This reduces eye strain. Create distinct scenes: a warm, dim 'Songwriting' scene, a bright, neutral 'Mixing' scene, and a dynamic, colorful 'Streaming' scene.
Power Management & The Ground Loop Nightmare
Audio equipment is incredibly sensitive to electrical noise. A common mistake in smart home studios is using cheap smart plugs to control studio monitors or audio interfaces. Many smart plugs use internal switching relays or triacs that introduce Electromagnetic Interference (EMI) directly into the power line, resulting in a high-pitched whine or buzz in your speakers.
- Isolated Smart Relays: If you must use smart switches for hardwired studio lighting, ensure they are audiophile-grade or use isolated relays that do not bleed noise into the circuit.
- Smart PDUs (Power Distribution Units): For rack-mounted gear, a networked PDU is vastly superior to standard smart plugs. PDUs offer sequential power-up (turning on the interface before the monitors to prevent loud pops), individual outlet metering, and clean power filtering.
- UPS Network Integration: A Uninterruptible Power Supply (UPS) is mandatory for protecting your DAW (Digital Audio Workstation) and external hard drives. High-end UPS units feature network management cards. By integrating your UPS via SNMP or API into your smart home hub, you can trigger an automated 'Safe Shutdown' routine for your studio PC and NAS (Network Attached Storage) if the battery drops below 20% during a storm.
Automation Routines: Streamlining Your Recording Workflow
The true magic of a smart home recording studio lies in automation. By bridging your musical equipment with your smart home hub, you can eliminate the friction between having an idea and capturing it. For advanced logic setups, explore our Home Assistant automation guide.
The MIDI-to-Smart-Home Bridge
Musicians already live in a world of MIDI (Musical Instrument Digital Interface). By using a MIDI-to-OSC (Open Sound Control) bridge or a simple webhook script on a local computer, you can map physical buttons on a MIDI controller (like an Elgato Stream Deck, Novation Launchpad, or even a spare keyboard) to trigger smart home API calls.
Essential Studio Automation Scenes
- The 'Tracking' Scene: Triggered by a single button press on your desk. The smart thermostat turns off the HVAC blower. Motorized blackout shades close. Overhead lights dim to 20% to reduce visual distraction. Bias lighting turns on. Your audio interface powers up, and your DAW launches on your PC. The room is instantly prepped for a silent, focused vocal take.
- The 'Mixing' Scene: The HVAC blower is allowed to run on its lowest, quietest setting to maintain comfort during long sessions. Overhead lights shift to a neutral 5000K daylight temperature at 80% brightness to ensure accurate visual perception of the DAW interface. Air purifiers switch to auto-mode.
- The 'Streaming / Podcast' Scene: Key lights and rim lights power on to their pre-calibrated brightness and color temperature. The 'On Air' smart sign outside the studio door illuminates red to warn family members or roommates not to enter. The HVAC shuts off, and the smart door lock engages to prevent accidental interruptions.
- The 'Studio Shutdown' Scene: Triggered via voice command or a smart button by the door. All studio monitors, amplifiers, and outboard gear are powered down sequentially via the smart PDU. The HVAC returns to its normal eco-schedule. The 'On Air' sign turns off, and the room's occupancy sensor takes over to ensure no lights are left burning.
Frequently Asked Questions
How do I stop smart home devices from causing audio interference?
Wireless protocols like Zigbee, Z-Wave, and Wi-Fi operate on radio frequencies that can occasionally interfere with wireless microphones, in-ear monitors, or unbalanced audio cables. To prevent this, keep your smart home hub and major wireless routers at least six feet away from your audio interface and microphone receivers. Additionally, use balanced XLR or TRS cables for all your audio connections, as balanced lines are inherently designed to reject electromagnetic and radio frequency interference (RFI). If you use 2.4GHz wireless guitar systems or mics, consider shifting your smart home devices to the Z-Wave protocol (which operates around 908 MHz in the US) to keep the 2.4GHz spectrum clear for your audio gear.
Can smart thermostats be completely silent during recording?
The smart thermostat itself is silent, but the HVAC equipment it controls is not. Forced-air systems generate significant broadband noise. The best approach is not to rely on the HVAC during a take, but to use the smart thermostat to 'pre-condition' the room. By dropping the temperature to 68°F (20°C) right before you hit record, and then automating the system to shut the blower off completely while the microphones are hot, you achieve a silent noise floor without sacrificing comfort. For longer sessions, a ductless mini-split controlled by a smart IR blaster on its lowest 'sleep' fan setting is the quietest active cooling option available.
What is the best humidity level for a smart recording studio?
The ideal relative humidity (RH) for a recording studio housing acoustic instruments, vintage amplifiers, and analog tape machines is between 40% and 50%, with 45% being the sweet spot. Wood instruments like acoustic guitars, cellos, and pianos can suffer from cracked tops or sharp fret ends if the humidity drops below 35%. Conversely, humidity above 60% can cause wood to swell, leading to sluggish piano actions and a dull, lifeless tone in acoustic guitars, while also risking corrosion on the solder joints and potentiometers of vintage analog synthesizers. Use a smart humidity sensor paired with a smart plug-controlled humidifier to maintain this strict range year-round.
How do I integrate my DAW with my smart home hub?
Direct integration between a DAW (like Pro Tools, Logic, or Ableton) and a smart home hub (like Home Assistant or Hubitat) is not natively supported. However, you can bridge the gap using MIDI and Webhooks. By assigning a specific MIDI note or Control Change (CC) message to a button on your MIDI controller, you can use a background script (like Bome Network, OSCulator, or a simple Python script) to translate that MIDI message into an HTTP POST request (Webhook). Your smart home hub listens for this Webhook and triggers the corresponding automation scene, such as turning off the lights or shutting the HVAC blower, all without ever leaving your DAW environment.
Are smart power strips safe for expensive studio monitors?
Cheap, consumer-grade smart power strips can be detrimental to expensive studio monitors. Many inexpensive smart plugs use solid-state relays or triacs to switch power, which can introduce high-frequency switching noise directly into the power line. This noise can manifest as a faint hiss or whine through the tweeters of your studio monitors. Furthermore, cutting power abruptly to active studio monitors can sometimes cause damaging 'pops' if the internal amplification circuitry does not have adequate protection. For studio monitors, it is highly recommended to use an audiophile-grade power conditioner with a mechanical smart relay, or to leave the monitors powered on and control them via their physical front-panel switches, using smart home automation only for the room's lighting and climate.