The Ultimate Guide to Photogenic Smart Home Rooms: Design, Setup & Photography
The modern smart home is no longer just about convenience and automation; it is about creating a visually stunning environment that looks as good in person as it does in photographs. Whether you are preparing your home for a real estate listing, building a portfolio for your interior design business, or simply want to capture stunning smart homes rooms photos for social media, the intersection of technology and aesthetics is crucial. Clunky gadgets, visible wires, and harsh LED glows can ruin an otherwise beautiful room. Conversely, thoughtfully integrated smart tech can elevate a space, providing dynamic lighting, hidden entertainment, and automated ambiance that translates beautifully through a camera lens.
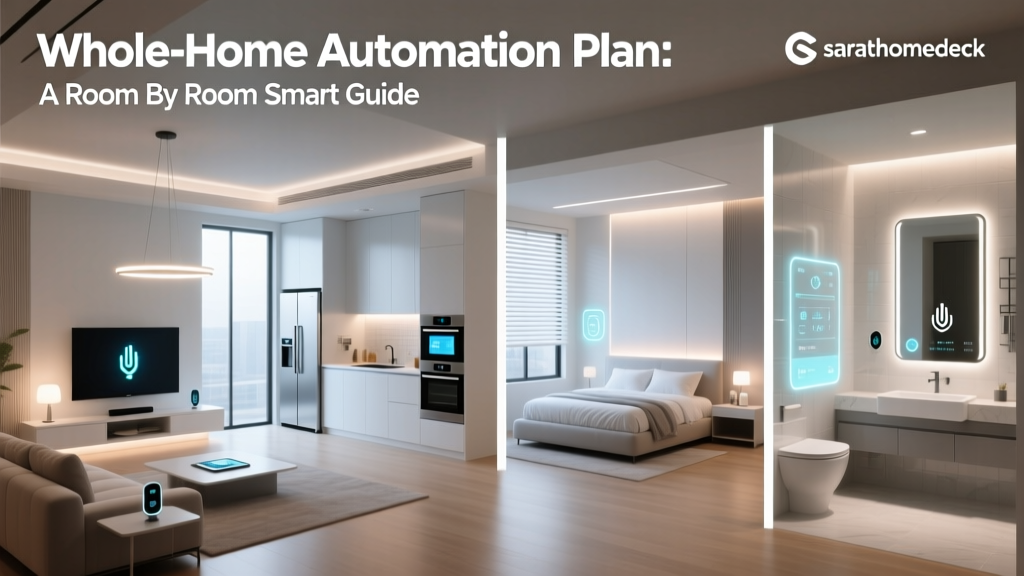
In this comprehensive guide, we will explore how to design, automate, and photograph every room in your smart home. We will cover recommended devices, installation tips for hiding the tech, automation routines that create the perfect mood, and professional photography techniques to ensure your smart home looks flawless in every shot. For more foundational knowledge, be sure to check out our guide to hiding smart home wires and our smart lighting design hub.
Budget Tiers for Aesthetic Smart Setups
Creating a photogenic smart home does not necessarily require a complete gut renovation. You can achieve stunning visual results across various budget levels by prioritizing the right devices and installation techniques.
Starter Tier: The Visual Basics
Budget Focus: Plug-and-play devices, smart bulbs, and basic cable management.
- Devices: Smart plugs for lamps, color-tunable smart bulbs in accent fixtures, and entry-level smart displays.
- Design Tip: Avoid placing smart bulbs in fixtures where the bulb is fully visible, as the plastic heat-sink base can look cheap in photos. Instead, use them in shaded lamps or recessed cans.
- Photo Tip: Use smart plugs to turn on all accent lamps simultaneously before a photoshoot, ensuring consistent, warm ambient lighting without the harshness of overhead fixtures.
Mid Tier: Integrated Elegance
Budget Focus: In-wall smart switches, motorized blinds, and hidden audio.
- Devices: Smart switches (like those featured in our smart switch reviews), automated roller shades, and architectural soundbars.
- Design Tip: Swap out smart bulbs for smart switches. This allows you to use high-end, designer light fixtures with traditional, aesthetically pleasing Edison or filament bulbs while retaining smart control.
- Photo Tip: Motorized blinds are a photographer’s best friend. You can set them to exactly 50% open to diffuse harsh midday sunlight, creating soft, even exposure across the room.
Pro Tier: Invisible Technology
Budget Focus: Custom AV, architectural lighting, invisible speakers, and automated cabinetry.
- Devices: Plaster-in invisible speakers, circadian rhythm lighting systems, smart privacy glass, and motorized art lifts.
- Design Tip: Technology should be felt, not seen. Use custom millwork to hide routers, hubs, and amplifiers in ventilated closets, utilizing RF repeaters to maintain control without visible sensors.
- Photo Tip: Pro-tier lighting systems allow you to adjust the color temperature (Kelvin) of every light in the room to perfectly match the camera’s custom white balance, eliminating the need for post-processing color correction.
The Living Room: Crafting the Ultimate Showcase
The living room is the centerpiece of any home and the most common subject of smart homes rooms photos. It is where entertainment, relaxation, and socializing converge, making it the perfect space to showcase high-end automation and design.
Recommended Devices
The focal point of the modern living room is the television. However, a massive black rectangle can dominate a room and ruin the aesthetic of a beautifully designed space. Opt for a lifestyle TV that doubles as digital art when turned off. Pair this with a flush-mount soundbar or in-wall architectural speakers to eliminate floor-standing audio equipment. For lighting, utilize smart track lighting or recessed smart downlights to highlight artwork and architectural features.
Installation Tips
Cable management is paramount. Use an in-wall recessed media box behind the TV to hide power strips and HDMI cables. If you are mounting a soundbar, choose a model that can be recessed into the wall or mounted flush beneath the TV using a custom bracket. For a cleaner look, route all speaker wire behind the drywall and use paintable magnetic grilles for in-ceiling speakers.
Automation Routines
Create an “Entertain” scene that dims the overhead lights to 30%, turns on warm accent lamps, lowers the motorized blinds to prevent window glare, and starts a curated ambient playlist. For a “Movie” scene, program the lights to fade out slowly over ten seconds as the TV turns on, and activate LED bias lighting behind the TV to reduce eye strain and add a cinematic glow that looks incredible in photographs.
Design & Photography Tips
Photographing a living room with a TV can be challenging due to screen glare and refresh rate flickering. To capture a stunning shot with the TV displaying art, use a tripod and a slower shutter speed (around 1/30th or 1/60th of a second) to sync with the screen’s refresh rate and avoid banding. Use a circular polarizing filter on your lens to cut reflections from the TV glass and glossy coffee tables. Frame the shot from a corner to capture the depth of the room, ensuring the smart lighting creates a gradient of warmth from the foreground to the background.
The Kitchen: Blending Tech with Culinary Design
The kitchen is a high-traffic area where functionality meets design. Smart homes rooms photos of kitchens perform exceptionally well online because buyers and designers love seeing how technology can streamline cooking without compromising the room’s aesthetic.
Recommended Devices
Focus on tech that integrates seamlessly into the cabinetry and countertops. Under-cabinet smart LED strips are essential for both task lighting and ambiance. Consider a smart display mounted flush under the cabinets or hidden inside a pop-up countertop dock. Smart faucets with motion sensors and voice-activated temperature control add a touch of modern luxury. For appliances, smart ovens and refrigerators with sleek, matte-finish touch panels blend better with modern cabinetry than bulky stainless steel screens.
Installation Tips
Hide the power supplies for under-cabinet lighting inside the upper cabinets, routing the low-voltage wires through the cabinet bottoms so they are completely invisible. If installing a smart display, use an under-mount bracket that allows the screen to fold flat against the cabinet when not in use. Install wireless charging pads flush into the stone or quartz countertops to eliminate the need for visible charging cables on the island.
Automation Routines
A “Morning Coffee” routine is a great visual and functional tool. Program the under-cabinet lights to fade up to a warm 2700K at 6:00 AM, trigger the smart coffee maker, and open the kitchen blinds just enough to let in the morning sunrise. For a “Cooking” scene, set the overhead lights to a crisp 4000K for optimal visibility, and turn on the smart range hood automatically when the smart induction cooktop is activated.
Design & Photography Tips
Kitchens are full of reflective surfaces—stainless steel, glass, and polished stone. When taking photos, turn off the overhead flash and rely entirely on your smart lighting setup. Use the under-cabinet lights to fill in the shadows on the countertops, which prevents the camera’s dynamic range from crushing the blacks in the lower cabinets. If your smart oven has a glowing digital clock or screen, turn it off or cover it with a piece of gaffer tape during the shoot to prevent a harsh, distracting blue light leak in your final image.
The Bedroom: Designing a Serene, Camera-Ready Retreat
The bedroom should be a sanctuary, free from the visual clutter of blinking LEDs and tangled wires. The best smart homes rooms photos of bedrooms emphasize tranquility, soft textures, and perfect lighting control.
Recommended Devices
Motorized drapery tracks and smart roller shades are the stars of the smart bedroom. For lighting, focus on circadian rhythm smart bulbs in bedside lamps and hidden LED strip lighting behind the headboard or under the bed frame. Smart sleep trackers that sit under the mattress are preferable to wearable devices or bulky bedside monitors. Choose a smart alarm clock that uses gentle light simulation rather than harsh digital numbers.
Installation Tips
Hide motorized blind tubes inside custom window valances or recessed ceiling pockets. This ensures the hardware is completely invisible, leaving only the beautiful fabric in the frame. For under-bed lighting, use a diffused aluminum channel to create a smooth, continuous glow rather than a dotted LED effect, which can look cheap and distracting in photos. Route all bedside charging cables through the wall or the legs of the nightstand to keep the surface completely clear.
Automation Routines
The “Wind Down” routine is essential for both living and photographing the space. Program the overhead lights to turn off, the headboard LEDs to shift to a deep, warm amber (2200K), and the smart blinds to close completely. The “Good Morning” routine should slowly open the blinds over 20 minutes while the bedside lamps gradually increase in brightness and shift to a cool, energizing daylight temperature.
Design & Photography Tips
When photographing a bedroom, the goal is to capture a “cozy” atmosphere. Shoot during the blue hour (just after sunset) and turn on your warm interior smart lights. This creates a beautiful contrast between the cool blue twilight outside the window and the warm, inviting glow inside. Ensure all standby LEDs on TVs, air purifiers, or smart speakers are covered or turned off via their companion apps; even a tiny green LED can draw the viewer’s eye and ruin the serene mood of a bedroom photo.
The Bathroom: Creating a Photogenic Spa Experience
Bathrooms are notoriously difficult to photograph due to mirrors, tight spaces, and harsh lighting. However, integrating smart technology can transform the space into a luxurious, spa-like environment that photographs beautifully.
Recommended Devices
A smart mirror with built-in, adjustable LED lighting and an anti-fog heater is the ultimate bathroom upgrade. It provides perfect, shadow-free illumination for both the user and the camera. Smart privacy glass (switchable glass) can instantly transition from clear to frosted, offering a futuristic design element. In-wall waterproof speakers and smart shower systems with programmable temperature and flow presets add to the spa experience without taking up physical space.
Installation Tips
Ensure the smart mirror is recessed or flush-mounted against the tile to avoid bulky frames. Run the wiring for the mirror’s LEDs and anti-fog pad directly behind the drywall, connecting it to a smart switch hidden in a vanity drawer or a discreet wall plate. For in-wall speakers, use acoustic back-boxes to prevent sound from leaking into adjacent rooms and to improve the bass response, which is often lost in tiled bathrooms.
Automation Routines
Create a “Spa Mode” routine that dims the vanity lights to 40%, turns on the under-vanity toe-kick lighting, starts the waterproof in-wall speakers playing ambient nature sounds, and activates the smart shower to pre-heat the water to your exact preferred temperature. A “Ventilation” routine can automatically trigger the smart exhaust fan when the shower is turned on and keep it running for 20 minutes after the water stops to prevent moisture buildup.
Design & Photography Tips
Mirrors are the biggest challenge in bathroom photography because they reflect the photographer, the camera, and any messy clutter outside the frame. Use a smart mirror’s adjustable lighting to balance the exposure of the room. Position your camera at an angle where the mirror reflects a clean, attractive part of the room, like a neatly folded towel or a piece of art. If the smart glass is frosted, use it as a soft, glowing backdrop by placing a smart light behind it, creating a stunning, high-end architectural photo.
The Home Office: The Productivity Studio
With the rise of remote work, the home office has become a critical space. Desk setup photography is a massive trend online, and a well-designed smart office can yield some of the most engaging smart homes rooms photos on the internet.
Recommended Devices
Invest in a smart standing desk with programmable height presets and a built-in cable management tray. Monitor light bars and smart bias lighting (LED strips placed behind the monitors) reduce eye strain and look incredibly sleek on camera. Smart acoustic panels with integrated hidden speakers can improve both the room’s sound profile and its visual texture. A smart air quality monitor that blends into the bookshelf ensures a healthy working environment.
Installation Tips
Cable management is the difference between an amateur desk setup and a professional one. Use under-desk cable raceways, velcro ties, and a centralized power hub mounted to the underside of the desk. Route monitor cables through the grommets or the legs of the smart desk. Mount the smart home hub or docking station under the desk, using a smart plug to control the power to all desk peripherals with a single voice command or automation trigger.
Automation Routines
A “Deep Focus” routine should turn off all notifications on your smart displays, set the overhead lights to a bright, cool 5000K to promote concentration, and lower the blinds to eliminate screen glare. A “Video Call” routine is perfect for professionals; it adjusts the smart bias lighting behind the monitor to a soft 4000K, turns on a dedicated ring light or smart key light, and ensures the background smart blinds are closed to protect privacy and optimize camera exposure.
Design & Photography Tips
When photographing a desk setup, use a wide-angle lens to capture the entire workspace, but be mindful of distortion at the edges. Turn on the monitor bias lighting to separate the dark screens from the wall behind them, adding depth to the image. Use the smart lights to create a subtle color gradient in the background (e.g., a soft blue or purple wash on the wall behind the desk) to give the photo a modern, tech-forward aesthetic. Ensure the desk surface is completely clear of wires, using the smart desk’s wireless charging pad to power your phone seamlessly.
Frequently Asked Questions
How do I hide wires for a clean smart home photo?
Hiding wires is essential for achieving that high-end, photogenic look. Start by using in-wall cable management kits for wall-mounted TVs and mirrors. For lamps and table devices, route cords down the back legs of furniture or use paintable cord channels along the baseboards. In custom cabinetry, drill discreet holes in the back panels to feed wires directly into hidden power strips. For a comprehensive breakdown of techniques, read our ultimate guide to hiding smart home wires. Remember, if a wire is visible in the viewfinder, it will be visible in the final photo, so take the time to secure everything with cable clips and zip ties.
What is the best smart lighting for real estate photography?
For real estate photography, consistency and color accuracy are key. The best smart lighting setups allow you to adjust the Color Rendering Index (CRI) and color temperature (Kelvin). Choose smart bulbs and switches with a CRI of 90 or higher to ensure that the colors of the furniture, wood floors, and paint look vibrant and true to life. Before the shoot, use your smart home app to set every light in the house to the exact same color temperature (usually around 3500K to 4000K for a bright, modern look). This prevents the camera from struggling with mixed color temperatures, which can result in ugly blue or orange color casts in different corners of the room.
How do I prevent smart screens from flickering in photos?
Screen flickering, banding, and moiré patterns occur when your camera’s shutter speed conflicts with the refresh rate of the smart TV, monitor, or LED driver. To fix this, switch your camera to manual mode. Lower your shutter speed to match the local AC power frequency (usually 1/60th of a second in North America, or 1/50th in Europe). If you are shooting video, ensure your frame rate and shutter angle are synced with the screen. Additionally, some smart TVs have a “Flicker Free” or “Photo Mode” in their settings specifically designed to stabilize the image for cameras. Always test a few shots on your camera’s LCD screen and zoom in to check for banding before committing to the final setup.
Can smart home tech increase my home’s value in listing photos?
Yes, but only if the technology is presented as an aesthetic and functional upgrade rather than a cluttered science experiment. Homebuyers are highly attracted to smart homes rooms photos that showcase hidden technology, automated lighting, and motorized blinds because these features imply luxury, convenience, and modern infrastructure. When listing a home, highlight the “scenes” and automation routines in the photo descriptions. For example, a photo of the living room at dusk with the blinds automatically closed and the architectural lighting glowing warmly sells a lifestyle, not just a collection of gadgets. Ensure all smart home accounts are factory reset and ready for the new owner to claim before closing the sale.
What camera settings work best for smart homes rooms photos?
Interior photography requires maximizing depth of field and dynamic range. Use a sturdy tripod and shoot with a narrow aperture (f/8 to f/11) to ensure everything from the foreground smart switch to the background motorized blinds is in sharp focus. Keep your ISO as low as possible (ISO 100 or 200) to eliminate digital noise, which is especially noticeable in the dark shadows of a room. Because smart homes often have bright windows and dark interior corners, use Auto Exposure Bracketing (AEB) to take three or five shots at different exposures, then blend them into an HDR image in post-processing. Finally, always shoot in RAW format to give yourself maximum flexibility to adjust the white balance and recover highlights from glossy smart appliances and screens.