Why Start with Matter and a Central Hub?
Setting up your first smart home can feel like navigating a maze of competing ecosystems, proprietary apps, and confusing wireless protocols. However, the landscape has fundamentally shifted with the introduction of Matter. Developed by the Connectivity Standards Alliance (CSA), Matter is an open-source, royalty-free connectivity standard that allows devices from different brands to communicate seamlessly. Whether you prefer Apple HomeKit, Amazon Alexa, or Google Home, a Matter-compatible device will work natively across all platforms without requiring cloud-based workarounds.
For a beginner, the most reliable way to build a foundational smart home is by starting with a central hub and a dedicated smart lighting network. This approach provides immediate, tangible benefits—like automated entryway lighting and voice-controlled ambiance—while establishing the local network infrastructure required for future expansions like smart locks, thermostats, and security sensors.
Pre-Installation: Preparing Your Home Network
Before unboxing any smart devices, you must ensure your home network is equipped to handle the increased traffic and specific frequency requirements of IoT (Internet of Things) hardware. Most smart home accessories, particularly those using Wi-Fi or Zigbee, operate exclusively on the 2.4GHz band because it offers superior wall penetration and range compared to the 5GHz band.
Upgrading to a Mesh Wi-Fi System
If you are relying on a single ISP-provided router, you will likely experience dead zones and device drop-offs. Upgrading to a Wi-Fi 6 mesh system is highly recommended. According to the Wi-Fi Alliance, Wi-Fi 6 (802.11ax) introduces OFDMA technology, which allows a router to communicate with multiple low-bandwidth IoT devices simultaneously, drastically reducing latency and network congestion.
- Recommended Hardware: Eero 6+ or TP-Link Deco X20 (Cost: $150 - $250 for a 3-pack).
- Network Topology: Place the primary node near your modem, and distribute satellite nodes in central hallways to ensure a strong 2.4GHz signal reaches your smart switches and bulbs.
- IoT Isolation: Many modern mesh routers allow you to create a dedicated 'IoT Network' or Guest Network. Assigning your smart home devices to this isolated SSID improves security and prevents bandwidth-heavy devices (like streaming TVs) from interfering with smart home commands.
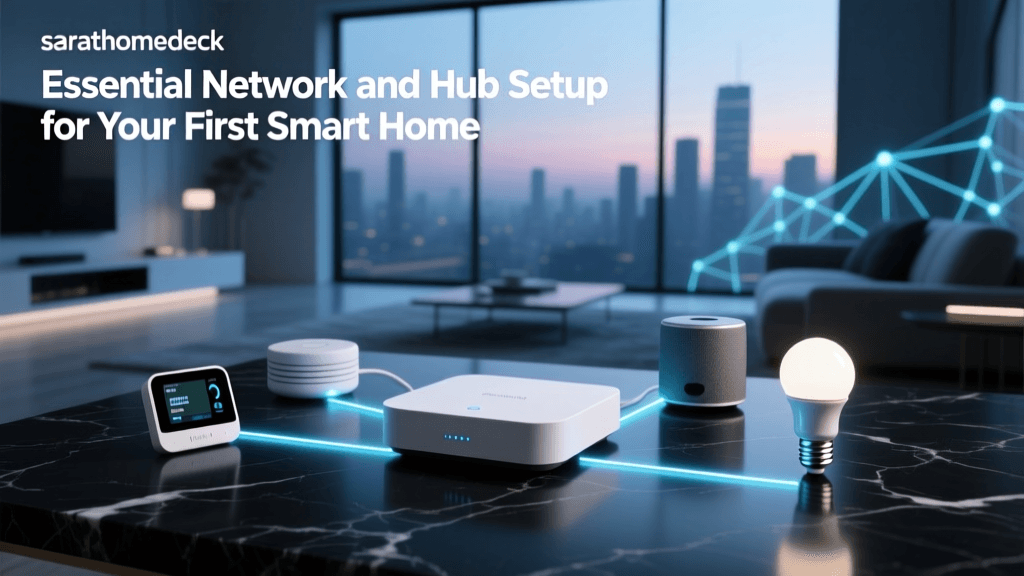
Choosing Your First Smart Hub
A smart hub acts as the brain of your home, translating commands from your phone or voice assistant into the specific wireless protocols (Thread, Zigbee, or Bluetooth) your devices use. With the advent of Matter, many modern smart speakers and streaming boxes now double as 'Thread Border Routers,' bridging low-power mesh networks to your main Wi-Fi.
| Device | Ecosystem | Thread Border Router? | Avg. Cost | Best For |
|---|---|---|---|---|
| Apple TV 4K (Ethernet) | Apple Home | Yes | $149 | Privacy-focused users, HomeKit secure video |
| HomePod Mini | Apple Home | Yes | $99 | Multi-room audio, compact spaces |
| Amazon Echo (4th Gen) | Alexa | Yes (Zigbee & Thread) | $99 | Budget setups, wide third-party support |
| Google Nest Hub (2nd Gen) | Google Home | Yes | $99 | Visual dashboards, Google ecosystem users |
Pro-Tip: If you are an Apple user, always opt for the Apple TV 4K with the Ethernet port. The Ethernet model includes a dedicated Thread Border Radio chip, whereas the Wi-Fi-only model relies on software-based Thread support, which can be less stable for large device networks.
Step-by-Step Hub Configuration
Once you have selected your hub, physical placement is critical. Do not hide your hub inside a metal media console or behind a large television, as these materials will block RF (Radio Frequency) signals.
- Central Placement: Position the hub in a central, elevated location (e.g., on a bookshelf in the living room) to maximize its Thread or Zigbee broadcast radius.
- App Setup: Download the native app (Apple Home, Amazon Alexa, or Google Home). Follow the on-screen prompts to connect the hub to your 2.4GHz Wi-Fi network.
- Firmware Update: Before adding any accessories, force a firmware update on the hub. Manufacturers frequently release day-one patches to improve Matter commissioning stability.
- Enable Thread: In the hub's settings menu, ensure that 'Thread Network' or 'Local Control' is toggled on. This prepares the hub to accept Matter-over-Thread devices.
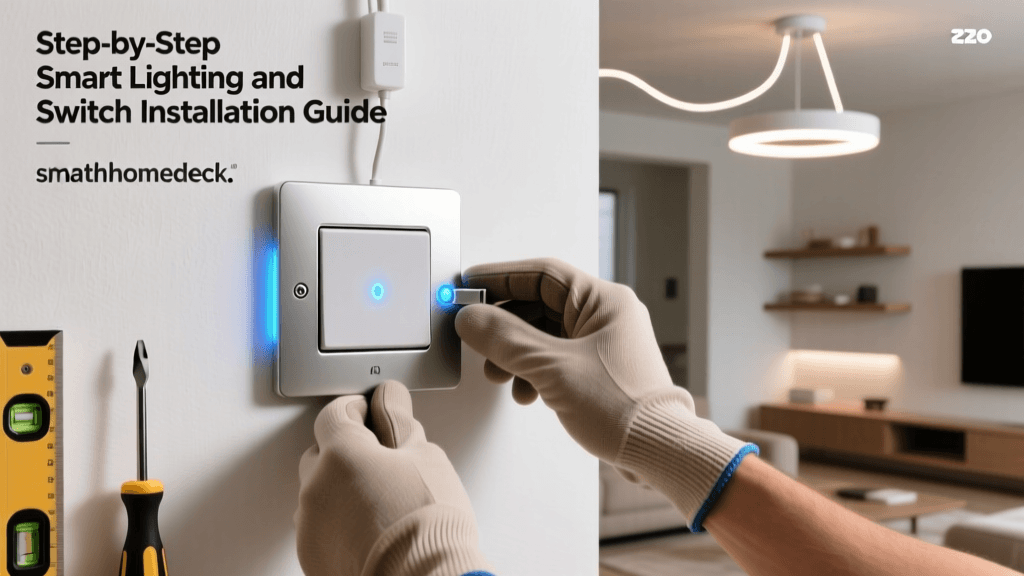
Installing Your First Smart Lighting Circuit
Smart lighting is the gateway to home automation. When planning your first installation, you must choose between Smart Bulbs and Smart Switches. For whole-room control and permanent fixtures, smart switches are vastly superior because they maintain physical control and do not require the wall switch to remain perpetually 'on'.
Smart Switch Installation Basics
Installing a smart switch, such as the Kasa Matter Smart Light Switch or Lutron Caseta, requires basic electrical knowledge. Always prioritize safety.
- Step 1: Kill the Power. Turn off the circuit breaker for the room you are working in. Verify the power is off using a non-contact voltage tester (Cost: $15).
- Step 2: Inspect the Wiring. Remove the existing wall switch. Most smart switches require a Neutral Wire to remain powered on when the lights are off. In North American homes, the neutral wire is typically a bundle of white wires tucked in the back of the electrical box. If you only see black (hot), white (load), and bare copper (ground) wires, you will need to purchase a 'No-Neutral' smart switch, like the Lutron Caseta system.
- Step 3: Connect the Wires. Using wire nuts or push-in connectors, attach the smart switch's Line (Hot) wire to your home's black wire, the Load wire to the wire leading to the light fixture, and the Neutral wire to the white bundle. Finally, connect the green ground wire to the bare copper wire.
- Step 4: Commissioning. Restore power at the breaker. Open your smart home app, tap 'Add Device,' and scan the Matter QR code located on the side of the smart switch. The hub will automatically route the setup through your local Thread network.
Visualizing Smart Home Protocol Adoption
Understanding the underlying protocols helps you plan your device capacity and placement. While Wi-Fi offers high bandwidth, it is power-hungry and limits the number of devices a standard router can handle. Low-power mesh networks like Thread and Zigbee are designed specifically for smart home telemetry and control.
Smart Home Protocol Comparison
As the chart illustrates, Thread 1.3 offers a massive device capacity and relies on a self-healing mesh topology. According to the Thread Group, every mains-powered Thread device (like a smart plug or switch) acts as a router, extending the network's reach and eliminating the single-point-of-failure issues common in traditional Wi-Fi setups.
Creating Your First Automation Workflow
Once your hub and lighting are installed, the real magic of a smart home begins with automation. Instead of relying on voice commands or apps, you want your home to react to environmental triggers automatically.
Example Workflow: The 'Arriving Home' Routine
This routine uses geofencing (your phone's GPS location) to prepare your home as you pull into the driveway.
- Trigger: When 'My Phone' arrives at 'Home' (Geofence radius set to 150 meters).
- Condition: Only run if the current time is between 'Sunset' and '11:00 PM'.
- Action 1: Turn on Entryway Smart Switch to 100% brightness.
- Action 2: Turn on Living Room Lamp (Smart Plug) to 50% brightness (Warm White).
- Action 3: Adjust Smart Thermostat to 72°F (22°C).
By utilizing local processing via your Matter hub, this automation will execute in milliseconds, even if your home's internet connection to the outside world goes down. Local control is one of the primary advantages of investing in a dedicated hub rather than relying solely on cloud-based Wi-Fi devices.
Troubleshooting Common Setup Hurdles
Even with Matter, you may encounter friction during your initial setup. Here is how to resolve the most common DIY installation issues:
1. Device Fails to Pair or Times Out
The Cause: Matter commissioning requires a handshake between your phone, the Wi-Fi router, and the Thread Border Router. If your phone is on a 5GHz network while the device requires 2.4GHz, the handshake will fail. The Fix: Temporarily disable the 5GHz band on your router, or ensure your smartphone is connected to a dedicated 2.4GHz IoT SSID during the pairing process. Once paired, you can re-enable 5GHz.
2. Smart Switch Feels Warm to the Touch
The Cause: Smart switches contain internal Wi-Fi or Zigbee radios that generate a small amount of heat. However, if the switch is excessively hot, it may be overloaded. The Fix: Check the wattage rating of the switch (usually 600W for LED/CFL or 1500W for Incandescent). Ensure you are not exceeding the maximum load. If you are controlling a large chandelier with many high-wattage bulbs, consider swapping to a heavy-duty smart relay module installed in the ceiling canopy instead of the wall switch.
3. Thread Network is Sluggish
The Cause: Thread networks require mains-powered devices to act as routers. If you only have a few battery-powered sensors and one hub, the mesh cannot form properly. The Fix: Add a few inexpensive Matter-over-Thread smart plugs in central outlets. These plugs act as signal repeaters, instantly strengthening the mesh backbone and allowing battery-powered door/window sensors to communicate reliably.
Conclusion
Setting up your first smart home network is a highly rewarding DIY project that increases your home's efficiency, security, and comfort. By starting with a robust Wi-Fi 6 mesh foundation, selecting a capable Matter hub with Thread Border Router capabilities, and safely installing smart switches, you are building a future-proof infrastructure. As the Matter ecosystem continues to expand, your local, privacy-focused network will seamlessly integrate tomorrow's innovations without missing a beat.