The Renter's Dilemma: Security Without the Security Deposit Loss
Moving into a new apartment or rental home often means inheriting outdated locks, blind spots in hallways, and a strict lease agreement that forbids drilling holes in the walls. For DIY smart home enthusiasts, this creates a frustrating paradox: you want the peace of mind that comes with modern smart security, but you cannot risk forfeiting your security deposit by permanently altering the property. Fortunately, the smart home industry has evolved. Today, a robust, renter-friendly smart security setup is not only possible but entirely reversible.
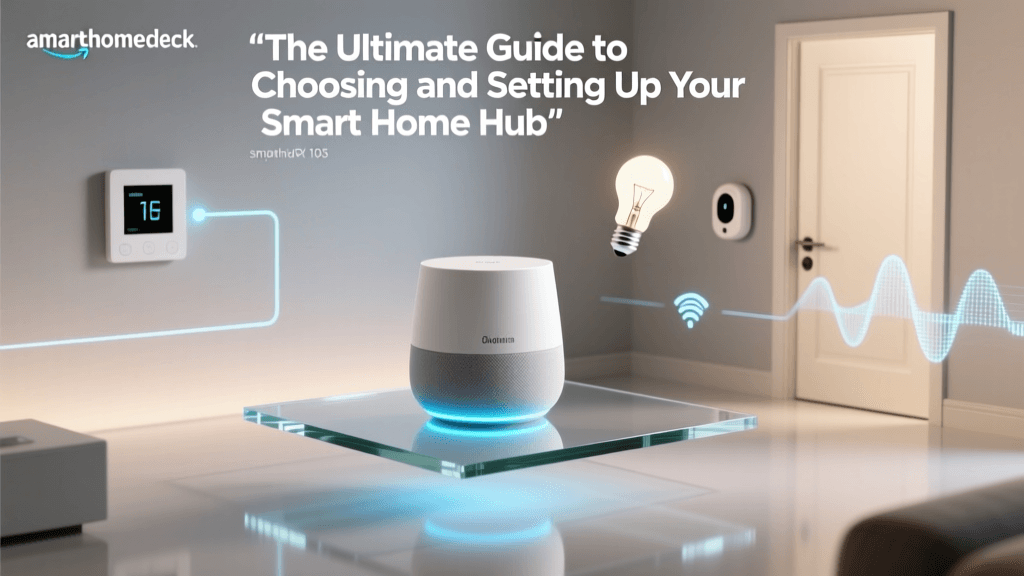
This comprehensive guide will walk you through the exact products, non-destructive installation techniques, and network configurations required to build a whole-home security ecosystem in a rental property. Whether you are in a high-rise condo or a single-family rental, you will learn how to upgrade your access control, monitor your entryways, and secure your network without picking up a power drill.
The Renter's Manifesto: Rules for Non-Destructive Installation
Before unboxing any devices, you must establish a baseline for what is permissible in your rental unit. Adhering to these golden rules will ensure your smart home setup remains entirely reversible.
1. Audit Your Lease Agreement
Most standard leases include an 'alterations clause' that prohibits making permanent changes to the property. However, swapping out interior hardware (like a thumb-turn) or using temporary adhesives rarely qualifies as a permanent alteration. Always review your lease and, if necessary, send a quick email to your landlord or property manager requesting permission to install 'temporary, non-destructive smart home devices.'
2. Master the Art of Temporary Adhesives
Never use the default double-sided foam tape that comes with most smart home accessories if it is designed for outdoor or heavy-duty use; it will rip the drywall paper upon removal. Instead, standardizing on 3M Command Strips or Scotch Extreme Mounting Tape (used with a heat gun for removal) is critical. For heavier devices like battery-powered doorbells, use a no-drill adhesive mounting plate specifically designed for stucco or painted wood, which can be safely dissolved using citrus-based solvents.
3. The Ziploc Bag Protocol
Every single screw, optical peephole, and interior thumb-turn you remove must be placed in a labeled Ziploc bag and stored in a dedicated 'Apartment Reversal' box. When move-out day arrives, you will need these exact original parts to restore the unit to its factory condition.
Smart Locks: Upgrading Access Without Replacing the Deadbolt
The deadbolt is the first line of defense for your apartment. Replacing the entire lockset requires drilling new holes and often violates lease terms. The solution is the retrofit smart lock. These devices leave your exterior keypad or keyhole completely untouched while replacing only the interior thumb-turn mechanism.
Top Retrofit Locks for Renters
According to extensive testing by Wirecutter's Best Smart Locks Guide, retrofit locks offer the best balance of security and convenience for renters. Here are the top contenders:
| Product | Installation Method | Price Range | Battery Life | Best For |
|---|---|---|---|---|
| August Wi-Fi Smart Lock (4th Gen) | Replaces interior thumb-turn (1 screw) | $200 - $230 | 3-6 Months | Seamless Auto-Unlock & Apple HomeKey |
| SwitchBot Lock Pro | 3M VHB Adhesive Tape (Zero screws) | $150 - $180 | 6 Months | Strict no-screw lease agreements |
| Level Lock+ | Replaces entire interior mechanism | $300 - $330 | 12 Months | Invisible design & premium aesthetics |
Installation Spotlight: The SwitchBot Lock Pro
If your landlord forbids you from even removing the single screw holding your interior thumb-turn, the SwitchBot Lock Pro is your only option. It utilizes industrial-strength 3M VHB (Very High Bond) tape to adhere directly over your existing thumb-turn. To install, you simply clean the metal surface with isopropyl alcohol, apply the tape, press the SwitchBot housing over the thumb-turn, and calibrate the motor via the app. It can generate up to 40kg of torque, easily turning even stiff apartment deadbolts.
Video Doorbells & Peephole Cameras
Apartment doors rarely have the clearance or wiring for traditional wired video doorbells. Furthermore, drilling into a fire-rated apartment door is a massive safety hazard and a guaranteed way to lose your deposit. Here is how to secure your entryway wirelessly.
The Peephole Swap: Ring Peephole Cam
Most apartment doors feature a standard optical peephole. The Ring Peephole Cam (2nd Gen) is designed to replace this optical lens. Installation takes about ten minutes: you unscrew the interior collar, push the optical glass out, and insert the Ring camera module from the outside, securing it with the new interior battery pack. The camera knocks on your door from the inside when someone approaches, and the built-in battery lasts roughly 30 to 60 days depending on foot traffic in your hallway.
Battery-Powered Doorbells for House Rentals
If you are renting a single-family home or a townhouse with a traditional doorframe, a battery-powered doorbell like the Eufy Dual Video Doorbell or the Ring Battery Doorbell Plus is ideal. Instead of drilling, purchase a third-party 'No-Drill Adhesive Mount for Video Doorbells' (typically $15-$20 on Amazon). These mounts use heavy-duty outdoor gel adhesives that grip siding, brick, or stucco, and can be removed later by applying a heat gun to soften the gel and using dental floss to slice through the bond.
Battery Life vs. Cost: Renter-Friendly Security Devices
When choosing wireless security devices, balancing battery longevity with upfront cost is crucial for renters who do not want to be constantly recharging devices mounted in awkward locations.
As the chart illustrates, devices utilizing specialized lithium AA batteries (like the Blink Outdoor 4) offer vastly superior battery life compared to built-in lithium-ion packs, making them ideal for renters who want a 'set it and forget it' balcony or patio camera.
Indoor & Balcony Cameras: Zero-Drill Placement Hacks
Securing the interior of your apartment and your private balcony requires strategic placement without putting holes in the drywall or concrete balcony railings.
The Tension Rod Hack for Balconies
If you live on a ground floor or have a balcony facing a public walkway, privacy and security are paramount. Drilling into concrete balcony pillars is usually prohibited. Instead, purchase a heavy-duty outdoor shower tension rod ($25). Wedge it vertically between your balcony floor and ceiling. You can then use standard hose clamps or zip-ties to mount a Wyze Cam v3 or Blink Outdoor directly to the tension rod. This provides an elevated, unobstructed view of your patio without damaging the property.
Over-the-Door and Shelf Mounts
For indoor cameras monitoring the entryway or living room, avoid drilling into studs. Utilize over-the-door hooks designed for cameras, which simply hang over the top of any interior door. Alternatively, use bookshelf placement. A Blink Mini tucked between books on a high shelf provides an excellent vantage point of the room and requires zero installation hardware.
Renter-Friendly Smart Lighting & Climate Control
Security isn't just about cameras; it's about the illusion of occupancy and environmental monitoring.
Smart Bulbs and Plug-In Lamps
Hardwired smart switches require dealing with high-voltage wiring and replacing landlord-owned wall plates. Instead, swap out your bulbs for Philips Hue White and Color Ambiance bulbs or budget-friendly Wyze Bulbs. Pair these with smart plugs (like the Kasa Smart Plug Mini) connected to your existing floor lamps. Set up 'Vacation Mode' automations that randomly turn lights on and off between 8 PM and 11 PM to deter burglars while you are away.
Climate & Leak Monitoring
Apartment water leaks can result in massive liability claims against your renter's insurance. Place Moisture & Freeze Sensors (like the Eve Water Guard or SwitchBot Contact Sensor) under your kitchen sink, behind the toilet, and near the HVAC unit. These plug directly into the wall or run on coin-cell batteries and will alert your phone the second a leak is detected, potentially saving you thousands in damages.
Network Setup in High-Density Buildings
One of the biggest hidden challenges of apartment smart home setups is Wi-Fi congestion. In a high-density building, dozens of neighboring routers are broadcasting on the 2.4GHz band, which can cause your smart locks and cameras to drop offline.
Solving the Congestion Problem
To ensure your security devices remain online, you must optimize your network:
- Utilize 5GHz and 6GHz Bands: Reserve your 2.4GHz band exclusively for IoT devices (locks, bulbs, sensors) and move your phones, laptops, and streaming devices to the 5GHz or 6GHz bands.
- Mesh Wi-Fi Without Ethernet: Running Cat6 cable through apartment walls is impossible. Instead, use a wireless Mesh system like the Eero Pro 6. Place the main node near your fiber/DSL modem, and place the second node in the hallway or bedroom to ensure your smart lock and peephole camera maintain a strong signal.
- Powerline Adapters: If your apartment has thick concrete walls that block Wi-Fi, use a Netgear Powerline 2000 adapter. This sends your internet connection through the apartment's existing copper electrical wiring, allowing you to place a Wi-Fi access point in a dead zone without running cables.
Privacy & Security Best Practices
When installing cameras and smart locks in a rental, you must be hyper-aware of digital privacy. As highlighted in CNET's Best Smart Locks coverage, ensuring your devices are protected from digital intrusion is just as important as physical security.
Renter Privacy Tip: Never point indoor cameras toward shared spaces, hallways, or neighboring balconies. Always configure privacy zones in your camera apps to black out your neighbor's windows or the public sidewalk to comply with local surveillance laws.
Always enable Two-Factor Authentication (2FA) on your smart home accounts. Use a dedicated email address for your smart home devices, and ensure that if you use a smart lock with a keypad, you change the default master PIN immediately and delete any temporary guest codes after visitors leave.
Moving Out: The 30-Minute Reversal Protocol
The true test of a renter-friendly smart home is how well it can be dismantled. Follow this protocol 48 hours before your move-out walkthrough:
- Soften Adhesives: Use a hairdryer on medium heat to warm up any 3M Command Strips or mounting tape. Heat softens the acrylic adhesive, allowing it to stretch rather than tear the drywall paper.
- Dissolve Residue: If any sticky residue remains on the door or walls, apply a citrus-based solvent like Goo Gone or 90% isopropyl alcohol. Let it sit for three minutes, then wipe clean with a microfiber cloth. Never use acetone or harsh chemicals, as they will strip the paint.
- Restore Hardware: Retrieve your labeled Ziploc bags. Reattach the original interior thumb-turn, screw the optical peephole back into the front door, and reinstall the landlord's original light bulbs if you swapped them out.
- Factory Reset: Perform a hard factory reset on all smart locks, cameras, and hubs to wipe your Wi-Fi credentials and personal data from the local memory before handing over the keys.
Conclusion
Living in a rental property does not mean you have to compromise on your safety or convenience. By leveraging retrofit smart locks, peephole cameras, tension-rod mounts, and strategic network planning, you can build a comprehensive, enterprise-grade security system that leaves absolutely no trace behind. Protect your home, protect your privacy, and most importantly, protect your security deposit.