Building a smart home is one of the most rewarding upgrades you can make to your living space. From automated lighting that greets you at the door to security cameras that keep a watchful eye on your property, a well-designed smart home ecosystem offers unparalleled convenience, energy efficiency, and peace of mind. However, the sheer volume of devices, protocols, and platforms available can make the initial setup feel overwhelming.
This comprehensive smart home installation guide is designed to take you from a blank slate to a fully automated, interconnected home. Whether you are starting with a single smart speaker or wiring an entire house with smart switches, this step-by-step walkthrough will ensure your devices communicate seamlessly and securely.
Project Overview
- Difficulty Level: Moderate (Requires basic Wi-Fi networking knowledge and, for some devices, basic electrical wiring skills)
- Estimated Time: 4 to 8 hours (Depending on the size of your home and the number of devices)
- Core Objective: Establish a robust network, select a unified ecosystem, install core devices, and create automated routines.
Tools & Products Needed
Before you begin unboxing devices, gather the necessary tools and hardware to ensure a smooth installation process.
- Smartphone or Tablet: Required for downloading companion apps and pairing devices via Bluetooth and Wi-Fi.
- Mesh Wi-Fi Router System: Essential for eliminating dead zones and handling the bandwidth of multiple IoT (Internet of Things) devices. Explore our top picks for mesh Wi-Fi systems.
- Smart Hub or Bridge: Necessary if you are using Zigbee, Z-Wave, or Thread devices. Check out our guide to the best smart hubs.
- Non-Contact Voltage Tester: Absolutely critical if you are installing hardwired smart switches or thermostats to ensure power is completely off.
- Phillips & Flathead Screwdrivers: For removing existing wall plates and securing new devices.
- Wire Strippers & Electrical Tape: For preparing wires when installing hardwired smart lighting or security systems.
- Smart Devices: Your chosen ecosystem of smart bulbs, switches, plugs, locks, and cameras.
Step 1: Plan Your Smart Home Ecosystem & Network
The most common mistake beginners make is buying devices that do not communicate with one another. Before purchasing hardware, you must choose a primary ecosystem to act as the central brain of your home.
Choosing Your Platform
The major players in the smart home space include Amazon Alexa, Google Home, Apple HomeKit, and Samsung SmartThings. When selecting a platform, consider the mobile devices your household already uses. Apple users will benefit greatly from the privacy and local processing of HomeKit, while Android users might prefer the deep integration of Google Home. For advanced users who want total local control without relying on the cloud, platforms like Home Assistant are the gold standard.
Fortunately, the introduction of the Matter protocol has begun to bridge the gap between these ecosystems. Matter-certified devices can be paired to multiple platforms simultaneously, offering unprecedented flexibility. When shopping, always look for the Matter logo to future-proof your installation.
Upgrading Your Network Infrastructure
A standard ISP-provided router will quickly buckle under the weight of 30+ smart home devices. Smart homes require robust networking. We highly recommend upgrading to a Mesh Wi-Fi system. Mesh networks use multiple nodes placed around your home to create a single, seamless blanket of coverage, ensuring that a smart plug in the far corner of your basement stays connected.
Pro Tip: Most smart home devices (especially smart plugs, bulbs, and cameras) operate exclusively on the 2.4GHz Wi-Fi band because it offers better range and wall penetration than the faster 5GHz band. During setup, ensure your router's 2.4GHz and 5GHz bands are temporarily separated, or use a dedicated IoT network feature if your router supports it, to prevent pairing failures.
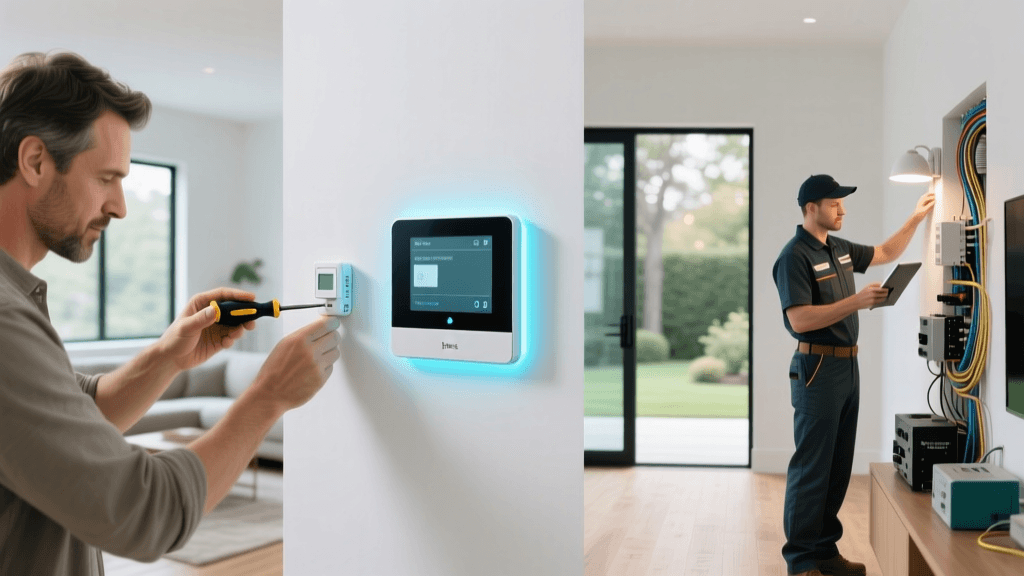
Step 2: Set Up Your Smart Hub & Core Network
If your chosen ecosystem requires a dedicated hub (such as SmartThings, Hubitat, or an Apple TV/HomePod acting as a HomeKit hub), this is the first piece of hardware you should install.
Optimal Hub Placement
Do not hide your smart hub inside a metal media cabinet or behind a television. Hubs rely on radio frequencies (Zigbee, Z-Wave, Thread) to communicate with sensors and switches. Metal and thick walls block these signals. Place your hub in a central, elevated location in your home, ideally out in the open, to maximize the mesh network radius.
Creating an IoT Guest Network
Security is paramount when connecting dozens of devices to your home network. Many modern routers allow you to create a 'Guest' or 'IoT' network. This creates a virtual LAN (VLAN) that isolates your smart bulbs and cameras from your personal computers and smartphones. If a cheap, poorly secured smart plug is compromised by a bad actor, the IoT network prevents them from accessing your personal data or primary devices. Connect all your smart home hardware to this isolated network during the setup phase.
Step 3: Install & Configure Smart Lighting & Plugs
Lighting is the most popular entry point into home automation. You generally have two choices: smart bulbs or smart switches. For a comprehensive breakdown, read our complete guide to smart lighting solutions.
Smart Bulbs vs. Smart Switches
Smart Bulbs are ideal for lamps, color-changing accents, and fixtures where you want individual control over multiple bulbs in a single fitting. However, they require the physical wall switch to remain 'on' at all times to maintain power to the bulb's internal radio.
Smart Switches replace your existing wall switches. They are the superior choice for overhead lighting, recessed cans, and multi-bulb fixtures. They maintain the familiar physical control of a wall switch while adding app and voice control.
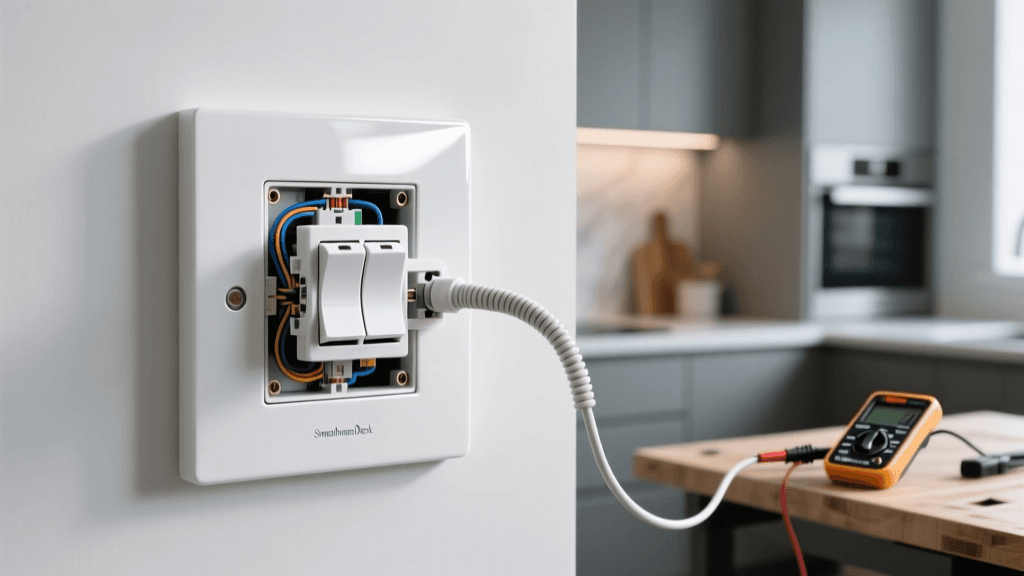
Wiring a Smart Switch Safely
If you are installing hardwired smart switches, follow these critical steps:
- Turn Off the Power: Go to your main electrical panel and flip the breaker for the room you are working in.
- Verify with a Tester: Use your non-contact voltage tester on the existing switch wires to confirm the power is 100% off.
- Check for a Neutral Wire: Most modern smart switches require a neutral wire (usually a bundle of white wires in the back of the gang box) to keep the switch's internal Wi-Fi/Zigbee radio powered when the lights are off. If your home was built before the 1980s, you may not have neutral wires. In that case, you must purchase specific 'No-Neutral' smart switches or use smart bulbs instead.
- Connect & Secure: Connect the line, load, neutral, and ground wires using wire nuts. Wrap the connections in electrical tape for added safety, carefully fold the wires into the box, and screw the switch into place.
Pairing Smart Plugs
Smart plugs are the ultimate plug-and-play solution for dumb appliances like coffee makers, fans, and holiday lights. Simply plug them into the wall, open your ecosystem's app, and follow the on-screen pairing instructions. Group your smart plugs into logical 'Rooms' within your app (e.g., 'Living Room Lamps') to make voice commands more intuitive.
Step 4: Secure Your Perimeter with Smart Locks & Cameras
Smart security devices provide immense peace of mind, but they require careful installation and strict privacy configurations. Browse our top-rated smart security devices to find the right fit for your property.
Installing Smart Locks
Smart locks replace either the entire deadbolt assembly or just the interior thumb-turn mechanism. If you are renting or want a simpler installation, a retrofit lock (which attaches to your existing deadbolt) is the best choice. When installing a full deadbolt replacement, ensure the latch bolt extends and retracts smoothly without rubbing against the strike plate. A smart lock's motor will drain its batteries rapidly if it encounters physical friction when locking or unlocking.
Mounting Smart Cameras & Doorbells
For wired video doorbells, you will need to turn off the power at the transformer (usually located in the basement or attic) before removing your old doorbell chime. Many smart doorbells require a 'pro power kit' to be installed at your indoor chime box to regulate voltage. Follow the manufacturer's wiring diagram precisely.
When mounting outdoor cameras, prioritize locations that cover entry points and driveways. Angle the camera slightly downward to avoid direct sunlight glare and to capture faces clearly. Ensure your outdoor cameras are rated for your local climate (look for an IP65 or IP67 weather resistance rating).
Step 5: Automate & Create Routines
Hardware installation is only half the battle. The true magic of a smart home lies in automations and routines—the invisible scripts that make your home react to your lifestyle without you needing to issue a voice command or open an app.
Building Your First Routines
Start with simple, high-impact automations:
- The 'Good Morning' Routine: Set your smart blinds to open, your thermostat to adjust to a comfortable waking temperature, and your kitchen smart plug (connected to the coffee maker) to turn on at your usual wake-up time.
- The 'Away' Routine: Triggered by Geofencing (using your smartphone's location). When the last person leaves the house, the lights turn off, the thermostat enters eco-mode, and the security cameras arm themselves.
- The 'Goodnight' Routine: Triggered by voice command or a bedside smart button. This locks all smart doors, turns off all interior lights, and arms motion sensors.
Utilizing Sensors for Automation
Do not rely solely on schedules. Invest in Zigbee or Thread motion sensors, door/window contact sensors, and temperature sensors. Placing a motion sensor in the hallway allows you to create an automation that turns on a dim, warm light at 2 AM if motion is detected, guiding you to the kitchen without blinding you with overhead lights.
Troubleshooting Common Installation Issues
Even the most meticulously planned smart home installations will encounter hiccups. Here is how to solve the most common problems.
Device Refuses to Pair or Connect
The Fix: 90% of pairing failures are due to Wi-Fi band confusion. Your smartphone is likely connected to the faster 5GHz band, but the smart device is trying to broadcast on the 2.4GHz band. Temporarily disable the 5GHz band on your router, or walk further away from your router (where the 5GHz signal drops off but the 2.4GHz signal remains) while running the pairing process in your app.
Smart Switches Flickering or Buzzing
The Fix: This is usually caused by incompatible LED bulbs. Smart switches use a small amount of current to power their internal radios, which can cause sensitive, low-wattage LED bulbs to flicker. Check the manufacturer's compatibility list and ensure you are using high-quality, dimmable LED bulbs. If the issue persists, you may need to install a bypass capacitor at the light fixture.
Automations Triggering Late or Failing
The Fix: If your routines rely on cloud-based processing, a slow internet connection will cause latency. Whenever possible, use a hub that supports local processing (like Home Assistant, Hubitat, or a local HomeKit hub). Local processing ensures your motion-sensor lights turn on instantly, even if your home's internet connection goes down.
Device Shows as 'Offline' in App
The Fix: Perform a proper power cycle. Do not just turn the device off and on via the app. Physically unplug the device from the wall, wait 30 seconds, and plug it back in. If it is a hardwired switch, flip the breaker off and on. If the device remains offline, check your router's DHCP settings to ensure it hasn't run out of available IP addresses for your growing IoT network.
Frequently Asked Questions
Do I need a smart hub if my devices have built-in Wi-Fi?
Technically, no. Wi-Fi devices connect directly to your router. However, relying entirely on Wi-Fi for dozens of devices will clog your router's bandwidth and cause network instability. Using a hub with low-power mesh protocols like Zigbee, Z-Wave, or Thread keeps your Wi-Fi airwaves clear for your phones, laptops, and streaming devices, while the hub acts as a single, efficient bridge to your network.
What happens to my smart home if the internet goes down?
If your system relies entirely on cloud-based platforms (like basic Alexa or Google Home setups), you will lose voice control, remote access, and cloud-dependent automations. However, devices will still respond to physical switches. To maintain automation during an internet outage, utilize a local hub (like Home Assistant or SmartThings) and local protocols (Matter, Thread, Zigbee), which process commands entirely within your home's LAN.
Are smart home devices secure from hackers?
Security depends on your setup. To maximize security, always use strong, unique passwords for your smart home accounts, enable Two-Factor Authentication (2FA), and keep your device firmware updated. Most importantly, isolate your IoT devices on a separate Guest or VLAN network so that a compromised smart bulb cannot be used as a backdoor into your personal computers or network-attached storage.
Can I install smart home devices if I rent my apartment?
Absolutely. Renters should focus on non-destructive, plug-and-play devices. Smart bulbs, smart plugs, and wireless battery-powered cameras require zero wiring. For smart locks, look for 'retrofit' models like the August Wi-Fi Smart Lock or SwitchBot Lock, which install over the interior thumb-turn of your existing deadbolt without requiring you to replace the exterior hardware or drill new holes.
How do I choose between Matter, Zigbee, and Z-Wave?
Matter is the newest, industry-standard protocol designed for universal compatibility and local control over Thread or Wi-Fi. Zigbee is widely used, affordable, and great for sensors and bulbs, but requires a compatible hub. Z-Wave operates on a lower frequency (908 MHz in the US), giving it superior range and wall penetration, making it the premium choice for smart locks and whole-home sensor networks. For new installations, prioritizing Matter and Thread devices is the best way to future-proof your home.