A smart home is only as good as the network that powers it. From smart bulbs and thermostats to security cameras, voice assistants, and smart locks, every connected device relies on a stable, secure, and well-architected Wi-Fi and wired infrastructure. A poorly designed network leads to dropped cameras, laggy voice commands, and — worst of all — security vulnerabilities that expose your home to intruders, both digital and physical.
This guide walks you through a complete smart home network setup, from planning coverage and selecting equipment to segmenting IoT devices on isolated VLANs and hardening your router against attacks. Whether you're outfitting a small apartment or a large multi-story home, these steps will give you a rock-solid foundation for every smart device you add in the future.
Project Overview
- Difficulty: Intermediate (some networking knowledge helpful)
- Estimated Time: 2–4 hours for a typical 3-bedroom home
- Cost Range: $200–$800 depending on home size and equipment tier
- Skills Required: Basic router configuration, cable routing, app setup
Tools and Products You'll Need
Before you begin, gather the following equipment. For detailed recommendations, browse our smart home product reviews and best mesh Wi-Fi systems guide.
Core Networking Gear
- Mesh Wi-Fi system (2–4 nodes depending on square footage) or a high-performance router with external access points
- Modem (if not provided by your ISP) compatible with your internet plan
- Unmanaged or managed gigabit Ethernet switch (8–16 ports)
- Cat6 or Cat6a Ethernet cable in various lengths
- PoE (Power over Ethernet) switch if you plan to use wired access points or PoE cameras
Tools and Accessories
- Ethernet cable tester and crimper
- RJ45 connectors and wall plates (if running in-wall cabling)
- Drill, drywall saw, and fish tape for cable runs
- Label maker for cable management
- Smartphone or laptop for configuration
- UPS (uninterruptible power supply) for modem, router, and switch
Step 1: Plan Your Network Architecture
The single biggest mistake homeowners make is buying equipment before planning. A smart home network needs to handle dozens — sometimes hundreds — of low-bandwidth IoT devices alongside high-bandwidth streaming, gaming, and video calls. Planning first saves you from costly rework later.
Map Your Devices by Category
Walk through each room and list every connected device you currently own or plan to install. Group them into three tiers:
- High-bandwidth, trusted devices: laptops, smart TVs, gaming consoles, phones, tablets
- High-bandwidth, semi-trusted devices: security cameras, video doorbells, baby monitors
- Low-bandwidth IoT devices: smart bulbs, plugs, sensors, thermostats, vacuums, voice assistants
This categorization directly informs how you'll segment your network in a later step.
Survey Your Home for Coverage
Use a Wi-Fi analyzer app on your phone to walk through your home and note dead zones, weak signal areas, and sources of interference (microwaves, thick concrete walls, metal framing, large appliances). Multi-story homes, homes with brick or stucco exteriors, and homes with radiant floor heating often need additional access points or mesh nodes.
Decide Between Mesh and Wired Access Points
For most retrofit installations, a tri-band mesh Wi-Fi system offers the best balance of performance and ease of installation. If your home already has Ethernet in the walls — or if you're willing to run new cables — wired access points connected to a central router and PoE switch will deliver superior performance and lower latency, which matters for security cameras and real-time automation.
For more on choosing between these approaches, see our mesh vs. access points comparison.
Step 2: Install the Core Hardware
With your plan in hand, it's time to physically install the backbone of your network.
Position Your Modem and Primary Router
Place your modem and primary router (or main mesh node) in a central, elevated, and unobstructed location. Avoid closets, basements, and areas near large metal objects. The ideal spot is often a main-floor hallway or open living area. Connect the modem to your ISP's incoming line, then connect the router's WAN port to the modem using a short Cat6 cable.
Connect the Ethernet Switch
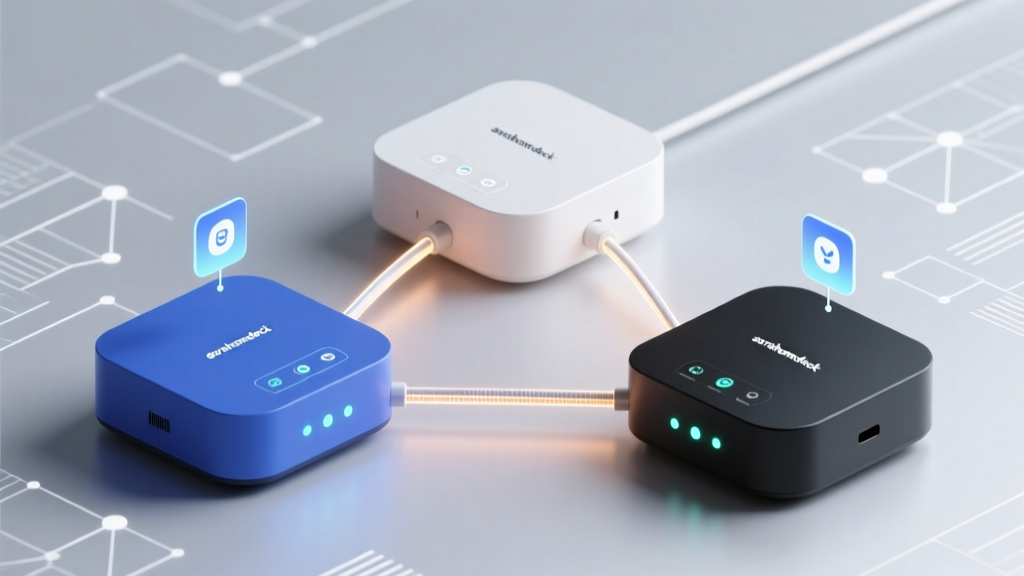
Plug an Ethernet cable from one of the router's LAN ports into your gigabit switch. This switch becomes the distribution hub for every wired device: access points, smart home hubs (like Home Assistant, Hubitat, or HomeKit), NAS drives, desktop PCs, and streaming boxes. Hardwiring stationary, high-bandwidth devices frees up wireless airtime for mobile devices and IoT gadgets.
Deploy Mesh Nodes or Access Points
For mesh systems, place satellite nodes roughly one room away from the primary router — not at the edge of the signal. Each node should still receive a strong signal from its upstream neighbor. For wired access points, mount them on ceilings or high on walls in central locations of each coverage zone, then run Cat6 back to the switch.
Label every cable at both ends with a label maker. Trust us: six months from now, you'll be grateful you did.
Protect Everything with a UPS
Connect your modem, router, and switch to a small UPS. A smart home with smart locks, leak sensors, and security cameras is useless during a power flicker. A 600–1000VA UPS keeps the network alive for 30–60 minutes during outages and protects sensitive electronics from surges.
Step 3: Configure Your Network and SSIDs
Physical installation is only half the job. The configuration step is where you transform a collection of hardware into a secure, high-performing smart home network.
Create Separate SSIDs for Different Device Types
At minimum, set up three distinct Wi-Fi networks:
- Main (5 GHz or 6 GHz): for phones, laptops, tablets, and TVs — devices you trust and that need high bandwidth
- IoT (2.4 GHz): for smart bulbs, plugs, sensors, and appliances — most IoT devices only support 2.4 GHz anyway
- Guest: for visitors, with no access to your main network or smart home devices
Use WPA3 encryption on all networks where supported, and WPA2-AES as a fallback for legacy IoT devices that can't handle WPA3.
Segment with VLANs (If Your Router Supports It)
For advanced users with prosumer routers (UniFi, pfSense, Omada, or higher-end Asus/Netgear models), VLAN segmentation is the gold standard. Create separate VLANs for:
- Trusted devices (your phones and computers)
- IoT devices (smart home gadgets)
- Cameras and surveillance
- Guests
Then configure firewall rules so the IoT VLAN can reach the internet but cannot initiate connections to your trusted VLAN. This prevents a compromised smart bulb from becoming a pivot point into your laptop or NAS. For a deep dive, read our VLAN setup guide for smart homes.
Reserve Static IPs for Critical Devices
Assign DHCP reservations or static IPs to devices you'll frequently access: smart home hubs, cameras, printers, NAS drives, and Home Assistant servers. This makes troubleshooting, port forwarding, and local control dramatically easier.
Enable Advanced DNS and Filtering
Point your router's DNS to a privacy-respecting provider like Cloudflare (1.1.1.1), Quad9 (9.9.9.9), or NextDNS. For even better ad and tracker blocking across every device on your network, run Pi-hole or AdGuard Home on a Raspberry Pi or Docker container — a single installation protects every device without configuring each one individually.
Step 4: Secure and Harden Your Network
Smart home devices are notoriously insecure. Manufacturers often ship them with default passwords, outdated firmware, and open ports. Your network must compensate for these weaknesses.
Change Every Default Credential
Before connecting any device, log in and change the default admin username and password. This applies to your router, switch, cameras, hubs, and NAS. Use a password manager and generate unique passwords at least 16 characters long.
Disable Unnecessary Remote Access
Many routers and IoT devices enable remote cloud access by default. Unless you specifically need it, turn it off. If you do need remote access to your home network, use a secure tunnel like Tailscale, ZeroTier, or Cloudflare Tunnel instead of opening ports via UPnP or port forwarding.
Keep Firmware Updated
Enable automatic firmware updates on your router, mesh nodes, and smart home hubs. For devices that don't support auto-update, set a monthly calendar reminder to check manually. Outdated firmware is the #1 vector for smart home breaches.
Isolate Cameras and Voice Assistants
Security cameras and always-listening voice assistants deserve extra scrutiny. Put them on their own VLAN or isolated SSID, block their internet access if they don't need it (many local-only hubs don't), and review their privacy settings in the companion app. For more, see our smart home privacy guide.
Step 5: Test, Document, and Maintain
A network isn't finished until you've verified it works under real-world conditions and documented it for future-you.
Run Speed and Coverage Tests
Use a tool like iPerf or a Wi-Fi analyzer app to measure throughput and signal strength in every room. Walk the perimeter of your property to verify outdoor cameras and doorbells maintain a strong connection. Aim for at least -65 dBm signal strength in every location where a smart device lives.
Simulate Real-World Load
Stream 4K video on a TV, run a video call on a laptop, and trigger a few smart home automations simultaneously. Watch for stuttering, dropouts, or latency spikes. If you see problems, revisit node placement, channel selection, or consider adding another access point.
Document Your Setup
Create a simple spreadsheet or note listing every device, its IP address (or DHCP reservation), its SSID/VLAN, and its physical location. Store admin credentials in your password manager. Take photos of cable runs, switch ports, and wall plates. This documentation will save you hours when something inevitably breaks at 2 a.m.
Schedule Quarterly Maintenance
Every three months, check for firmware updates, review connected device lists for anything unfamiliar, audit firewall rules, and rotate any shared guest passwords. A few minutes of maintenance prevents hours of incident response.
Troubleshooting Common Smart Home Network Issues
Smart Devices Won't Connect to Wi-Fi
Most IoT devices only support 2.4 GHz Wi-Fi. Make sure you have a dedicated 2.4 GHz SSID, disable WPA3 on that SSID (use WPA2-AES), and ensure the SSID name doesn't contain special characters or spaces. Some budget devices also fail on channels 12 and 13 — lock your 2.4 GHz radio to channel 1, 6, or 11.
Cameras Keep Dropping Offline
Video streams are bandwidth-hungry and latency-sensitive. Move the camera closer to an access point, add a mesh node, or switch to a wired PoE camera. Also check that your router isn't applying aggressive QoS rules that throttle the camera's traffic.
Mesh Nodes Show Poor Backhaul Performance
If your mesh satellites are too far from the primary router, the wireless backhaul becomes the bottleneck. Move nodes closer together, add an intermediate node, or — best of all — wire the nodes together using Ethernet backhaul, which most modern mesh systems support.
Devices Can't Communicate Across the Network
If your smart home hub can't discover devices on a different VLAN, you likely need to enable mDNS reflection (also called Bonjour or Avahi forwarding) on your router. Home Assistant, HomeKit, and Chromecast all rely on mDNS for device discovery.
Internet Is Fast but Local Devices Feel Slow
This usually indicates wireless congestion. Use a Wi-Fi analyzer to find the least crowded channels, switch to 5 GHz or 6 GHz where possible, and reduce the transmit power on nearby access points so devices associate with the closest one rather than a distant, stronger signal.
Frequently Asked Questions
Do I really need a mesh system, or is one good router enough?
For apartments and homes under 1,500 square feet with an open floor plan, a single high-quality router placed centrally is usually sufficient. For larger homes, multi-story layouts, or homes with signal-blocking materials like brick, concrete, or metal lath, a mesh system or multiple wired access points is strongly recommended. The goal is consistent -65 dBm or better signal everywhere a smart device lives.
Should I use Wi-Fi 6, Wi-Fi 6E, or wait for Wi-Fi 7?
Wi-Fi 6 is the current sweet spot for smart homes: it handles dense device environments well, is widely supported, and is affordably priced. Wi-Fi 6E adds the 6 GHz band, which is excellent for reducing congestion but isn't supported by most IoT devices yet. Wi-Fi 7 offers exciting performance gains but is still expensive and has limited device support. For most installations today, Wi-Fi 6 is the right choice — invest the savings in better coverage rather than newer radios.
How many devices can a typical smart home network support?
Modern consumer routers and mesh systems can theoretically handle 100–250 devices, but real-world performance degrades well before that limit. For a typical smart home with 40–80 devices, a quality mesh system or prosumer router is plenty. If you're approaching 100+ devices (common in homes with many smart bulbs and sensors), consider a prosumer setup with VLAN segmentation and dedicated access points. Also consider switching to Zigbee or Thread for low-bandwidth sensors, which offloads traffic from your Wi-Fi entirely — see our Zigbee vs. Wi-Fi comparison.
Is it worth running Ethernet cables in my walls?
Absolutely, if you can. Ethernet is faster, more reliable, more secure, and lower latency than any wireless connection. Even running Cat6 to just a few key locations — your home office, living room TV, and the central hallway where a mesh node lives — dramatically improves overall network performance. If running cables isn't feasible, MoCA adapters (which use coaxial TV cabling) or powerline adapters are reasonable fallbacks, though neither matches the performance of true Ethernet.
How do I keep my smart home network secure long-term?
Security is ongoing, not a one-time setup. Change default passwords, keep firmware updated, segment IoT devices onto their own VLAN or SSID, disable remote access you don't need, use a privacy-focused DNS provider, and audit your connected device list quarterly. Consider running a network monitor like Pi-hole or a self-hosted dashboard to spot unusual traffic patterns. The most important habit: treat every IoT device as potentially hostile and design your network so a compromised device can't reach your personal data or other trusted devices.
With these steps complete, your smart home network is ready to support every automation, camera, and voice command you throw at it — reliably, securely, and for years to come. For more project ideas, explore our full library of smart home installation guides.