The Complete Smart Home Panel 3 Installation Guide
Upgrading your living space with a centralized control hub is one of the most rewarding projects you can undertake. The Smart Home Panel 3 serves as the brain of your connected home, offering a sleek touchscreen interface, built-in Zigbee and Thread radios, and seamless integration with your favorite voice assistants. Whether you are replacing an outdated thermostat, swapping out a dumb switch panel, or mounting a brand-new control center in your hallway, this comprehensive guide will walk you through the entire process.
Difficulty Level: Intermediate
Estimated Time: 2 to 3 hours
Electrical Experience Required: Basic understanding of household wiring (Line, Neutral, and Ground)
If you are completely new to electrical work, we highly recommend reviewing our smart switch wiring basics guide before beginning, or hiring a licensed electrician to handle the physical wiring while you manage the software configuration.
Tools & Materials Needed
Before you begin the installation, gather the following tools and materials to ensure a smooth and uninterrupted workflow. Having everything within reach will save you time and prevent frustration during the wiring phase.
- Smart Home Panel 3 Kit (Includes display, backplate, mounting screws, and wire connectors)
- Non-Contact Voltage Tester (Crucial for safety)
- Phillips and Flathead Screwdrivers
- Wire Strippers and Cutters
- Power Drill with Drill Bits (Including masonry bits if drilling into tile or stone)
- Drywall Anchors (If you cannot mount directly into a wall stud)
- Bubble Level or Laser Level
- Smartphone or Tablet (For app setup and Wi-Fi configuration)
- Electrical Tape and Wire Nuts/Wago Connectors
Step 1: Preparation and Safety First
Safety is the absolute highest priority when working with your home electrical system. The Smart Home Panel 3 requires a continuous power supply to keep its high-resolution display and internal radios active, which means you will be working with live household current.
1. Turn Off the Power: Locate your main electrical breaker box and turn off the breaker that supplies power to the room or specific wall box where you plan to install the panel. If you are unsure which breaker controls the area, turn off the main breaker for the entire house to be completely safe.
2. Verify the Power is Off: Never assume the power is off just because you flipped a switch. Use your non-contact voltage tester on the existing wires or the old panel you are removing. The tester should remain completely silent and unlit. If it beeps or lights up, the wrong breaker was turned off, or you have a multi-way circuit that requires additional breakers to be switched off.
3. Unbox and Inventory: Carefully unbox your Smart Home Panel 3. Lay out the backplate, the touchscreen display, the mounting screws, and the included wire connectors. Inspect the screen for any shipping damage. Keep the protective film on the display until the very last step to prevent scratches during the physical installation.
4. Plan the Location: If you are installing the panel in a new location rather than replacing an existing wall plate, choose a centralized spot in your home. The panel acts as a mesh network repeater for Zigbee and Thread devices, so a central hallway or open-concept living area is ideal. Avoid placing it in direct sunlight, near sources of extreme heat or moisture, or behind thick masonry walls that could block wireless signals. For more tips on optimal device placement, check out our smart home network setup guide.
Step 2: Mounting the Smart Home Panel 3 Backplate
The backplate is the foundation of your installation. It houses the wiring terminals and provides the structural support for the heavy glass-fronted display. A secure, level mount is essential for both safety and aesthetics.
1. Locate the Studs or Prepare Anchors: Use a stud finder to locate the wooden or metal studs behind your drywall. Mounting directly into a stud provides the most secure hold. If your desired location does not align with a stud, you must use high-quality drywall anchors rated for the weight of the panel (at least 15 pounds).
2. Mark and Drill Pilot Holes: Hold the backplate against the wall at your desired height (typically around 48 to 52 inches from the floor for comfortable viewing and touching). Use your bubble level to ensure the plate is perfectly horizontal. Mark the screw holes with a pencil. Remove the plate and drill pilot holes into the studs or drywall. If drilling into tile or stone, use a specialized masonry bit and proceed slowly to prevent cracking.
3. Feed the Wires Through: Before securing the backplate to the wall, feed your household electrical wires through the large center cutout of the backplate.
4. Secure the Backplate: Align the backplate with your pilot holes and drive the mounting screws through the plate and into the wall or anchors. Do not overtighten the screws, as this can warp the plastic backplate and prevent the display from snapping on correctly later. Give the plate a firm tug to ensure it is completely flush and secure against the wall.
Step 3: Wiring and Electrical Connections
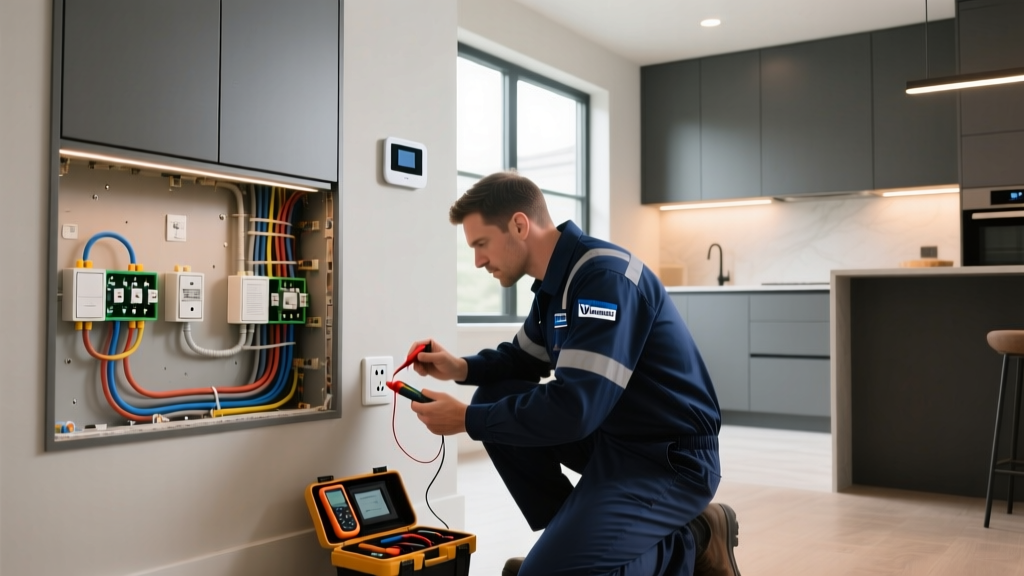
This is the most critical step of the installation. The Smart Home Panel 3 requires a neutral wire to function properly. Unlike older smart switches that could leak current through the load wire, the Panel 3 needs a dedicated neutral to power its always-on screen, Wi-Fi antenna, and mesh radios.
1. Identify Your Wires: You should have three main wires protruding from the wall box or gang box:
- Line (Hot): Usually black or red. This brings power from the breaker.
- Neutral: Usually white. This completes the circuit.
- Ground: Bare copper or green. This provides a safety path for stray current.
Note: If you are replacing an old thermostat or a switch that did not require a neutral wire, you may not have a neutral wire bundled in the back of the box. If this is the case, you will need to consult an electrician to pull a new neutral wire to the location.
2. Connect the Ground Wire: Always start with the ground wire for safety. Connect the bare copper or green ground wire from your wall to the green ground terminal or wire on the Smart Home Panel 3 backplate using a wire nut or a Wago lever connector. Give it a gentle tug to ensure a solid connection.
3. Connect the Neutral Wire: Connect the white neutral wire from your wall to the white neutral wire/terminal on the backplate. The Panel 3 draws continuous power, so a secure neutral connection is mandatory to prevent the screen from flickering or the device from rebooting randomly.
4. Connect the Line (Hot) Wire: Connect the black or red line wire from your wall to the black line wire/terminal on the backplate. If your installation involves controlling a specific hardwired circuit (like a whole-home lighting relay), you will also connect the Load wire to the designated red terminal. For standard hub-only installations, the load terminal may remain empty.
5. Tuck and Organize: Carefully fold and tuck the wires into the back of the wall box or the cavity behind the backplate. Ensure no bare copper is exposed outside of the connectors and that the wires are not pinched against the drywall or the screw terminals.
Step 4: Attaching the Panel and Powering Up
With the wiring complete and the backplate secured, it is time to attach the beautiful touchscreen display and bring the system to life.
1. Align the Display: Take the Smart Home Panel 3 display unit and align the connector pins on the back of the screen with the corresponding port on the mounted backplate. The connectors are keyed, so they will only fit in one orientation.
2. Snap into Place: Gently press the display against the backplate until you hear the retaining clips click into place. The panel should sit flush against the wall with no visible gaps. If it feels loose, remove the display and check for wires that might be pushing against the back of the screen.
3. Restore Power: Head back to your electrical panel and flip the breaker back to the ON position.
4. Observe the Boot Sequence: Within 10 to 15 seconds, the Smart Home Panel 3 should illuminate. You will see the manufacturer logo followed by a loading animation as the internal operating system boots up. If the screen remains completely black, turn the breaker back off immediately and double-check your Line and Neutral connections.
Step 5: Network Configuration and App Setup
The hardware is installed, but the panel is just a blank canvas until it is connected to your network and configured via the companion app.
1. Connect to Wi-Fi: The touchscreen will prompt you to select a Wi-Fi network. Important: The Smart Home Panel 3 requires a 2.4GHz Wi-Fi network for the initial setup and optimal range. If your router uses a combined SSID for 2.4GHz and 5GHz, you may need to temporarily separate them in your router settings or move closer to the router to ensure it grabs the 2.4GHz band. Enter your Wi-Fi password using the on-screen keyboard.
2. Download the Companion App: On your smartphone, download the official Smart Home Panel app from the iOS App Store or Google Play Store. Create an account or log in with your existing credentials.
3. Pair the Panel: The app should automatically detect the newly powered-on Panel 3 on your local network. Follow the on-screen prompts to claim the device to your home. The panel will likely prompt you to install a firmware update immediately. Allow this process to complete; it can take up to 15 minutes, and the screen will restart several times.
4. Configure Radios and Pair Devices: Once updated, navigate to the 'Hub Settings' on the panel. Enable the Zigbee and Thread radios. You can now begin pairing your smart bulbs, sensors, and locks directly to the panel. For a comprehensive list of compatible devices and pairing strategies, visit our best smart home hubs review section.
5. Create Rooms and Automations: Use the panel or the app to assign your devices to specific rooms. You can then build complex smart home automations, such as turning off all lights and locking the doors when you tap the 'Goodnight' scene on the panel.
Troubleshooting Common Installation Issues
Even with careful preparation, you might encounter a few hiccups during the installation or setup process. Here is how to resolve the most common issues.
The Screen is Flickering or Rebooting Randomly
This is almost always caused by a loose or high-resistance Neutral wire connection. The panel requires a steady stream of current. Turn off the breaker, remove the display, and inspect the neutral wire nut or Wago connector. Ensure the copper wires are twisted tightly together and that no bare wire is exposed. If the issue persists, check your breaker to ensure it is not tripping due to an overloaded circuit.
Wi-Fi Connection Fails During Setup
If the panel cannot find your network or rejects the password, verify that you are connecting to a 2.4GHz network. Many modern mesh routers use band steering, which can confuse smart home devices. Try moving a temporary Wi-Fi access point or your smartphone (acting as a hotspot on the 2.4GHz band) within a few feet of the panel just for the initial setup. Once connected, the panel will remember the network credentials.
Zigbee or Thread Devices Won't Pair
If the panel is online but refuses to pair local devices, check for wireless interference. Microwaves, cordless phones, and unshielded USB 3.0 cables can severely disrupt Zigbee signals. Ensure the panel is not mounted directly behind a large television or inside a metal gang box, which acts as a Faraday cage and blocks radio frequencies.
Touchscreen is Unresponsive or Inaccurate
If the screen registers touches in the wrong locations or ignores taps, it may need a calibration reset. Navigate to Settings > Display > Touch Calibration on the panel. If the screen is completely frozen, locate the small, recessed physical reset button on the bottom edge of the display. Use a paperclip to press and hold the button for 10 seconds to force a hard reboot.
Frequently Asked Questions
Can I install the Smart Home Panel 3 without a neutral wire?
No. Unlike basic smart switches that can operate without a neutral wire by trickling current through the light bulb, the Smart Home Panel 3 features a high-resolution, always-on display and powerful internal mesh radios. These components require a dedicated neutral wire to provide a continuous, stable circuit. If your wall box lacks a neutral wire, you will need to hire an electrician to run a new cable from the nearest junction box.
Does the Panel 3 support local control if the internet goes down?
Yes, one of the greatest advantages of the Smart Home Panel 3 is its robust local processing engine. Once your Zigbee and Thread devices are paired directly to the panel, your automations, scenes, and physical touch controls will continue to function perfectly even if your home internet connection drops or the cloud servers experience an outage. Voice control via cloud-based assistants (like Alexa or Google Assistant) will be unavailable during an outage, but local app control and wall-panel control remain fully operational.
How do I perform a factory reset on the Smart Home Panel 3?
If you are moving homes, experiencing severe software corruption, or transferring ownership of the device, a factory reset is necessary. To perform a hard factory reset, locate the pinhole reset button on the bottom bezel of the display. While the panel is powered on, insert a paperclip or SIM-ejector tool into the hole and press the hidden button for 15 to 20 seconds. The screen will go black, display a wiping animation, and reboot to the original out-of-the-box welcome screen. Note that this will erase all local device pairings and network settings.
Can I mount the Panel 3 on a tile, brick, or stone wall?
Absolutely. The backplate can be mounted on virtually any solid surface. However, you cannot use standard drywall anchors for masonry or tile. You will need to use a hammer drill with a carbide-tipped masonry bit to drill pilot holes, and then insert lead or plastic masonry anchors designed for the weight of the panel. When drilling into tile, use a specialized diamond-tipped glass and tile bit, and apply masking tape over the drill spot to prevent the bit from wandering and scratching the tile glaze.
What is the difference between the Smart Home Panel 3 and traditional smart hubs?
Traditional smart hubs are usually small, black plastic boxes that sit on a desk or plug directly into a wall outlet behind a sofa. They lack a user interface, requiring you to use your smartphone for all interactions. The Smart Home Panel 3 replaces the need for a hidden hub by combining the hub's internal radios and processing power with a beautiful, wall-mounted touchscreen interface. This provides a dedicated, always-accessible control point for guests, children, and family members who might not have the smart home app installed on their personal phones. For more comparisons, explore our complete installation guides and hub reviews.
By following this guide, your Smart Home Panel 3 is now securely mounted, safely wired, and fully integrated into your connected ecosystem. Enjoy the convenience of true, centralized smart home control!