Smart Home Setup for Beginners: A Complete Step-by-Step Guide
Setting up a smart home can feel overwhelming, especially when you are surrounded by hundreds of devices, apps, & ecosystems that all promise to make your life easier. The truth is, building a connected home does not have to be complicated. With the right plan & a methodical approach, you can transform your living space into an intelligent, responsive environment — even if you have never touched a smart device before.
This guide walks you through every stage of a smart home setup for beginners, from choosing your ecosystem to automating your daily routines. Whether you live in a small apartment or a large house, these steps will help you build a reliable, scalable smart home that grows with your needs.
Project Overview
Difficulty Level: Beginner to Intermediate
Estimated Time: 2–4 hours for initial setup (expanding over days or weeks)
Budget Range: $150–$500 for a starter setup
Skills Required: Basic Wi-Fi knowledge, ability to download & use smartphone apps
Tools & Products You Will Need
Before diving into the installation process, gather the essential tools & products. You do not need everything at once — start with the basics & expand as you become more comfortable with your system.
Essential Items
- Smartphone or tablet (iOS or Android) for device setup & control
- Reliable Wi-Fi router — preferably a dual-band or tri-band mesh router for broader coverage
- Smart speaker or hub (Amazon Echo, Google Nest, or Apple HomePod) to serve as your central controller
- Smart bulbs or smart plugs — the easiest entry points for smart lighting & appliance control
- 2.4 GHz & 5 GHz Wi-Fi network — most smart devices require a 2.4 GHz connection
Optional but Recommended
- Smart thermostat for energy-efficient climate control
- Smart doorbell camera or security camera for home monitoring
- Smart door lock for keyless entry
- Smart sensors (motion, door/window, temperature) for automation triggers
- Network switch or Wi-Fi extender if you plan to add many devices
- Surge protector to protect your smart home hub & networking equipment
- Label maker or masking tape for labeling cables & devices during setup
For a deeper look at which devices pair best together, check out our guide on the best smart home devices to help you make informed purchasing decisions.
Step 1: Choose Your Smart Home Ecosystem
The single most important decision you will make when setting up a smart home is choosing your ecosystem. Your ecosystem determines which devices work together, how you control them, & what kind of automations you can create. Think of it as choosing the operating system for your entire home.
The Three Major Ecosystems
Amazon Alexa: Alexa offers the broadest device compatibility on the market. With thousands of supported products, you will rarely find a smart device that does not work with Alexa. The ecosystem excels at voice control, routines, & third-party integrations. If you want maximum flexibility & the widest selection of compatible hardware, Alexa is a strong choice.
Google Home: Google Home shines in its natural language processing & integration with Google services like Calendar, Maps, & YouTube. If you already use Gmail, Google Calendar, or Android phones, this ecosystem creates a seamless experience. Google Assistant tends to understand complex voice commands better than its competitors, making it ideal for users who rely heavily on voice control.
Apple HomeKit: HomeKit prioritizes privacy & security above all else. All communication is end-to-end encrypted, & Apple maintains strict certification requirements for compatible devices. The trade-off is a smaller selection of supported products & generally higher prices. If you are deeply invested in the Apple ecosystem — using an iPhone, iPad, Apple Watch, & Mac — HomeKit offers the most polished, integrated experience.
What About Matter?
Matter is a newer universal smart home standard backed by Amazon, Google, Apple, Samsung, & hundreds of other companies. Devices certified under Matter are designed to work across all major ecosystems simultaneously. When shopping for new devices, look for the Matter logo — it future-proofs your purchase & gives you the freedom to switch ecosystems later without replacing your hardware. Learn more in our overview of Matter & the future of smart homes.
Making Your Decision
Consider these questions before committing:
- What phone & computer do you use daily?
- Do you prefer voice control, app control, or a mix of both?
- How important is device compatibility vs. privacy?
- Do you want the simplest setup or the most customization options?
There is no wrong answer. Many households successfully mix ecosystems using Matter-compatible devices or bridging tools like Home Assistant. However, starting with one primary ecosystem keeps things simple while you learn the ropes.
Step 2: Prepare Your Network & Infrastructure
Your Wi-Fi network is the backbone of your smart home. Every connected device — from smart bulbs to security cameras — relies on a stable, robust network to function properly. Before adding dozens of devices, make sure your infrastructure can handle the load.
Assess Your Current Wi-Fi
Most standard routers provided by internet service providers can handle 10–15 smart devices before performance starts to degrade. If you plan to build a comprehensive smart home with 30 or more devices, you will likely need an upgrade.
Run a speed test in every room where you plan to install smart devices. Pay attention to signal strength in corners, basements, & upper floors — these are common dead zones that can cause devices to drop offline intermittently.
Upgrade to a Mesh Router System
Mesh Wi-Fi systems use multiple nodes placed throughout your home to create a single, seamless network. Unlike traditional range extenders, mesh systems maintain full speed & automatically route devices to the nearest node. Popular options include systems from Eero, Google Nest Wifi, TP-Link Deco, & Netgear Orbi.
For most homes, a two- or three-node mesh system provides excellent coverage. Place the primary node near your modem & position satellite nodes in areas with weak signals or high device density.
Set Up a Dedicated Smart Home Network
Many modern routers allow you to create a separate guest network or VLAN. Dedicating a network specifically for your smart devices offers several advantages:
- Security: Isolates smart devices from your personal computers & phones, limiting potential attack vectors
- Performance: Prevents smart devices from consuming bandwidth needed for streaming or video calls
- Organization: Makes it easier to manage & troubleshoot connected devices
Understand 2.4 GHz vs. 5 GHz Bands
Most smart home devices — especially bulbs, plugs, & sensors — operate exclusively on the 2.4 GHz band because it offers longer range & better wall penetration. Cameras & streaming devices often use 5 GHz for higher bandwidth. Make sure your router broadcasts both bands & that you know which network name (SSID) corresponds to each. Many setup failures happen simply because users try to connect a 2.4 GHz device to a 5 GHz network.
For a complete guide to optimizing your network for smart home use, visit our article on setting up Wi-Fi for smart homes.
Step 3: Install Your Core Smart Home Devices
With your ecosystem chosen & your network prepared, it is time to start installing devices. Follow this recommended order to build your smart home layer by layer, starting with the hub & working outward to accessories.
Set Up Your Smart Hub or Speaker
Your smart hub is the command center of your home. Follow these steps:
- Download the companion app for your chosen ecosystem (Amazon Alexa, Google Home, or Apple Home)
- Plug in your smart speaker or hub & wait for it to boot up — this usually takes 30–60 seconds
- Open the app & follow the on-screen setup wizard to connect the hub to your Wi-Fi network
- Sign in with your account & configure basic settings like your home address, voice preferences, & language
- Place the hub in a central location — a living room or hallway works well — where it can hear voice commands from multiple rooms
If you are using a dedicated hub like a Samsung SmartThings Hub or an Amazon Echo with built-in Zigbee, place it away from thick walls & metal objects that can interfere with wireless signals.
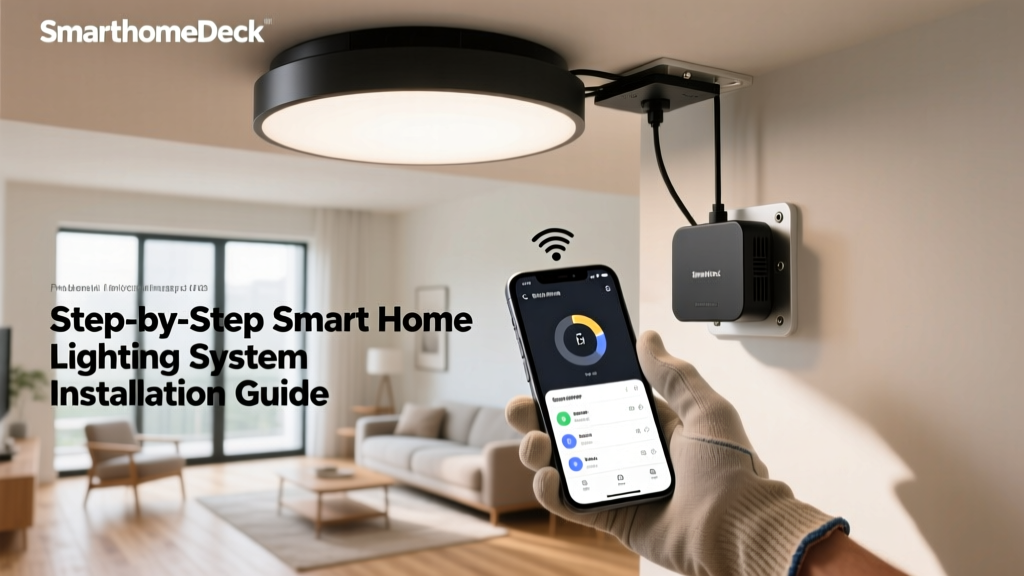
Install Smart Lighting
Smart lighting is the most popular starting point for beginners because it delivers immediate, visible results with minimal effort.
Smart Bulbs: Screw the bulb into any standard fixture, turn the power on, & use the manufacturer's app to pair it with your hub. Once connected, you can control brightness, color temperature, & even full RGB colors from your phone or with voice commands.
Smart Switches: These replace your existing wall switches & require basic wiring knowledge. Turn off power at the circuit breaker before installation. Most smart switches need a neutral wire — check your existing switch box to confirm one is available. If you are uncomfortable with electrical work, hire a licensed electrician or stick with smart bulbs instead.
Smart Plugs: The simplest option — plug them into any outlet, then plug a lamp or appliance into the smart plug. You instantly gain on/off control & scheduling capabilities for any device with a physical switch. For more tips, see our guide on smart lighting installation.
Set Up Smart Climate Control
A smart thermostat is one of the most impactful upgrades you can make. It learns your schedule, adjusts temperatures automatically, & can reduce your energy bills by 10–23% according to manufacturer studies.
- Turn off power to your HVAC system at the circuit breaker
- Remove your old thermostat & take a photo of the wiring for reference
- Install the new thermostat's baseplate & connect wires according to the manufacturer's labeling guide
- Attach the thermostat display & restore power
- Follow the on-screen setup & connect to Wi-Fi through the companion app
- Set your preferred schedule & enable eco-modes for energy savings
Not all HVAC systems are compatible with every smart thermostat. Before purchasing, use the compatibility checker on the manufacturer's website. Systems with heat pumps, radiant heating, or multi-zone setups may require professional installation.
Install Security & Monitoring Devices
Smart security devices give you peace of mind & can even lower your home insurance premiums.
Video Doorbell: Most smart doorbells can be installed in 15–30 minutes. If you have existing doorbell wiring, connect the new unit to those wires for continuous power. Battery-powered models offer more placement flexibility but require periodic recharging. Mount the doorbell at chest height (about 48 inches from the ground) for the best camera angle.
Security Cameras: Indoor cameras simply plug into an outlet & connect to Wi-Fi. Outdoor cameras may require drilling & weatherproof mounting hardware. Position cameras to cover entry points, driveways, & backyards. Make sure to adjust motion detection zones to avoid false alerts from passing cars or swaying trees.
Smart Locks: These replace your existing deadbolt & typically install in under an hour with just a screwdriver. After mounting, calibrate the lock through the app so it knows the fully locked & unlocked positions. Create unique access codes for family members & guests so you can track who enters & exits your home.
Step 4: Connect Everything & Create Automations
Individual smart devices are useful on their own, but the real magic happens when they work together. Automations allow your devices to respond to triggers — like time of day, motion detection, or your location — without any manual input from you.
Add Devices to Your Ecosystem
For each new device, follow this general process:
- Download the device manufacturer's app & create an account if needed
- Power on the device & put it into pairing mode (usually indicated by a blinking light)
- Connect the device to your Wi-Fi network through the manufacturer's app
- Link the manufacturer's account to your primary ecosystem (Alexa, Google Home, or Apple Home)
- Assign the device to a room for organized control
- Name the device something clear & voice-friendly — "Bedroom Lamp" works better than "Device_4F2B"
Pro tip: Add devices one at a time & test each one before moving on. This makes troubleshooting far easier if something goes wrong.
Create Rooms & Groups
Organize your devices by room within your smart home app. This allows you to issue commands like "Turn off all the lights in the kitchen" instead of controlling each bulb individually. You can also create groups that span multiple rooms — a "Downstairs" group, for example, lets you turn off every light on the ground floor with a single command.
Build Your First Automations
Start with simple, high-impact automations & gradually build more complex routines as you gain confidence.
Good Morning Routine: Triggered at a specific time on weekdays, this routine can turn on your bedroom lights gradually, adjust the thermostat to a comfortable temperature, start your coffee maker (via a smart plug), & read out your calendar events & weather forecast.
Goodnight Routine: Triggered by voice command or schedule, this locks all doors, turns off all lights, sets the thermostat to sleep mode, arms security cameras, & confirms that the garage door is closed.
Away Mode: Triggered when the last person leaves home (using geofencing via phone location), this turns off all lights, lowers the thermostat, activates security cameras, & starts the robot vacuum.
Motion-Activated Lighting: Using motion sensors, lights in hallways, bathrooms, or garages turn on automatically when someone enters & turn off after a period of inactivity. This is especially useful at night or for households with children & elderly family members.
Test Everything Thoroughly
After creating each automation, test it multiple times under different conditions. Verify that triggers fire correctly, actions execute in the right order, & the routine handles edge cases — like what happens if a device is temporarily offline. Most ecosystems let you view automation logs to see exactly what happened & when.
Explore more automation ideas in our collection of smart home automation ideas for every room.
Step 5: Secure & Maintain Your Smart Home
A smart home is only as good as its security. Connected devices introduce new entry points that malicious actors could potentially exploit. Taking a few proactive steps will keep your home — & your data — safe.
Strengthen Your Passwords
Use a unique, strong password for every smart home account. A password manager makes this easy to manage without having to memorize dozens of complex strings. Enable two-factor authentication (2FA) on every account that supports it — this adds a critical second layer of defense even if your password is compromised.
Keep Firmware Updated
Manufacturers regularly release firmware updates that patch security vulnerabilities & add new features. Enable automatic updates wherever possible. For devices that require manual updates, set a monthly reminder to check for & install any available updates.
Review Privacy Settings
Every smart home ecosystem has privacy settings that control what data is collected & how it is used. Review these settings during setup & revisit them periodically. You can often opt out of data sharing, delete voice recordings, & limit location tracking. For cameras & microphones, look for physical shutters or mute buttons that provide hardware-level privacy assurance.
Create a Device Inventory
Maintain a simple spreadsheet or document listing every smart device in your home, including:
- Device name & location
- Manufacturer & model number
- Account login used
- Wi-Fi network it is connected to
- Date of last firmware update
This inventory becomes invaluable when troubleshooting, replacing devices, or auditing your security posture.
Troubleshooting Common Smart Home Setup Issues
Even with careful planning, you will likely encounter a few hiccups during setup. Here are solutions to the most common problems beginners face.
Device Will Not Connect to Wi-Fi
Symptom: The device stays stuck on "connecting" or fails with a network error during setup.
Solutions:
- Confirm you are connecting to the 2.4 GHz band, not 5 GHz — most smart plugs, bulbs, & sensors only support 2.4 GHz
- Move the device closer to the router during initial setup, then relocate it after pairing is complete
- Check that your Wi-Fi password does not contain special characters that some devices cannot process
- Restart your router & try again
- Temporarily disable any band steering or "smart connect" features that merge 2.4 GHz & 5 GHz into a single SSID
Voice Commands Are Not Working
Symptom: Your smart speaker does not respond to voice commands or misunderstands them frequently.
Solutions:
- Check that the microphone is not physically muted — most speakers have a mute button with an LED indicator
- Reduce background noise from TVs, fans, or air conditioners near the speaker
- Re-train the wake word recognition in the app if your speaker supports it
- Verify that the device you are trying to control is still linked to your ecosystem & has not been accidentally removed
- Use simpler, more distinct device names — "Office Lamp" is easier for voice assistants to distinguish from "Office Fan"
Automations Fail to Trigger
Symptom: A routine that worked previously stops firing or only triggers inconsistently.
Solutions:
- Check that location services are enabled on your phone if the automation relies on geofencing
- Verify that the trigger device (sensor, camera, or schedule) is online & functioning
- Delete & recreate the automation — sometimes the configuration can become corrupted after app updates
- Check for conflicting automations that might be overriding or canceling each other
- Review automation logs in your ecosystem's app to identify exactly where the routine fails
Devices Go Offline Frequently
Symptom: Smart devices randomly disconnect from the network & show as "offline" in the app.
Solutions:
- Add a Wi-Fi extender or mesh node near the affected devices to improve signal strength
- Check your router's DHCP settings — if you have many devices, increase the DHCP lease time or reserve IP addresses for smart home devices
- Reduce the total number of connected devices by removing unused gadgets from the network
- Update your router's firmware to the latest version
- Consider a dedicated Zigbee or Z-Wave hub for sensors & low-power devices — these use separate wireless protocols that do not compete with your Wi-Fi
App Crashes or Fails to Load
Symptom: The smart home app freezes, crashes, or cannot find devices that are clearly powered on.
Solutions:
- Force-close the app & reopen it
- Clear the app cache in your phone's settings
- Update the app to the latest version from your app store
- Uninstall & reinstall the app if problems persist — your device configurations are stored in the cloud & will be restored when you sign back in
- Check the manufacturer's status page or social media for known outages
If you are dealing with a specific device issue, browse our complete smart home troubleshooting library for device-specific fixes.
Frequently Asked Questions
How much does it cost to set up a smart home for beginners?
A basic smart home setup can be achieved for $150–$300. This typically includes a smart speaker or hub ($30–$100), a few smart bulbs or plugs ($20–$80), & possibly a smart thermostat ($100–$250). More comprehensive setups with security cameras, smart locks, & sensors can range from $500 to $2,000 or more. The beauty of a modular approach is that you can start small & invest gradually as you discover which smart features add the most value to your daily life.
Do smart home devices work without internet?
Most smart home devices require an internet connection for initial setup, remote access, & cloud-based features like voice assistant integration. However, some devices retain basic local functionality during internet outages — smart bulbs can still be controlled via physical switches, & smart locks can still be operated with keypads or physical keys. If local control during outages is a priority, look for devices that support local protocols like Zigbee, Z-Wave, or Matter over Thread, which can communicate through a local hub without internet access.
Can I mix different smart home brands together?
Yes, & it is easier than ever thanks to platforms like Amazon Alexa, Google Home, & Apple HomeKit that act as universal controllers. You can use a Philips Hue bulb, a Ring doorbell, an Ecobee thermostat, & a Schlage lock all within the same ecosystem. The Matter standard further simplifies cross-brand compatibility. The key is ensuring each device supports your chosen primary ecosystem. Check the "Works with" badges on product packaging or the manufacturer's website before purchasing.
Are smart home devices secure from hackers?
Smart home devices carry inherent security risks, but you can significantly reduce those risks with proper precautions. Use strong, unique passwords for every account, enable two-factor authentication, keep firmware updated, & place devices on a separate network from your personal computers. Choose reputable brands that invest in security & provide regular software updates. Avoid cheap, no-name devices from unknown manufacturers, as these often lack security updates entirely. When configured properly, a smart home can be just as secure as any other connected technology you use daily.
What is the best smart home ecosystem for renters?
Renters should prioritize non-permanent, easily removable devices. Smart bulbs, smart plugs, battery-powered cameras, & smart speakers require no installation & can move with you when you relocate. Avoid hardwired devices like smart switches, thermostats, or wired doorbells unless your landlord gives permission. Amazon Alexa & Google Home tend to offer the most renter-friendly options because of their broad compatibility with plug-and-play devices. When you move, simply unplug everything, pack it up, & reconfigure it at your new address — the entire process takes about an hour.
Ready to Expand Your Smart Home?
Now that you have the fundamentals in place, explore our other guides to take your smart home to the next level:
- Best Smart Home Devices — Our top picks for every room & budget
- Smart Home Automation Ideas — Creative routines to simplify your life
- Smart Home Security Guide — Protect your home with connected cameras & locks
- Smart Home Energy Savings — Cut utility bills with intelligent climate & lighting control
Building a smart home is a journey, not a one-time project. Start with the basics, learn how your ecosystem works, & gradually add devices that solve real problems in your daily life. The setup you create today will evolve with you — becoming smarter, more intuitive, & more valuable with every device you add & every automation you refine. Welcome to the future of living.