Smart home installation is the process of setting up connected devices — such as smart lights, thermostats, cameras, locks, and speakers — so they work together seamlessly through a central hub or app. Whether you're adding a single smart bulb or wiring an entire house with automation, understanding the fundamentals of smart home installation will save you time, money, and frustration.
In this comprehensive guide, we'll walk you through everything you need to know about smart home installation from scratch. By the end, you'll understand what's involved, how to plan your setup, which devices to choose, and how to get everything running smoothly.
Difficulty Level: Beginner to Intermediate
Estimated Time: 2–6 hours (depending on the number of devices)
Cost Range: $50–$2,000+ (depending on scope)
Step 1: Understand What Smart Home Installation Actually Involves
Before you unbox a single device, it's important to understand what smart home installation really means. At its core, smart home installation is about connecting everyday household devices to the internet — or to each other — so you can control, monitor, and automate them remotely.
The Three Layers of Smart Home Installation
Every smart home project involves three fundamental layers:
- The Network Layer: This is your Wi-Fi network, mesh system, or dedicated smart home protocol (like Zigbee, Z-Wave, Thread, or Matter). It's the backbone that allows your devices to communicate.
- The Device Layer: These are the physical products you install — smart bulbs, plugs, cameras, sensors, thermostats, locks, and more.
- The Control Layer: This is how you interact with your smart home. It could be a smartphone app, a voice assistant like Amazon Alexa or Google Assistant, a wall-mounted panel, or a dedicated hub like Samsung SmartThings or Apple HomePod.
A successful smart home installation addresses all three layers. Skipping any one of them leads to unreliable performance, disconnected devices, and a frustrating experience.
Types of Smart Home Installations
Smart home installations generally fall into three categories:
- Starter Setup (1–5 devices): Ideal for beginners. Typically includes a smart speaker, a few smart bulbs or plugs, and maybe a smart thermostat. Setup takes 1–2 hours.
- Partial Home Setup (6–20 devices): Covers multiple rooms with lighting, security cameras, sensors, and climate control. Expect 3–5 hours of setup and configuration.
- Whole-Home Installation (20+ devices): A comprehensive system with integrated lighting, security, HVAC, entertainment, and automation routines. This can take a full day or more, and you may want to consider hiring a professional installer for hardwired components.
Step 2: Plan Your Smart Home Before You Buy Anything
The biggest mistake most people make with smart home installation is buying devices impulsively without a plan. This leads to incompatible products, wasted money, and a fragmented system that doesn't work well together. Here's how to plan properly.
Choose Your Ecosystem
The first major decision is choosing a smart home ecosystem. This determines which devices will work together and how you'll control them. The major ecosystems include:
- Amazon Alexa: The widest device compatibility. Works with thousands of products. Great for voice control and routines.
- Google Home: Excellent integration with Google services, strong voice recognition, and good multi-room audio support.
- Apple HomeKit: Best for iPhone users. Strong privacy protections, but fewer compatible devices (though Matter support is expanding this).
- Samsung SmartThings: Platform-agnostic hub that supports Zigbee, Z-Wave, and Wi-Fi devices. Great for advanced automations.
- Home Assistant: An open-source platform for tech-savvy users who want total control and local processing.
You don't have to commit to just one — many devices work across multiple platforms — but having a primary ecosystem simplifies your setup significantly.
Audit Your Wi-Fi Network
Your Wi-Fi network is the foundation of your smart home. Before adding dozens of connected devices, make sure your network can handle the load.
- Check your router's device limit: Most consumer routers support 20–30 devices. If you're planning a larger installation, consider upgrading to a mesh Wi-Fi system.
- Test coverage in every room: Walk through your home with your phone and check signal strength in every corner. Dead zones mean dead smart devices.
- Consider a separate IoT network: Many modern routers let you create a guest network or VLAN. Putting all your smart home devices on a separate network improves security and reduces congestion on your main network.
- Check your internet speed: Smart home devices don't require much bandwidth individually, but security cameras and smart displays can add up. A minimum of 25 Mbps download speed is recommended for a basic smart home; 100+ Mbps for homes with multiple cameras.
Map Out Your Rooms and Priorities
Create a simple floor plan or room-by-room list. For each room, note which smart home features matter most to you:
- Smart lighting (bulbs, switches, or strips)
- Climate control (thermostats, smart vents, fans)
- Security (cameras, door/window sensors, smart locks)
- Entertainment (smart speakers, streaming devices, smart TVs)
- Convenience (smart plugs, robotic vacuums, smart blinds)
Prioritize based on your daily routines. If you always forget to turn off lights, start with smart lighting. If security is your top concern, begin with cameras and sensors. For more ideas, check out our guide to the best smart home devices for beginners.
Step 3: Gather Your Tools and Products
Having the right tools and products on hand before you start will make your smart home installation go smoothly. Here's a comprehensive checklist.
Essential Tools
- Smartphone or tablet (for device setup and app configuration)
- Phillips-head and flathead screwdrivers
- Power drill with bits (for mounting cameras, doorbells, and sensors)
- Wire strippers and electrical tape (for hardwired devices like smart switches)
- Voltage tester (critical for any electrical work)
- Level (for mounting devices straight)
- Measuring tape
- Ladder or step stool (for ceiling-mounted sensors and outdoor cameras)
- Pencil and painter's tape (for marking drill holes)
Essential Products
- Smart hub or speaker: Your central control point (e.g., Amazon Echo, Google Nest Hub, Apple HomePod, or Samsung SmartThings Station)
- Smart bulbs or switches: Choose based on your needs — smart switches replace wall switches, while smart bulbs screw into existing fixtures
- Smart plugs: The easiest entry point for smart home — plug in any lamp or appliance and control it remotely
- Smart thermostat: One of the highest-impact devices for comfort and energy savings
- Security cameras or video doorbell: For monitoring your home inside and out
- Door/window sensors: Trigger automations when doors open or close
- Motion sensors: Turn lights on and off automatically based on occupancy
Optional but Recommended
- Wi-Fi mesh system (if your current router can't cover your whole home)
- Smart home hub with Zigbee/Z-Wave support (reduces Wi-Fi congestion)
- Surge protector or UPS (to keep your hub online during brief power outages)
- Cable management supplies (zip ties, cable clips, cord covers)
- Label maker (to label switches, plugs, and cables for easy identification)
Step 4: Install and Configure Your Smart Home Devices
Now comes the exciting part — actually installing your devices. Follow this systematic approach to ensure everything connects properly and works together.
Set Up Your Hub or Central Controller First
Before connecting any individual devices, set up your smart home hub or primary smart speaker. This is the brain of your system.
- Plug in your hub and wait for it to boot up completely.
- Download the companion app on your smartphone.
- Create your account and follow the on-screen setup instructions.
- Connect the hub to your Wi-Fi network (use 2.4 GHz for most smart home devices, as it has better range).
- Enable any voice assistant features you want to use.
- Update the hub's firmware if prompted — always do this before adding devices.
Install Smart Lighting
Smart lighting is usually the first category people tackle, and for good reason — it's relatively easy and has an immediate impact on your daily life.
For smart bulbs:
- Turn off the light switch.
- Remove the existing bulb.
- Screw in the smart bulb.
- Turn the switch back on.
- Open the bulb's app and follow the pairing instructions (usually involves the bulb blinking a few times).
- Name the bulb and assign it to a room.
For smart switches (requires basic electrical work):
- Turn off power at the circuit breaker — never skip this step.
- Use a voltage tester to confirm the power is off.
- Remove the existing switch plate and switch.
- Note the wiring configuration (take a photo for reference).
- Connect the smart switch wires to the corresponding house wires (line, load, neutral, and ground).
- Secure the switch in the wall box and attach the faceplate.
- Restore power at the breaker.
- Follow the app's setup process to connect the switch to your network.
For a detailed walkthrough, see our complete guide to installing smart light switches.
Install Smart Thermostats
A smart thermostat can reduce your energy bills by 10–15% while keeping your home more comfortable.
- Turn off power to your HVAC system at the breaker.
- Remove your old thermostat's faceplate (take a photo of the wiring).
- Label each wire with the included tags (R, W, Y, G, C, etc.).
- Disconnect the wires and remove the old baseplate.
- Install the new thermostat's baseplate, threading the wires through.
- Connect each wire to the corresponding terminal on the new thermostat.
- Attach the faceplate and restore power.
- Follow the on-screen setup wizard and connect to Wi-Fi.
Important note: Many smart thermostats require a C-wire (common wire) for continuous power. If your current setup doesn't have one, you may need a C-wire adapter kit or professional installation.
Install Security Cameras and Doorbells
Security devices are among the most impactful smart home upgrades you can make.
For wireless/battery cameras:
- Choose mounting locations with good Wi-Fi signal and a clear field of view.
- Use the included template to mark drill holes.
- Drill holes and insert wall anchors.
- Mount the camera bracket and attach the camera.
- Power on the camera and follow the app's setup process.
- Adjust the angle using the live preview in the app.
For wired cameras and video doorbells:
- Turn off power to your existing doorbell at the breaker.
- Remove the old doorbell button and chime.
- Connect the wires to the new doorbell's terminals.
- Mount the new doorbell and attach the faceplate.
- Restore power and complete app setup.
- Configure motion zones and notification preferences.
Learn more about choosing the right placement in our security camera placement guide.
Install Sensors and Smart Plugs
These are the simplest devices to install but have an outsized impact on automation.
Door/window sensors: Peel the adhesive backing and stick one piece on the door/window and the other on the frame, aligned when closed. Open the app, add the sensor, and name it.
Motion sensors: Mount at chest height (about 4–5 feet) in a corner or on a wall facing the area you want to monitor. Avoid pointing them at heat sources or windows with direct sunlight.
Smart plugs: Simply plug them into an outlet, plug your lamp or appliance into the smart plug, and follow the app's pairing process. Name the plug and assign it to a room.
Step 5: Connect Everything and Create Automations
Having individual smart devices is nice, but the real magic of smart home installation happens when everything works together. This is where automations come in.
Connect Devices to Your Central Hub
If you're using a hub like SmartThings, Home Assistant, or an Echo with a built-in Zigbee radio, add all your devices to the hub so they can communicate with each other.
- Open your hub's app.
- Tap "Add Device" or the "+" icon.
- Select the device type or scan the QR code on the device.
- Follow the pairing instructions (some devices require you to press a button, others pair automatically).
- Name each device clearly (e.g., "Living Room Lamp" instead of "Smart Bulb 3").
- Assign devices to rooms for easy grouping and voice control.
Create Useful Automations and Routines
Automations are the heart of a smart home. Here are some high-value automations to set up right away:
- Good Morning: At sunrise, gradually brighten bedroom lights, start the coffee maker (via smart plug), and read the weather forecast through your smart speaker.
- Leaving Home: When your phone leaves the home's geofence, turn off all lights, lock the doors, set the thermostat to eco mode, and arm security cameras.
- Movie Night: With a single voice command, dim the living room lights to 20%, close the smart blinds, and turn on the TV.
- Security Alert: If a door opens between midnight and 6 AM, turn on all exterior lights, start recording on security cameras, and send a push notification.
- Energy Saver: If no motion is detected in a room for 30 minutes, turn off the lights and smart plugs in that room.
Set Up Voice Control
Voice control is one of the most convenient aspects of a smart home. To get the best experience:
- Give each device a unique, intuitive name that's easy to say.
- Create groups (e.g., "all lights," "downstairs," "bedroom") for batch commands.
- Set up routines for complex multi-step actions triggered by a single phrase.
- Test voice commands to make sure your assistant understands them correctly.
Test Everything Thoroughly
Before you consider your installation complete, run through a full test:
- Test every device individually through the app.
- Test every device with voice commands.
- Run each automation and verify it triggers correctly.
- Test automations at different times of day to check scheduling.
- Walk through your home and check that sensors detect motion and door openings reliably.
- Verify that security cameras record and send notifications properly.
- Check that all devices reconnect automatically after a Wi-Fi interruption (restart your router to test this).
Troubleshooting Common Smart Home Installation Problems
Even with careful planning, you'll likely encounter some issues during your smart home installation. Here are the most common problems and how to fix them.
Device Won't Connect to Wi-Fi
- Make sure you're connecting to the 2.4 GHz band — most smart home devices don't support 5 GHz.
- Move closer to the router during initial setup.
- Check that your Wi-Fi password doesn't contain special characters that some devices can't process.
- Restart both the device and your router.
- Factory reset the device (usually by holding a button for 10–15 seconds) and try again.
Devices Keep Going Offline
- Your router may have too many connected devices. Check its device limit and consider upgrading.
- Assign static IP addresses or DHCP reservations to your smart home devices in your router settings.
- Move the device closer to the router or add a Wi-Fi extender or mesh node.
- Check for firmware updates for both the device and your router.
- If using Zigbee or Z-Wave, add more mains-powered devices to strengthen the mesh network.
Voice Commands Aren't Working
- Make sure the device is linked to your voice assistant's app (e.g., enable the skill in the Alexa app).
- Check that device names don't conflict with each other or with common words.
- Re-discover devices in your voice assistant app.
- Test with specific commands ("Alexa, turn on the kitchen ceiling light" vs. "Alexa, turn on the light").
Automations Aren't Triggering
- Verify that the trigger conditions are set correctly (time, sensor state, geofence, etc.).
- Check that all devices involved in the automation are online and responding.
- Some automations require a hub to be running — make sure your hub is powered on and connected.
- Review the automation log (available in most apps) to see if it triggered but failed to execute an action.
Smart Switch Doesn't Work After Installation
- Double-check that the power is restored at the breaker.
- Verify all wire connections are tight and correct.
- Confirm that your switch box has a neutral wire — many smart switches require one.
- Make sure the switch is compatible with your bulb type (some smart switches don't work with certain LED bulbs).
Frequently Asked Questions
Do I need a smart home hub, or can I just use Wi-Fi devices?
For a small setup with just a few Wi-Fi devices, you don't strictly need a dedicated hub. Your smartphone and the individual device apps will work fine. However, as your smart home grows beyond 10–15 devices, a hub becomes increasingly valuable. Hubs reduce Wi-Fi congestion by using dedicated protocols like Zigbee or Z-Wave, enable local processing (so automations work even if the internet goes down), and provide a unified app for managing all your devices. If you're planning to expand over time, investing in a hub early will save you headaches later.
How much does a full smart home installation cost?
The cost varies enormously based on scope. A basic starter kit (smart speaker, a few bulbs, and a smart plug) can cost as little as $50–$150. A mid-range setup covering lighting, security, and climate for a typical 3-bedroom home typically runs $500–$1,500. A premium whole-home installation with hardwired switches, multiple cameras, smart locks, motorized blinds, and professional installation can cost $3,000–$10,000 or more. The good news is that you can start small and expand gradually, spreading the cost over months or years. Check our smart home budget planner for help estimating your costs.
Can I install smart home devices in a rental apartment?
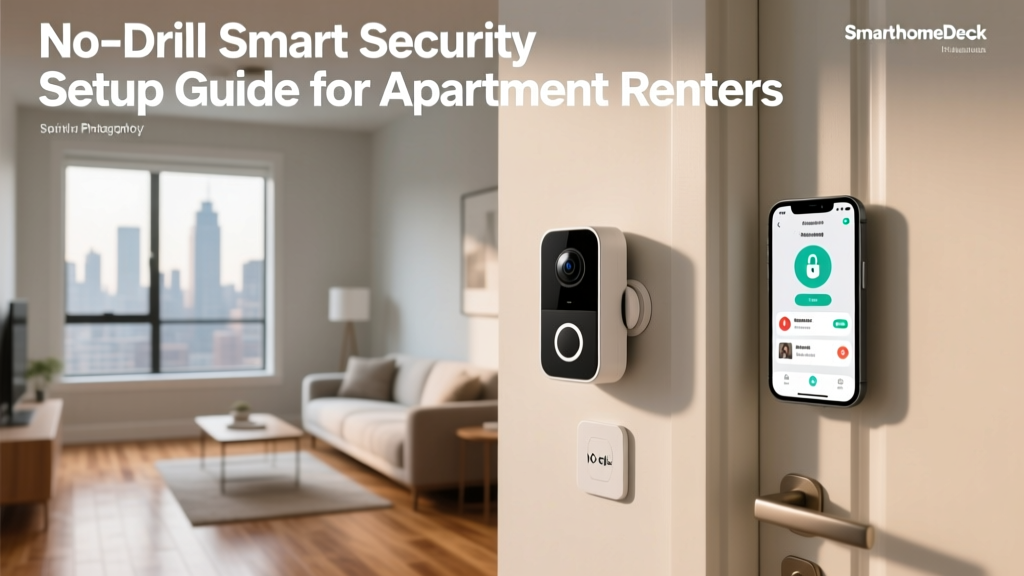
Yes, absolutely — but with some limitations. Smart bulbs, smart plugs, sensors, and battery-powered cameras are all renter-friendly because they don't require any permanent modifications. Smart switches and thermostats involve wiring changes, so you'll need your landlord's permission (and you should keep the original devices to reinstall when you move out). Wireless doorbells and cameras that mount with adhesive strips are also great for rentals. Always check your lease agreement before making any modifications, and document the original state of everything before you start.
Is smart home installation safe, or are there security risks?
Smart home devices are generally safe when installed and configured properly, but there are real security considerations. To protect your smart home: use strong, unique passwords for every device and app; enable two-factor authentication wherever available; keep all device firmware updated; put smart home devices on a separate Wi-Fi network or VLAN; disable remote access features you don't use; and buy devices from reputable manufacturers that provide regular security updates. Avoid cheap, no-name devices from unknown brands, as they may have unpatched vulnerabilities and lack ongoing support. For a deeper dive, read our smart home security and privacy guide.
Should I hire a professional for smart home installation?
It depends on the complexity of your project and your comfort level with technology and basic electrical work. If you're installing a few smart bulbs, plugs, and a camera, DIY is perfectly fine — the apps walk you through every step. However, you should consider hiring a professional if: you need to install hardwired devices and aren't comfortable working with electrical wiring; you want a whole-home system with integrated lighting, audio, and security; you're building a new home and want smart home wiring built into the walls; or you simply don't have the time or patience to troubleshoot issues. A professional installer can also help you choose the right products, design automations, and provide ongoing support. Visit our professional installation guide to learn more about what to expect and how to find a qualified installer.
Final Thoughts on Smart Home Installation
Smart home installation doesn't have to be overwhelming. By understanding the three layers — network, devices, and control — and following a methodical approach, you can build a reliable, useful smart home that makes your daily life easier and more enjoyable.
Start small, plan carefully, and expand gradually. The beauty of modern smart home technology is that you can begin with a single smart plug and grow into a fully automated home over time. Every device you add makes the next one easier to install and configure.
Whether you're looking to save energy with a smart thermostat, improve security with cameras and sensors, or simply add convenience with voice-controlled lighting, smart home installation is one of the most rewarding home improvement projects you can undertake. And now that you understand what's involved, you're ready to get started.
Browse our complete library of smart home guides for more in-depth tutorials, product recommendations, and installation walkthroughs for every type of smart home device.