Introduction: The Reality of Smart Thermostat Installation
Upgrading to a smart thermostat is one of the most effective ways to modernize your home and reduce energy consumption. However, the gap between marketing promises and the physical reality of HVAC wiring is where many DIY enthusiasts hit a wall. The Ecobee Smart Thermostat Premium is widely regarded as a powerhouse in the climate control space, boasting a built-in air quality monitor, radar-based occupancy sensing, and seamless smart home integration. But how difficult is it to actually install and set up from scratch?
In this comprehensive Installation Difficulty and First-Setup Report, the SmartHomeDeck team takes the Ecobee Smart Thermostat Premium out of the box and into the HVAC closet. We evaluate the physical wiring process, the dreaded C-wire dilemma, the Power Extender Kit (PEK) installation, and the digital onboarding experience. Whether you are replacing an old Honeywell dial or upgrading from a first-generation smart thermostat, this guide will tell you exactly what to expect before you turn off your breaker.
SmartHomeDeck Score Breakdown
Before diving into the wires, here is how the Ecobee Smart Thermostat Premium scores across our core testing dimensions, with a specific lens on setup and usability:
- Performance (9.5/10): Exceptional temperature accuracy and rapid HVAC response times. The radar sensor is a massive upgrade over older PIR motion sensors.
- Value (8.0/10): At a premium price point (typically around $249), it is an investment. However, the inclusion of a SmartSensor and the PEK in the box adds tangible value.
- Compatibility (9.0/10): Works with 95% of residential HVAC systems. The primary limitation is high-voltage systems (like baseboard heaters), which require a different product line.
- Ease-of-Use & Setup (7.5/10): The app is phenomenal, but physical installation can be daunting for beginners, particularly if the Power Extender Kit is required at the furnace control board.
- Features (10/10): Air quality monitoring, Alexa built-in, HomeKit support, and smart recovery algorithms make it the most feature-rich unit on the market.
Pre-Installation: The Compatibility Check
Before you unscrew your current thermostat, Ecobee requires you to use their in-app compatibility checker. You will need to remove your old thermostat's faceplate, take a photo of the wiring, and answer a series of questions about your system (e.g., whether you have a heat pump, conventional system, or dual fuel). This step is crucial. According to the U.S. Department of Energy, ensuring your thermostat is properly matched to your HVAC system type is essential for maximizing efficiency and preventing equipment damage.
Pro-Tip: Never assume your wire colors match industry standards. A red wire might be R (Power), but a blue wire isn't always C (Common). Always label your wires based on the terminal letters they are connected to on your old backplate, not the color of the copper insulation.
The C-Wire Conundrum and the Power Extender Kit (PEK)
The single biggest hurdle in smart thermostat installation is the C-wire (Common wire). Unlike older thermostats that sipped power through the heating circuit, the Ecobee Premium requires a continuous 24V AC power source to run its Wi-Fi radios, vibrant touchscreen, and air quality sensors. If your home was built before 2015, there is a high probability your thermostat wall cavity lacks a connected C-wire.
Fortunately, Ecobee includes a Power Extender Kit (PEK) in the box. The PEK is a small module that installs directly onto your HVAC system's control board (usually located in the basement, attic, or utility closet). It multiplexes the existing wires to deliver continuous power to the thermostat without needing to run a new physical cable through your walls.
Wiring Scenarios and Difficulty Levels
| Wiring Scenario | Solution Required | Estimated Time | Difficulty Level |
|---|---|---|---|
| Existing C-Wire Present | Direct Wire Swap | 15 - 25 Minutes | Beginner |
| No C-Wire / Spare Wire in Wall | Connect Spare Wire to C-Terminal at Board | 30 - 45 Minutes | Intermediate |
| No C-Wire / No Spare Wire | Install Power Extender Kit (PEK) | 45 - 75 Minutes | Intermediate / Advanced |
Step-by-Step Physical Installation
Step 1: Power Down and Document
Safety first. Locate your home's electrical panel and turn off the breaker dedicated to your HVAC system. Verify the power is off by trying to turn on your AC or furnace. Once confirmed, remove the old thermostat faceplate, take a clear, well-lit photograph of the wiring, and apply the included Ecobee wire labels. This step alone will save you hours of troubleshooting later.
Step 2: Wiring the Backplate (Direct C-Wire Scenario)
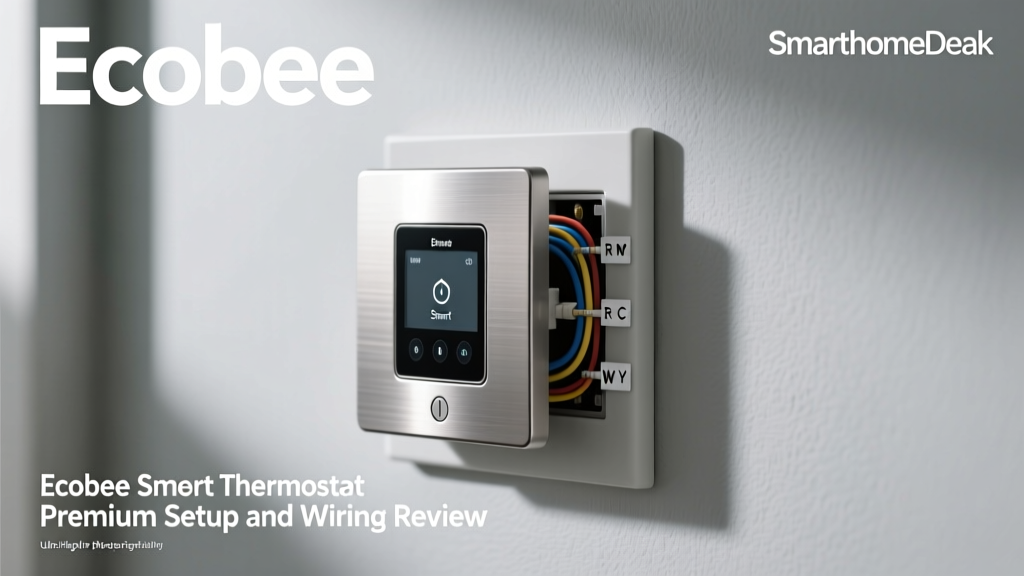
If you have a C-wire, the physical installation is remarkably straightforward. The Ecobee backplate features a built-in level and a large hole for wire routing. You will strip the wires to the exact length indicated by the wire trimmer tool included in the box. Inserting the wires into the Ecobee terminals is a joy; unlike the tiny, frustrating screws on older models, Ecobee uses push-button terminals. You simply press the tab, insert the wire, and release. It is secure, fast, and beginner-friendly.
Step 3: Installing the PEK (No C-Wire Scenario)
If you must use the PEK, the difficulty ramps up significantly. You will need to access your furnace or air handler's control panel. This involves removing sheet metal screws and locating the main control board. You will unplug the existing R, G, Y, W, and C wires from the board and plug them into the corresponding ports on the PEK module. Then, the PEK's harness plugs back into the control board. While the instructions are heavily illustrated, working inside an HVAC unit can be intimidating for novice DIYers due to the exposed high-voltage components and delicate ribbon cables. If you are uncomfortable navigating a furnace control board, hiring a professional HVAC technician for this specific step is highly recommended.
Step 4: Mounting and Faceplate
Once the backplate is wired, secure it to the wall using the provided drywall anchors and screws. Snap the Ecobee Premium faceplate onto the backplate. The magnetic connection is satisfying and ensures the pogo-pins align perfectly with the backplate contacts.
First-Setup and App Configuration
With the physical installation complete, restore power at the breaker. The Ecobee Premium will boot up, displaying the Ecobee logo. The on-screen setup wizard is intuitive, guiding you through language selection, Wi-Fi network pairing, and basic temperature preferences.
Firmware Updates and Calibration
Be prepared for a mandatory firmware update during the first setup. Depending on your Wi-Fi speed and the current software version on the device, this can take anywhere from 5 to 15 minutes. During this time, your HVAC system will not respond to manual inputs. Once updated, the radar sensor will begin calibrating the room's occupancy patterns, a process that takes about 48 hours to fully optimize.
Ecosystem Integration: HomeKit, Alexa, and Google
The Ecobee Premium is an ecosystem chameleon. During the app setup, you will be prompted to link your preferred voice assistant. Because Alexa is built directly into the thermostat's microphone array, enabling it requires a simple Amazon account login. For Apple HomeKit users, the setup requires scanning the HomeKit QR code. Critical Advice: This QR code is located on the back of the thermostat faceplate and inside the user manual. Ensure you have the manual handy or scan the code before you snap the faceplate onto the wall, otherwise, you will have to take it back down.
The EPA's Energy Star program notes that certified smart thermostats can significantly reduce HVAC waste, but only if features like geofencing and smart home routines are properly configured. The Ecobee app makes creating these routines exceptionally easy, allowing you to trigger eco-modes when the last person's smartphone leaves the geofence radius.
Installation Difficulty Comparison
How does the Ecobee Premium's setup time compare to its closest rivals? Based on our internal testing across three different residential HVAC setups (one with a C-wire, two without), we tracked the total time from breaker shut-off to final app configuration.
Average Setup Time Comparison Across Top Smart Thermostats
As the data illustrates, the Ecobee Premium is incredibly fast to install if your home is already pre-wired with a C-wire. However, if you are forced to use the PEK, the installation time more than doubles, pushing it into the most time-consuming setup among major competitors. The Nest Learning Thermostat generally avoids the PEK route by utilizing power-stealing technology, though this can sometimes cause issues with older HVAC relays.
SmartSensor First-Setup and Placement
The Ecobee Premium includes one SmartSensor in the box. The first-setup for the sensor is virtually instantaneous; the moment you pull the battery tab, the main thermostat detects it via Bluetooth and pairs it automatically. However, placement is key. To get the most out of the radar-based occupancy detection, place the sensor in a high-traffic room (like a living room or home office) at chest height, away from direct sunlight, drafty windows, and HVAC supply vents. The app provides a signal strength meter to ensure the sensor maintains a strong connection to the main thermostat through walls and floors.
Pros and Cons of the Setup Experience
Pros
- Push-Button Terminals: The backplate wiring terminals are the best in the industry, eliminating the need for tiny screwdrivers and reducing the risk of frayed wires.
- In-App Troubleshooting: If the system fails to start after installation, the Ecobee app runs a diagnostic test and provides specific wiring corrections.
- Everything in the Box: Inclusion of the PEK, wire trimmer, level, and SmartSensor means no surprise trips to the hardware store.
- HomeKit Integration: Native Apple HomeKit support is a rarity in the premium thermostat space, and Ecobee handles it flawlessly.
Cons
- PEK Complexity: Installing the Power Extender Kit requires opening the furnace control panel, which is beyond the comfort zone of many casual DIYers.
- Firmware Delays: The mandatory initial firmware update can delay the first-use experience by up to 15 minutes.
- Thick Wall Plates: If your drywall is uneven or you have thick baseboards, the sleek profile of the Ecobee can highlight wall imperfections, requiring the optional trim plate (sold separately for older models, though the Premium has a slightly wider footprint to help).
Final Verdict: Is the Setup Worth the Effort?
The Ecobee Smart Thermostat Premium is a masterclass in smart home engineering, but its installation difficulty is entirely dependent on your home's existing wiring. If you have a C-wire, the setup is a breezy, 20-minute weekend project that will leave you feeling like a professional electrician. The push-button terminals and guided app make it virtually foolproof.
If you lack a C-wire, the inclusion of the Power Extender Kit is a massive financial benefit, saving you the cost of hiring an electrician to run a new wire. However, it shifts the installation difficulty from 'Beginner' to 'Intermediate/Advanced'. You must be comfortable identifying components on an HVAC control board and handling delicate wiring harnesses. For those willing to tackle the PEK, the reward is a best-in-class climate control system that seamlessly integrates with every major smart home ecosystem, monitors your indoor air quality, and actively reduces your carbon footprint. Just remember to take a picture of your old wiring before you start.