The 'Ten-Minute Install' Myth: A Reality Check
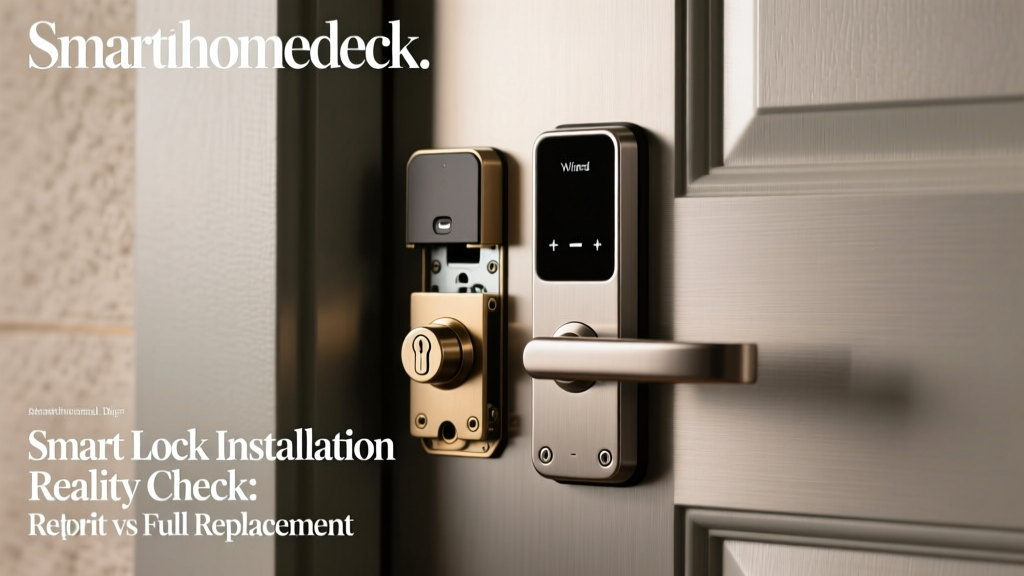
If you have ever watched a commercial for a smart lock, you have likely seen a smiling homeowner effortlessly swap out their deadbolt in under ten minutes, followed by an instant, magical connection to their smartphone. As senior reviewers at SmartHomeDeck, we can confidently tell you that this marketing narrative is, at best, a best-case scenario and, at worst, a complete fabrication. The reality of smart lock installation involves door alignment issues, confusing wiring harnesses, 2.4GHz Wi-Fi provisioning failures, and lengthy firmware updates.
In this comprehensive Installation Difficulty and First-Setup Report, we are putting three of the most popular smart locks on the market to the test. We are evaluating the August Wi-Fi Smart Lock (the premier retrofit option), the Schlage Encode Plus (a heavy-duty full replacement), and the Yale Assure Lock 2 (a sleek, key-free full replacement). Our goal is to provide you with a brutally honest look at the tools required, the actual time commitment, the mechanical pitfalls, and the digital onboarding experience.
Our Testing Methodology
To ensure a fair and realistic assessment, we did not install these locks on pristine, factory-squared test doors. We used two real-world exterior doors:
- Door A: A 1990s solid wood exterior door (1-3/4 inches thick) with slight weather-stripping friction and a moderately misaligned strike plate.
- Door B: A 2015 fiberglass exterior door (1-3/4 inches thick) with standard pre-bored holes and smooth deadbolt operation.
We timed three distinct phases of the installation process: Physical Hardware Installation, Digital App Provisioning, and Calibration/Firmware Updates. We also evaluated the mechanical toll on the lock motor, as a poorly installed smart lock will drain its batteries in weeks due to motor strain.
Category 1: The Retrofit Approach (August Wi-Fi Smart Lock)
The August Wi-Fi Smart Lock promises the easiest path to smart entry because it replaces only the interior thumb turn, leaving your exterior deadbolt and original keys completely untouched. But does 'easier' mean 'easy'?
Physical Installation Reality
The physical install requires only a Phillips-head screwdriver. You remove the existing interior thumb turn, mount the August backplate using the existing screws, and snap the magnetic DoorSense sensor onto the door frame. The most frustrating part of the physical install is selecting the correct wing-nut adapter for your specific deadbolt brand (Schlage, Kwikset, or Yale). If you choose the wrong one, the motor will bind. On our 1990s wood door, the mounting plate sat slightly crooked due to the existing screw holes being stripped, requiring us to use the included wood anchors.
Digital Setup and Calibration
August's app onboarding is generally smooth, utilizing Bluetooth for the initial handshake before migrating to your home Wi-Fi network. However, the Auto-Lock calibration is notoriously finicky. The app requires you to open and close the door multiple times while it maps the magnetic sensor's distance. If your door has weather-stripping that causes it to 'bounce' slightly when closed, the Auto-Lock feature will frequently fail to engage, thinking the door is still ajar.
- Tools Required: Phillips screwdriver, measuring tape.
- Actual Physical Time: 22 minutes.
- Digital & Calibration Time: 18 minutes.
- Biggest Pitfall: Door bounce confusing the DoorSense magnet.
Category 2: The Heavy-Duty Full Replacement (Schlage Encode Plus)
The Schlage Encode Plus is a beast. It features a built-in Wi-Fi radio, supports Apple Home Key, and boasts an ANSI Grade AAA rating. It is designed for security first, but that robust build comes with significant installation friction.
Physical Installation Reality
This is a full tear-down. You must remove the interior and exterior hardware, the deadbolt latch, and the strike plate. The Schlage Encode Plus requires routing a delicate ribbon cable through the door latch mechanism. Critical Tip: You must scan the HomeKit setup QR code located on the back of the interior assembly before you mount it to the door. Once it is screwed in, that code is hidden forever. Furthermore, the interior assembly is heavy; holding it perfectly level while simultaneously feeding the ribbon cable into the exterior keypad requires either exceptional dexterity or a second pair of hands.
Digital Setup and Calibration
Because the Encode Plus has built-in Wi-Fi, it does not require a bridge. However, connecting it to a 2.4GHz network via the Schlage Home app can be a tedious process of toggling your phone's Wi-Fi settings. The Apple Home Key setup, conversely, is instantaneous if you have an Apple TV or HomePod acting as a hub. The lock's built-in alarm sensor also requires a lengthy calibration period where it 'learns' the acoustic signature of your door closing versus someone kicking it in.
- Tools Required: Phillips screwdriver, flathead screwdriver, wire cutters (for trimming excess latch screws), level.
- Actual Physical Time: 48 minutes.
- Digital & Calibration Time: 25 minutes.
- Biggest Pitfall: Pinching the fragile ribbon cable during assembly.
Category 3: The Modular Minimalist (Yale Assure Lock 2)
The Yale Assure Lock 2 is famous for its slim profile and key-free touchscreen (on the standard model). It represents the modern, modular approach to smart locks, allowing you to swap out the internal network module (Z-Wave, Zigbee, or Thread) depending on your ecosystem.
Physical Installation Reality
Yale's mounting system is arguably the most elegant of the three. It uses a universal mounting plate that clamps to the door, eliminating the need to hold heavy assemblies while driving screws. However, the key-free nature of the lock means you must be 100% certain of your battery life and mechanical alignment before closing the door behind you. The spindle (the metal bar connecting the interior and exterior) requires precise trimming with a hacksaw or heavy-duty wire cutters if your door is thinner than the standard 1-3/4 inches. If you cut it too short, the exterior touchscreen will not communicate with the interior motor.
Digital Setup and Calibration
We tested the Yale with the Thread module. Pairing via Thread to an Apple Home or Amazon Echo hub was remarkably fast, bypassing the painful 2.4GHz Wi-Fi provisioning dance. However, the initial firmware update on a fresh Yale lock is notorious. Because the lock must stay awake to receive the update, the app instructs you to leave the door open and the lock engaged for up to 20 minutes. During this time, your home is completely unsecured.
- Tools Required: Phillips screwdriver, hacksaw or heavy-duty snips (for spindle), level.
- Actual Physical Time: 35 minutes.
- Digital & Calibration Time: 30 minutes (mostly firmware).
- Biggest Pitfall: Cutting the spindle too short and bricking the exterior keypad.
Installation Metrics Comparison
| Metric | August Wi-Fi (Retrofit) | Schlage Encode Plus (Full) | Yale Assure 2 (Full) |
|---|---|---|---|
| Physical Install Time | 22 Minutes | 48 Minutes | 35 Minutes |
| Digital Setup Time | 18 Minutes | 25 Minutes | 30 Minutes |
| Door Thickness Range | 1-3/8' to 2-1/4' | 1-3/8' to 2-1/4' | 1-3/4' to 2-1/4' |
| Wiring Required | No | Yes (Ribbon Cable) | No |
| Deck Ease-of-Use Score | 8.5 / 10 | 6.0 / 10 | 7.5 / 10 |
Digital Onboarding and Network Security
The physical installation is only half the battle. The 'digital installation'—provisioning the lock to your network and setting up user codes—is where many users abandon the process. According to the NIST IoT Cybersecurity guidelines, securing smart home devices requires strict attention to default credentials and network segmentation. During our testing, we noted that Schlage and Yale force users to create complex master PIN codes during setup, adhering to basic security hygiene. August, however, relies heavily on your smartphone's biometric security and email verification.
Furthermore, the emergence of the Matter smart home standard is beginning to streamline the digital setup process. Locks that support Thread and Matter (like our Yale Assure 2 test unit) benefit from standardized QR code pairing, eliminating the need to download proprietary manufacturer apps just to get the device on the network. If you are buying a full replacement lock today, prioritizing Thread or Matter compatibility will save you immense frustration during the digital provisioning phase.
The Hidden Enemy: Deadbolt Bind and Motor Strain
The number one reason smart locks fail, drain batteries, and report 'jamming' errors to your smart home hub is mechanical binding. When a motorized lock throws the deadbolt, it requires a clear, frictionless path into the strike plate on the door frame. If the door sags even a fraction of an inch due to humidity or loose hinges, the deadbolt will scrape against the metal strike plate. The lock's motor will sense this resistance, reverse, and throw an error.
How to Fix the Bind Before You Install
- The Manual Test: Before installing any smart lock, close your door and manually throw the existing deadbolt. It should glide in with zero resistance. If you have to push, pull, or lift the door handle to get it to lock, your smart lock will fail.
- Tighten Hinge Screws: Replace the short factory screws on your top door hinge with 3-inch structural screws that bite into the door framing stud. This lifts the door and corrects sag.
- File the Strike Plate: Use a metal file to enlarge the opening on your door frame's strike plate. The hole should be at least 1 inch deep to accommodate the full throw of the deadbolt without the bolt bottoming out.
Following CISA Secure by Design principles means ensuring the physical integrity of your entryway matches the digital security of the lock. A motorized lock that constantly struggles against a misaligned door frame is not just a battery drain; it is a mechanical failure point that could leave you locked out.
Final Deck Scores and Verdict
When evaluating these locks through the lens of installation and first-setup difficulty, clear winners emerge based on your DIY comfort level.
August Wi-Fi Smart Lock: The Renter and Novice Champion
Deck Score: 8.8/10
If you are renting, or if you are terrified of drilling holes and managing wires, the August is the undisputed king of easy setup. You will sacrifice some exterior aesthetics and rely on your old deadbolt's health, but the 22-minute physical install is genuinely achievable for anyone with a screwdriver.
Yale Assure Lock 2: The Smart Home Enthusiast's Pick
Deck Score: 8.2/10
The Yale offers the best balance of modern aesthetics and manageable installation, provided you have a standard door and are comfortable trimming a metal spindle. Its Thread/Matter integration makes the digital setup a breeze for users with modern smart home hubs, bypassing the dreaded Wi-Fi provisioning loop.
Schlage Encode Plus: The Security Maximalist
Deck Score: 7.5/10
The Schlage is a fortress, but it installs like one. The physical setup is heavy, the wiring is delicate, and the calibration is lengthy. We only recommend the Encode Plus if you prioritize ANSI Grade AAA physical security and Apple Home Key integration over a quick, painless installation afternoon. Plan for an hour of focused work, and do not forget to scan that HomeKit QR code before you mount the backplate.