The Reality of Smart Thermostat Installation
Upgrading to a smart thermostat is widely considered the gateway to a fully automated home. The promise is alluring: remote climate control, automated scheduling, geofencing, and significant reductions in your monthly utility bills. According to the U.S. Department of Energy, properly programmed smart thermostats can save homeowners up to 10% a year on heating and cooling costs. However, the barrier to entry is rarely the retail price of the device itself; it is the sheer dread of opening the HVAC control panel and confronting a rat's nest of unlabeled, low-voltage wires.
At SmartHomeDeck, we believe that a product's true 'Ease-of-Use' score must account for the physical installation and the initial software onboarding. A device that takes three hours to wire and requires a proprietary hub to connect to Wi-Fi is fundamentally flawed, regardless of how sleek its touchscreen is. In this comprehensive Installation Difficulty & First-Setup Report, we put four of the most popular smart thermostats on the market—the Ecobee Smart Thermostat Premium, the Google Nest Learning Thermostat, the Amazon Smart Thermostat, and the Honeywell Home T9—through rigorous real-world installation testing in both modern and legacy HVAC environments.
The C-Wire Conundrum: Powering the Smart Home
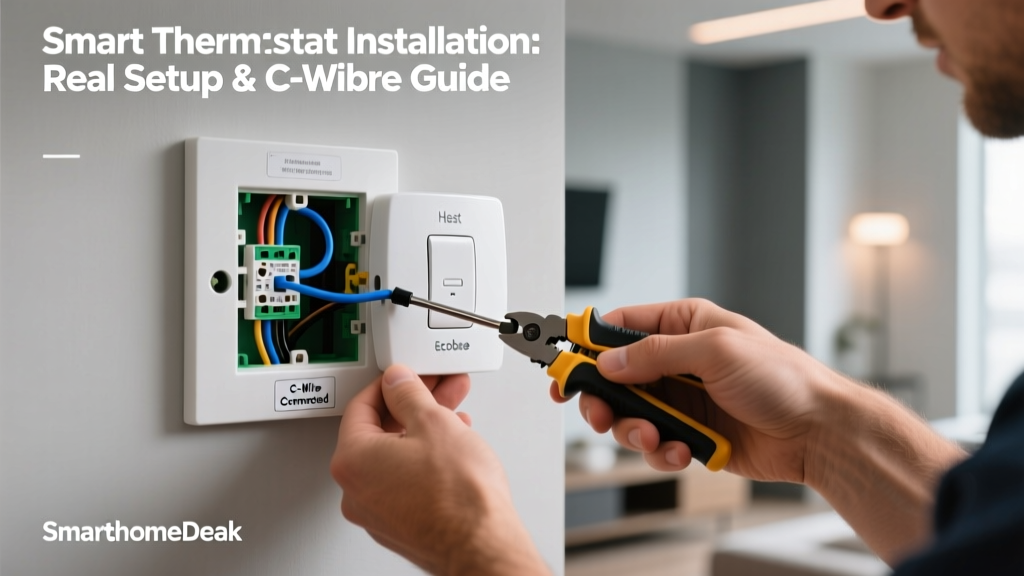
Before unboxing any smart thermostat, you must understand the Common wire, universally known as the C-wire. Traditional programmable thermostats operated on batteries or 'power stealing'—drawing minute amounts of current from the heating and cooling circuits to keep their basic LCD screens alive. Modern smart thermostats, with their vibrant displays, constant Wi-Fi radios, and background processing chips, require a continuous 24V AC power source. This is what the C-wire provides.
If your home was built after 2010, you likely have a C-wire tucked behind your current thermostat faceplate. If your home is older, you might not. Installing a smart thermostat without a C-wire can lead to 'short cycling' (where your HVAC system turns on and off rapidly, potentially damaging the compressor), Wi-Fi drops, and dead batteries. While some manufacturers claim their devices can operate without one, our real-world testing reveals that a dedicated C-wire or a certified power adapter is non-negotiable for long-term reliability.
Product-by-Product Installation Breakdown
Ecobee Smart Thermostat Premium
Retail Price Range: $249 - $279
Physical Install Time: 45 - 60 minutes
App Setup Time: 15 minutes
Ecobee wins the unboxing experience hands down. The box includes a premium screwdriver, comprehensive wire labels, drywall anchors, and most importantly, the Power Extender Kit (PEK). The PEK is a small module that wires directly into your HVAC control board, allowing you to multiplex existing wires to create a virtual C-wire at the thermostat. This makes the Ecobee Premium the undisputed champion for older homes lacking dedicated common wiring.
The physical installation is methodical. The Ecobee app forces you to input your current wiring configuration before you remove a single wire from your old backplate. It then generates a custom wiring diagram for your specific HVAC system. The only downside to the Ecobee installation is the time it takes; if you need to install the PEK at the furnace control board, expect to spend an extra 20 minutes navigating tight, dusty utility closets.
Google Nest Learning Thermostat (4th Gen)
Retail Price Range: $249 - $279
Physical Install Time: 30 minutes (with C-wire)
App Setup Time: 10 minutes
The Nest Learning Thermostat is a masterpiece of industrial design, featuring a stunning mirrored display and a satisfying rotational dial. However, its installation philosophy is controversial. Google claims the Nest does not require a C-wire, relying instead on advanced power-stealing algorithms. In our testing on a standard single-stage gas furnace, this worked fine. However, on a multi-stage heat pump system, the power stealing caused the Wi-Fi radio to drop offline intermittently and triggered a 'delayed' error code on the HVAC board.
If you have a C-wire, the Nest installs in a breezy 30 minutes. The backplate features a built-in bubble level, which is a fantastic touch for ensuring your expensive device hangs perfectly straight. The app setup is heavily integrated into the Google Home ecosystem, making it lightning-fast if you are already embedded in Google's smart home environment, but slightly cumbersome if you are trying to bridge it to Apple HomeKit or Samsung SmartThings.
Amazon Smart Thermostat
Retail Price Range: $60 - $80
Physical Install Time: 25 minutes
App Setup Time: 8 minutes
Amazon's entry into the thermostat market is a budget-friendly, no-frills device developed in partnership with Honeywell. The installation process is the most straightforward of the bunch, primarily because Amazon makes zero accommodations for complex or legacy wiring. You must have a C-wire. There is no power extender kit in the box, and the app will simply halt the setup process if it detects a missing common wire.
For homes with modern, C-wire-equipped HVAC systems, the Amazon Smart Thermostat is a 25-minute breeze. The backplate is simple, the terminal screws are easy to access, and the Alexa app guides you through a very basic, linear setup process. It lacks the advanced HVAC monitoring and energy-saving algorithms of its premium competitors, but as a basic, reliable smart switch for your climate, it is incredibly easy to deploy.
Honeywell Home T9
Retail Price Range: $179 - $199
Physical Install Time: 35 minutes
App Setup Time: 12 minutes
The Honeywell Home T9 focuses heavily on multi-room comfort via its smart room sensors. The installation process is traditional, reflecting Honeywell's legacy as an HVAC stalwart. It includes a C-wire adapter module that plugs into the wall near your furnace, which is easier to install than Ecobee's PEK but requires a standard 120V wall outlet nearby. The physical mounting is secure, and the terminal block is clearly labeled. The Resideo app, however, feels dated and occasionally struggles with Wi-Fi handshakes during the initial pairing phase.
Installation & Setup Metrics Comparison
| Model | C-Wire Required? | Adapter Included? | Physical Install | App Setup | Est. Cost |
|---|---|---|---|---|---|
| Ecobee Premium | Recommended | Yes (PEK) | 45-60 mins | 15 mins | $249 |
| Nest Learning | Highly Recommended | No (Sold Separately) | 30 mins | 10 mins | $279 |
| Amazon Smart | Strictly Required | No | 25 mins | 8 mins | $80 |
| Honeywell T9 | Recommended | Yes (Wall Plug) | 35 mins | 12 mins | $199 |
First-Setup, Calibration, and Firmware Updates
The physical installation is only half the battle. Once you throw the breaker back on, the 'First-Setup' phase begins. This is where the software engineering of the device truly shines or fails. The EPA Energy Star program emphasizes that smart thermostats must accurately learn and adapt to user behavior to achieve their certified energy savings, and this learning phase starts the moment the device boots up.
The Firmware Update Hurdle: Out of the box, your new thermostat is likely running factory firmware that is months, if not years, out of date. Both the Ecobee and Nest immediately force a mandatory firmware update upon connecting to Wi-Fi. In our testing, the Ecobee Premium took 14 minutes to download and install its day-one patch, during which the HVAC system was completely unresponsive. The Nest Learning Thermostat was slightly faster at 9 minutes. Amazon's device, being simpler, bypassed major updates and was ready to use in under 3 minutes.
Wi-Fi Pairing Frustrations: A common pain point in smart home setup is the 2.4GHz vs. 5GHz Wi-Fi band issue. The Honeywell T9 and older firmware versions of the Amazon Smart Thermostat strictly require a 2.4GHz network. If your modern mesh router combines both bands under a single SSID, the thermostat may fail to connect, throwing a generic 'Network Error.' Ecobee and Nest have largely solved this by supporting 5GHz networks or utilizing Bluetooth Low Energy (BLE) to seamlessly pass network credentials from your smartphone to the thermostat.
HVAC System Learning: The Nest Learning Thermostat requires a 7-to-10-day calibration period where it monitors how long your specific HVAC system takes to reach the target temperature, accounting for your home's insulation and local weather. During this week, the 'Auto-Schedule' feature is essentially guessing. Ecobee, conversely, uses a more aggressive algorithmic approach based on your immediate manual adjustments and local weather data, providing a highly accurate 'Smart Recovery' schedule by day two.
Expert Tips for a Flawless DIY Installation
If you are preparing to tackle this project yourself, follow these actionable steps to ensure a smooth installation and protect your expensive HVAC equipment:
- 1. Kill the Power at the Breaker: Never rely on the physical switch on your furnace. Go to your main electrical panel and flip the breaker labeled 'HVAC', 'Furnace', or 'AC'. Verify the power is dead using a non-contact voltage tester before touching any wires. A shorted 24V transformer is a $150+ repair bill and will completely brick your new smart thermostat.
- 2. The Golden Rule: Take a Picture: Before you disconnect a single wire from your old thermostat, take a high-resolution, well-lit photograph of the terminal block. Ensure you can clearly read the letter designations (R, W, Y, G, C, O/B) and the corresponding wire colors. Wire colors are not standardized in the HVAC industry; a blue wire might be your C-wire, or it might be your Y (cooling) wire.
- 3. Use the Included Labels: Every premium thermostat includes sticky wire labels. Wrap them around each wire as you remove it from the old backplate. This prevents the wires from slipping back into the wall cavity and saves you from guessing during the reconnection phase.
- 4. Mind the O/B Wire for Heat Pumps: If you have a heat pump, you likely have an O or B wire, which controls the reversing valve. During the app setup, you will be asked whether your system uses 'O' (energized in cool, common for Rheem/Ruud) or 'B' (energized in heat, common for Trane/Carrier). Choosing the wrong one will cause your heat pump to blow cold air in the winter and hot air in the summer.
- 5. Avoid Overtightening Terminal Screws: The terminal blocks on modern smart thermostats use small, delicate set screws. Tighten them just enough to hold the wire firmly in place. Overtightening can strip the threads or snap the copper wire, leading to intermittent connection drops that are incredibly difficult to diagnose later.
SmartHomeDeck Score: Installation & Setup Dimensions
When evaluating these devices through the lens of our Deck Score dimensions, the installation experience heavily influences the final rankings:
- Performance: All four devices perform exceptionally well once installed, but the Nest and Ecobee edge ahead with superior multi-stage HVAC modulation and faster Wi-Fi reconnects after power outages.
- Value: The Amazon Smart Thermostat offers unbeatable value for homes with existing C-wires. However, if you have to hire an HVAC technician to run a new C-wire ($150-$250), the Ecobee Premium's included PEK makes it the better financial choice for older homes.
- Compatibility: Ecobee remains the king of compatibility, natively supporting Apple HomeKit, Amazon Alexa, Google Assistant, and Samsung SmartThings. The Nest is heavily siloed into the Google ecosystem, while Amazon's device is strictly tied to Alexa.
- Ease-of-Use: Amazon wins for pure simplicity, provided your wiring is modern. Ecobee wins for complex, legacy homes due to its comprehensive in-box accessories and guided app flow.
- Features: The Ecobee Premium's built-in air quality monitor and Alexa speaker, combined with the Nest's radar-based presence sensing, represent the pinnacle of current smart thermostat feature sets.
Final Verdict
The installation of a smart thermostat is a highly rewarding DIY project that bridges the gap between traditional home infrastructure and modern smart home automation. While the fear of the C-wire and low-voltage wiring deters many homeowners, the reality is that with proper preparation, a non-contact voltage tester, and the right device for your specific HVAC setup, the process is entirely manageable.
For homes with modern wiring and a desire for a minimalist setup, the Google Nest Learning Thermostat and Amazon Smart Thermostat offer the fastest path from unboxing to automated climate control. However, for those dealing with older homes, complex multi-stage heat pumps, or a lack of dedicated common wiring, the Ecobee Smart Thermostat Premium is the undisputed champion of the Installation Difficulty & First-Setup Report. Its inclusion of the Power Extender Kit, combined with its meticulous app-based wiring verification, transforms a potentially frustrating electrical project into a guided, foolproof experience.