Why Your First Smart Device Choice is Critical
Entering the world of home automation is an exciting journey, but the sheer volume of options on the market can be paralyzing. Choosing your first smart home device is not just about adding a single convenience; it is about laying the foundation for your entire ecosystem. The first device you buy and install will often dictate which voice assistant you prioritize, which mobile app you use daily, and which communication protocol (Wi-Fi, Zigbee, Thread, or Matter) your future devices will need to support.
If you start with a device that requires a proprietary hub, you are committing to that brand's ecosystem. If you start with a direct-to-Wi-Fi device, you might face network congestion later. For DIY installers and homeowners setting up smart devices for the first time, the goal is to find a product that offers an immediate return on investment, requires minimal technical expertise to install, and provides a frictionless introduction to automation workflows.
Top Contenders for Your First Smart Home Device
When deciding which device to bring home first, you generally have three main categories to consider: smart plugs, smart bulbs, and smart thermostats. Each offers a different balance of cost, installation effort, and daily impact.
Smart Plugs: The Ultimate Gateway
Smart plugs are widely considered the best entry point into home automation. They are inexpensive, require zero wiring, and instantly make "dumb" appliances smart. By plugging a lamp, a coffee maker, or a fan into a smart plug, you gain app-based control, scheduling, and voice assistant integration.
- Top Picks: Kasa Smart Plug Mini (EP10) and Wyze Plug.
- Cost Range: $10 to $25 per plug.
- Installation Time: Under 5 minutes.
- Best For: Renters, budget-conscious beginners, and testing the waters of voice control.
Smart Bulbs: Instant Ambiance and Control
Smart lighting dramatically changes the atmosphere of a room. Smart bulbs replace your existing incandescent or LED bulbs and offer dimming, color-changing capabilities, and circadian rhythm scheduling. However, they require the physical light switch to remain in the "on" position at all times to maintain network connectivity.
- Top Picks: Philips Hue White and Color Ambiance (requires Hue Bridge for full features) and WiZ Connected Bulbs (Wi-Fi direct).
- Cost Range: $15 to $55 per bulb.
- Installation Time: 5 to 10 minutes.
- Best For: Homeowners wanting immediate aesthetic upgrades and multi-room scene creation.
Smart Thermostats: High Impact, Higher Effort
A smart thermostat is the most impactful device you can install regarding energy savings and whole-home comfort. However, it requires interacting with your home's HVAC control panel, dealing with low-voltage wiring, and ensuring compatibility with your heating and cooling system.
- Top Picks: Ecobee SmartThermostat Premium and Google Nest Learning Thermostat.
- Cost Range: $130 to $250.
- Installation Time: 45 to 90 minutes.
- Best For: Homeowners looking for long-term ROI, energy efficiency, and whole-home automation.
Feature and Cost Comparison
To help you visualize the commitment required for each option, here is a structured comparison of the three most common first-time smart home devices.
| Device Type | Average Cost | Install Difficulty | Hub Required? | Primary Benefit |
|---|---|---|---|---|
| Smart Plug | $15 | Very Easy | No (Wi-Fi) | Appliance automation |
| Smart Bulb | $30 | Easy | Optional | Lighting scenes & color |
| Smart Thermostat | $180 | Moderate/Hard | No (Wi-Fi) | Energy savings & comfort |
Visualizing the Setup Commitment
Time is a critical factor for DIY installers. The chart below illustrates the average setup time—from unboxing to fully integrated voice control—across different entry-level smart home categories.
Average Setup Time by Device Type
Understanding Your Network: The Hidden Hurdle
Before you purchase any Wi-Fi-based smart device, you must understand your home network's capabilities. The number one reason DIY smart home setups fail is due to Wi-Fi band incompatibility. Most entry-level smart plugs, bulbs, and thermostats operate exclusively on the 2.4GHz Wi-Fi band. This band offers superior range and wall penetration compared to the 5GHz band, which is necessary for low-power IoT (Internet of Things) devices.
Modern mesh routers often combine 2.4GHz and 5GHz networks under a single SSID (network name). While convenient for smartphones, this can confuse smart home devices during the initial handshake process. If your device fails to connect during setup, log into your router's admin panel and temporarily separate the bands, or create a dedicated 2.4GHz "IoT Guest Network." This not only solves connection issues but also provides a layer of security by isolating your smart devices from your primary computers and phones.
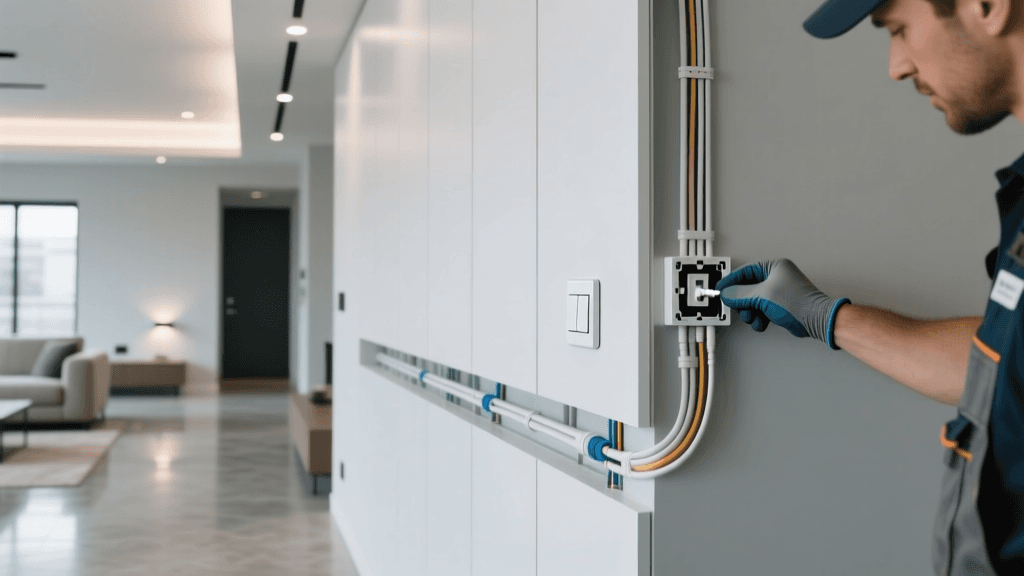
Step-by-Step Installation: Smart Plugs
Let us walk through the exact installation workflow for a standard Wi-Fi smart plug, such as the popular Kasa EP10.
- Download the App: Before plugging the device in, download the manufacturer's app (e.g., Kasa or Wyze) and create an account.
- Connect to 2.4GHz: Ensure your smartphone is connected to your router's 2.4GHz network.
- Power the Device: Plug the smart plug into a standard wall outlet. The LED indicator will typically begin blinking rapidly, indicating it is in pairing mode.
- Add Device in App: Tap the "+" icon in the app, select "Smart Plug," and follow the on-screen prompts. The app will use your phone's Bluetooth to locate the plug and pass the Wi-Fi credentials to it.
- Name and Assign: Give the plug a clear, descriptive name (e.g., "Living Room Floor Lamp") and assign it to a room. This is crucial for voice assistant commands like, "Alexa, turn off the Living Room."
Step-by-Step Installation: Smart Bulbs
Smart bulbs are slightly more nuanced because they interact with existing physical switches.
- Power Off: Turn off the light switch and, if possible, the circuit breaker for safety.
- Install the Bulb: Screw the smart bulb into the fixture. Ensure it is seated tightly but do not overtighten the glass or plastic housing.
- Restore Power: Turn the physical switch back on. The bulb will usually flash or cycle colors to indicate pairing mode.
- App Integration: Open your lighting app, scan the barcode on the bulb's base (if required), or let the app discover the bulb via Bluetooth.
Pro-Tip: If you are installing smart bulbs in a fixture controlled by a dimmer switch, you must remove the dimmer and replace it with a standard toggle switch. Smart bulbs have internal dimming circuitry; sending them reduced voltage from a wall dimmer will cause flickering, premature failure, and network disconnections.
The Thermostat Challenge: Wiring Basics
If you choose a smart thermostat as your first device, you are taking on a more advanced DIY project. The most common hurdle is the C-wire (Common wire). Smart thermostats require continuous 24V AC power to maintain their Wi-Fi radios and vibrant displays. Older homes often only have four wires connected to the thermostat baseplate (R, W, Y, G), which rely on "power stealing" from the HVAC system—a method that can cause short-cycling or dropped Wi-Fi connections.
Before buying a thermostat, pull your current thermostat off the wall and check for a blue or black wire connected to the "C" terminal. If you do not have a C-wire, you have two options:
- Use a Power Extender Kit (PEK): Brands like Ecobee and Nest include or sell adapters that plug into your HVAC control board in the attic or basement, allowing you to multiplex the existing wires to generate a virtual C-wire.
- Run New Wire: Use a thermostat wire upgrade kit to fish a new 5-wire or 8-wire cable through your walls from the furnace to the thermostat.
According to ENERGY STAR, properly installed smart thermostats can save homeowners approximately 8% on heating and cooling bills annually, making the installation effort highly worthwhile.
The Game Changer: Matter Protocol
As you select your first device, you must be aware of the Matter protocol. Developed by the Connectivity Standards Alliance, Matter is an industry-wide standard backed by Apple, Amazon, Google, and Samsung. It ensures that any Matter-certified device will work seamlessly across all major ecosystems without requiring proprietary hubs or complex cloud-to-cloud integrations.
When shopping for your first device, look for the Matter logo on the packaging. Choosing a Matter-compatible device future-proofs your investment, ensuring that even if you switch from an iPhone to an Android, or from Alexa to Siri, your foundational smart home hardware will continue to function locally and securely.
Energy Efficiency and Security
While convenience is the primary driver for smart home adoption, security cannot be an afterthought. The National Institute of Standards and Technology (NIST) emphasizes the importance of securing IoT devices to prevent them from becoming entry points into your home network. To secure your first device:
- Change Default Passwords: Never leave the default PIN or password active on a smart hub or camera.
- Enable 2FA: Turn on Two-Factor Authentication for the companion app account.
- Update Firmware: Immediately run a firmware update upon installation. Manufacturers frequently patch vulnerabilities discovered post-launch.
- Disable Unused Features: If your smart plug does not need "Remote Access" (control from outside the home), disable it in the app settings to close external ports.
Common Setup Troubleshooting
Even with careful planning, you may encounter issues during your first installation. Here is how to resolve the most common roadblocks:
- Device Stuck on "Connecting": This is almost always a 2.4GHz vs. 5GHz issue. Move closer to the router, forget the 5GHz network on your phone temporarily, and retry the setup.
- App Cannot Find Device: Ensure Bluetooth is enabled on your phone. Most modern smart devices use Bluetooth Low Energy (BLE) for the initial handshake before switching to Wi-Fi.
- Device Goes Offline Frequently: The device may be on the edge of your router's range. Consider adding a Wi-Fi extender or upgrading to a mesh network system to eliminate dead zones.
- Factory Reset: If all else fails, perform a hard reset. For smart plugs, this usually involves holding the power button for 10-15 seconds until the light flashes rapidly. For bulbs, it involves turning the switch on and off five times in a specific sequence.
Conclusion
Choosing your first smart home device is about balancing instant gratification with long-term scalability. For the absolute easiest, most foolproof introduction to automation, a Wi-Fi smart plug is the undisputed champion. It costs less than a takeout dinner, installs in five minutes, and immediately unlocks the magic of voice control and scheduling. If you are ready for a slightly more involved project with massive daily impact, a smart thermostat will transform your home's comfort and efficiency.
Whichever route you choose, take the time to understand your home network, prioritize Matter-compatible hardware, and follow robust security practices. Your first device is the cornerstone of your smart home—install it correctly, and the rest of your automation journey will follow seamlessly.