Smart Home Technology: What Is It & How to Install Your First System
If you have ever wondered about smart home technology, what is it exactly, and how does it actually work? At its core, smart home technology refers to a network of internet-connected devices, appliances, and systems that communicate with each other and can be controlled remotely. From adjusting your thermostat while you are at work to turning off the lights using only your voice, smart home ecosystems are designed to bring convenience, energy efficiency, and enhanced security into your daily life.
Transitioning from a traditional home to a connected one might seem overwhelming, but the installation process is highly accessible for beginners. This comprehensive guide will walk you through the foundational concepts and provide a step-by-step installation plan to get your first smart home ecosystem up and running.
Difficulty Level: Beginner
Estimated Time: 1 to 3 hours (depending on the number of devices)
Tools & Products Needed
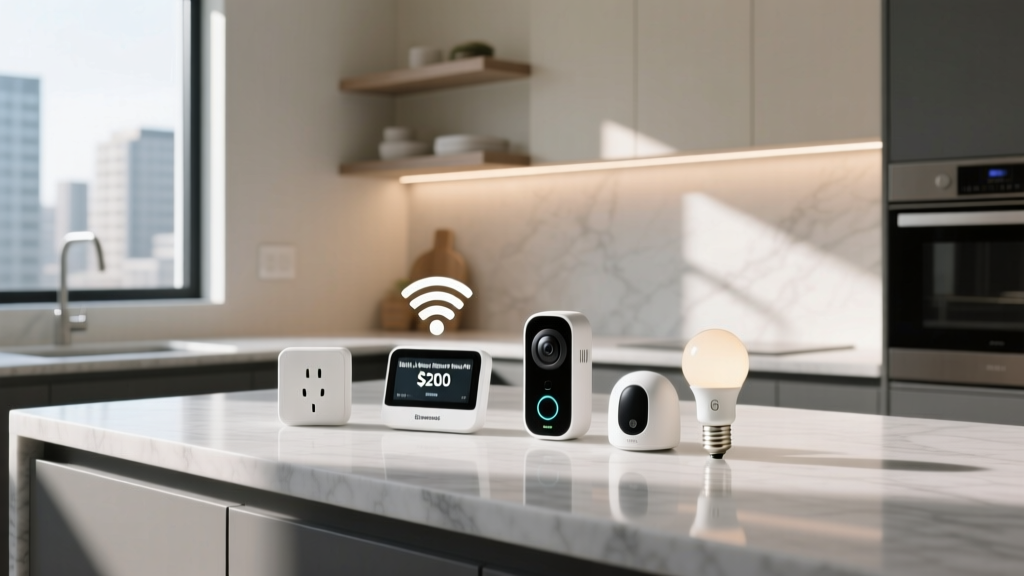
Before diving into the installation, gather the essential hardware and tools required to build a reliable smart home foundation. You do not need to buy everything at once; starting small is the best approach.
- Smartphone or Tablet: Required for downloading companion apps, creating accounts, and pairing devices (iOS & Android compatible).
- Dual-Band Wi-Fi Router: A reliable router that broadcasts both 2.4GHz & 5GHz networks is crucial, as most smart devices require the 2.4GHz band.
- Smart Hub or Bridge (Optional but Recommended): Devices like the Samsung SmartThings Hub or Amazon Echo act as the central brain for non-Wi-Fi devices.
- Smart Speaker or Display: A central voice assistant (like an Amazon Echo or Google Nest) for hands-free control.
- Smart Plugs: The easiest entry point for automating 'dumb' appliances like lamps or coffee makers.
- Smart Bulbs or Switches: For automated and voice-controlled lighting.
- Phillips Head Screwdriver & Voltage Tester: Necessary only if you decide to install hardwired smart switches or thermostats.
Step 1: Understand the Basics & Choose Your Ecosystem
Before installing any hardware, you must decide which smart home ecosystem will serve as the foundation of your setup. An ecosystem is the software platform that ties all your disparate devices together, allowing them to communicate and be controlled from a single interface.
The major players in the space include Amazon Alexa, Google Home, and Apple HomeKit. Each has its own pros & cons. Amazon Alexa boasts the largest library of compatible third-party devices. Google Home excels in natural language processing and integrates seamlessly with Android devices and Google services. Apple HomeKit offers the most robust privacy and security features but tends to have a smaller, more premium selection of compatible hardware.
You also need to understand the communication protocols that smart devices use to talk to your network:
- Wi-Fi: Connects directly to your router. Great for high-bandwidth devices like cameras, but can congest your network if you have dozens of devices.
- Bluetooth: Used primarily for initial setup and local, short-range control.
- Zigbee & Z-Wave: Low-power mesh networks that require a dedicated smart hub. They do not slow down your Wi-Fi and are excellent for sensors and locks.
- Thread & Matter: The newest industry standards designed to create a unified, secure, and highly responsive mesh network that works across all major ecosystems.
For beginners, starting with a Wi-Fi-based ecosystem centered around a smart speaker (like an Echo Dot or Nest Mini) is the most cost-effective and straightforward method.
Step 2: Optimize Your Network & Install the Hub
The backbone of any smart home is your internet network. If your Wi-Fi is weak or improperly configured, your smart devices will constantly drop offline, leading to a frustrating experience.
First, ensure your router is placed in a central location in your home, free from physical obstructions and interference from microwaves or cordless phones. Next, log into your router's admin settings and verify that your 2.4GHz & 5GHz bands are properly configured. The vast majority of smart home devices—especially smart plugs, bulbs, and sensors—only operate on the 2.4GHz band because it offers better range and wall penetration. If your router combines both bands into a single SSID (network name), you may need to temporarily separate them or disable the 5GHz band during the initial pairing process to ensure your devices connect correctly.
If you are utilizing a dedicated smart hub (such as a SmartThings Station or an Apple TV acting as a HomeKit hub), plug it directly into your router via an Ethernet cable if possible. This ensures the hub has a stable, uninterrupted connection to the internet, which is vital for processing automations and remote commands. Place the hub in a central, elevated location to maximize the range of its internal Zigbee or Thread radios.
Step 3: Install & Pair Your First Smart Devices
With your network optimized and your ecosystem chosen, it is time to install the physical devices. We recommend starting with smart plugs and smart bulbs to get a feel for the pairing process.
Installing Smart Plugs:
Plug the smart plug into a standard wall outlet. Download the manufacturer's companion app to your smartphone and create an account. Follow the in-app instructions to put the plug into 'pairing mode' (usually indicated by a rapidly blinking LED). The app will use your phone's Bluetooth to locate the plug and pass along your 2.4GHz Wi-Fi credentials. Once connected, link the manufacturer's app to your main ecosystem (e.g., linking the Tapo app to Amazon Alexa) via the 'Skills' or 'Works With' menu.
Installing Smart Bulbs:
Turn off the physical light switch, screw in the smart bulb, and turn the switch back on. The bulb will typically flash or cycle through colors to indicate it is ready to pair. Open your smart home app, select 'Add Device,' and follow the prompts. For a more permanent and reliable lighting setup, consider exploring our complete smart lighting setup guide, which covers hardwired smart switches and dimmers.
Organizing Your Digital Space:
As you add devices, immediately assign them to the correct 'Room' in your app (e.g., Living Room, Kitchen, Bedroom). This step is crucial for voice commands. If you do not organize your rooms, asking your voice assistant to 'turn off the living room lights' will result in an error. Grouping devices by room allows for seamless, area-wide control.
Step 4: Build Automations & Routines
Understanding smart home technology, what is it truly capable of, culminates in automation. A device you control from your phone is merely 'connected.' A device that acts on its own based on environmental triggers is truly 'smart.'
Navigate to the 'Routines' or 'Automations' tab in your smart home app. Here, you will use basic 'If This, Then That' (IFTTT) logic to create powerful workflows.
- The 'Good Morning' Routine: Set a trigger for 7:00 AM on weekdays. The action can include turning on the coffee maker (via a smart plug), slowly fading up the bedroom smart bulbs to 100% brightness, and having your smart speaker read the daily weather forecast.
- The 'Movie Night' Scene: Create a voice-activated scene. When you say, 'It is movie time,' the living room lights dim to 20%, the smart blinds close, and the TV turns on.
- Geofencing (Location-Based Automations): Use your smartphone's GPS as a trigger. Set an automation so that when the last person leaves the house, all lights turn off, the smart thermostat adjusts to an eco-friendly temperature, and your security cameras arm themselves. For more advanced security setups, check out our guide on smart home security.
Start with one or two simple routines and expand your automation library as you become more comfortable with the software interface.
Troubleshooting Common Installation Issues
Even the most carefully planned smart home installations can encounter hiccups. Here is how to resolve the most common roadblocks:
Device Refuses to Pair or Connect to Wi-Fi:
This is almost always a network band issue. Ensure your phone is connected to the 2.4GHz network during setup. If your router uses a combined SSID, try moving further away from the router; the 5GHz signal drops off faster than 2.4GHz, which may force your phone to switch bands automatically. Alternatively, disable the 5GHz band in your router settings temporarily.
Hub or Devices Frequently Drop Offline:
Network congestion is the usual culprit. If you have dozens of Wi-Fi devices, your router may be overwhelmed. Restart your router to clear the cache. If the issue persists, consider upgrading to a mesh Wi-Fi system or migrating your devices to a dedicated Zigbee or Thread hub to offload traffic from your main Wi-Fi network.
Voice Commands Are Misunderstood:
If your voice assistant turns on the wrong device, check for duplicate names. Ensure you do not have two devices named 'Lamp' in different rooms without assigning them to their specific room groups. Rename devices with clear, distinct titles like 'Bedside Lamp' or 'Desk Lamp.'
Smart Switch or Thermostat Has No Power:
If you are installing hardwired devices and they will not turn on, check your circuit breaker. Furthermore, many smart switches require a neutral wire to function. Use a voltage tester to verify the presence of a neutral wire in your electrical box. If you lack one, you will need to purchase specific 'no-neutral' smart switches. Read our detailed smart thermostat installation guide for wiring specifics.
Frequently Asked Questions
What is the difference between Wi-Fi, Zigbee, and Z-Wave?
Wi-Fi is a high-bandwidth protocol ideal for cameras and displays, but it consumes more power and can congest your home network if overused. Zigbee and Z-Wave are low-power, mesh-networking protocols designed specifically for smart home sensors, locks, and bulbs. They require a central hub but do not interfere with your Wi-Fi traffic, making them much more reliable for homes with dozens of smart devices.
Do I absolutely need a smart hub to get started?
No, you do not need a dedicated hub to begin. Many modern devices connect directly to your Wi-Fi, and smart speakers (like the Echo Dot or Nest Mini) often have built-in Zigbee or Thread radios that act as a basic hub. However, as your system grows beyond 15 or 20 devices, investing in a dedicated hub like the Samsung SmartThings or Home Assistant will vastly improve your network's stability and response times.
Is smart home technology secure from hackers?
Smart home technology is generally secure, provided you follow basic digital hygiene practices. Always use strong, unique passwords for your smart home accounts and enable Two-Factor Authentication (2FA). Keep your router's firmware updated, and consider placing your IoT (Internet of Things) devices on a separate 'Guest' network so they cannot access your personal computers or phones if a vulnerability is exploited.
Will my smart devices work if the internet goes down?
Most Wi-Fi-dependent smart devices will lose remote access and voice control capabilities if your internet connection drops, though they will usually continue to function via physical switches. However, if you use a local smart hub (like Home Assistant or a local Hubitat), your Zigbee and Z-Wave automations will continue to run perfectly even during an internet outage, as the processing happens locally within your home.
How much does it cost to build a basic smart home?
You can start experimenting with smart home technology for under $50 by purchasing a smart speaker and a two-pack of smart plugs. A basic starter kit including lighting, a few plugs, and a thermostat typically ranges from $200 to $500. Fully outfitting a home with hardwired switches, advanced security cameras, and motorized blinds can cost several thousand dollars. The beauty of modern smart home tech is its modularity; you can scale your investment over time as your budget allows.
By understanding the fundamentals of what smart home technology is and following this structured installation approach, you are well on your way to creating a responsive, efficient, and highly personalized living space. Take your time, start small, and enjoy the process of automating your home.