Smart Home Thermostat Manual: The Complete Guide to Setup, Features & Optimization
If you have recently upgraded to a smart thermostat — or are thinking about making the switch — you are joining millions of homeowners who have discovered that intelligent climate control is one of the most impactful smart home investments available. Unlike traditional programmable thermostats that require tedious button-pressing and cryptic menu navigation, smart thermostats learn your habits, adapt to your schedule, and put complete temperature control at your fingertips through your smartphone, tablet, or voice assistant.
Yet despite their user-friendly reputation, many smart thermostat owners never move beyond the basics. They set a temperature and forget about the wealth of features hidden inside their device. This comprehensive manual is designed to change that. Whether you own a Nest, Ecobee, Honeywell Home, or any other connected thermostat, this guide will walk you through every essential aspect of smart thermostat ownership — from initial installation and Wi-Fi configuration to advanced scheduling, energy optimization, and troubleshooting.
By the end of this guide, you will understand exactly how to configure your smart thermostat for maximum comfort, minimum energy waste, and seamless integration with the rest of your smart home ecosystem. Let's get started.
Understanding How Smart Thermostats Work
Before diving into setup and configuration, it is important to understand what makes a smart thermostat fundamentally different from the device it replaces. A traditional thermostat is essentially a switch: it reads the ambient temperature and turns your HVAC system on or off to reach a setpoint. A programmable thermostat adds a schedule, but it is rigid and unforgiving — deviate from the schedule and you are back to manual overrides.
A smart thermostat layers several technologies on top of basic temperature control:
- Wi-Fi connectivity allows remote control via a mobile app and enables over-the-air firmware updates that continuously improve functionality.
- Sensors — including ambient temperature, humidity, occupancy, and sometimes ambient light sensors — give the thermostat a richer understanding of your home environment.
- Machine learning algorithms observe your manual adjustments over time and build a heating and cooling schedule that reflects your actual behavior rather than assumptions.
- Geofencing uses your smartphone's location to detect when you leave home and when you are returning, automatically adjusting the temperature to save energy while you are away and ensuring comfort when you walk through the door.
- Integration with smart home platforms such as Amazon Alexa, Google Home, and Apple HomeKit allows voice control and participation in broader automation routines.
Together, these features create a thermostat that does not just react to temperature changes — it anticipates them. According to the U.S. Department of Energy, properly using a programmable or smart thermostat can save households up to 10% per year on heating and cooling costs. Smart thermostats make proper use significantly easier by removing the friction of manual programming.
Understanding these core capabilities is the foundation for everything that follows in this manual. Every feature, setting, and troubleshooting step connects back to these fundamental technologies.
Installation & Initial Setup
One of the most common questions smart thermostat buyers ask is whether professional installation is necessary. The answer, in most cases, is no. Most smart thermostats are designed for DIY installation and can be up and running in 30 minutes or less. However, there are important considerations to address before you remove your old thermostat from the wall.
Before You Begin: Compatibility & the C-Wire Question
The single most important pre-installation step is checking compatibility with your HVAC system. Most smart thermostats work with standard forced-air furnaces, central air conditioning, and heat pumps. However, homes with high-voltage heating systems (such as electric baseboard heaters), proprietary communicating HVAC systems, or multi-stage systems with more than two stages may require specific thermostat models or additional accessories.
The C-wire (common wire) is another critical consideration. Smart thermostats require continuous power to operate their Wi-Fi radios, displays, and processors. The C-wire provides a constant 24-volt power supply from your HVAC system's transformer. If your current thermostat wiring does not include a C-wire, you have several options:
- Check behind the existing thermostat: Sometimes a C-wire is present but simply not connected. Remove the faceplate and look for an unused blue or black wire tucked behind the wall plate.
- Use a C-wire adapter kit: Many thermostat manufacturers sell plug-in adapters that provide power through existing wiring without running a new wire to the furnace.
- Choose a thermostat that does not require a C-wire: Some models, such as certain Ecobee and Nest thermostats, can "power steal" from the heating and cooling wires, though this approach can occasionally cause HVAC short-cycling in some systems.
- Have an electrician run a C-wire: If none of the above options work, a licensed HVAC technician can add a C-wire to your thermostat cable, typically for a modest service fee.
Step-by-Step Installation
Once you have confirmed compatibility and addressed the C-wire situation, follow these general steps:
- Turn off power to your HVAC system at the circuit breaker. This is a non-negotiable safety step.
- Remove the faceplate of your old thermostat and take a photo of the wiring. Label each wire with the included stickers or masking tape, noting which terminal it is connected to (R, W, Y, G, C, etc.).
- Disconnect the wires and remove the old thermostat baseplate from the wall.
- Install the new thermostat's baseplate, feeding the wires through the center. Use a level to ensure it is straight, then secure it with the provided screws and anchors.
- Connect each wire to the corresponding terminal on the new baseplate. Refer to your photo and the installation guide included with your thermostat. Most smart thermostats use the same terminal labeling conventions as traditional thermostats.
- Attach the thermostat display to the baseplate. It should click or snap into place.
- Restore power at the circuit breaker. The thermostat should boot up and begin its initial setup sequence.
Wi-Fi Configuration & App Setup
Once powered on, your thermostat will guide you through on-screen prompts to connect to your home Wi-Fi network. For the most reliable connection, use a 2.4 GHz network — many smart thermostats do not support 5 GHz bands. If you have a mesh router or dual-band system, you may need to temporarily separate your network bands or move closer to your router during setup.
After connecting to Wi-Fi, download the manufacturer's companion app to your smartphone and create an account. The app is your primary interface for remote control, scheduling, energy reports, and firmware updates. Take the time to complete the full in-app setup, including:
- Naming your thermostat (especially important if you have multiple units or zones)
- Setting your home address for local weather integration
- Enabling location services for geofencing
- Linking your thermostat to your preferred voice assistant or smart home platform
For a broader look at connecting devices throughout your home, explore our guide on setting up a reliable smart home network, as a strong Wi-Fi backbone is essential for consistent thermostat performance.
Mastering Scheduling, Modes & Energy-Saving Features
With installation and connectivity behind you, the real value of a smart thermostat begins to emerge. This section covers the core features you will interact with daily and explains how to configure them for optimal comfort and efficiency.
Understanding Operating Modes
Smart thermostats typically offer several operating modes:
- Heat mode: Activates only your heating system. Use during colder months.
- Cool mode: Activates only your cooling system. Use during warmer months.
- Auto mode (Heat/Cool): The thermostat switches between heating and cooling as needed to maintain a target temperature range. This is ideal for transitional seasons when mornings are cool and afternoons are warm.
- Off mode: Disables both heating and cooling. The fan may still operate on a schedule or manually.
- Eco or Away mode: Maintains wider temperature ranges to minimize energy use while you are away from home. Most smart thermostats activate this mode automatically when geofencing detects that all household members have left.
Building an Effective Schedule
While learning thermostats can build a schedule automatically, manually configuring your schedule gives you more precise control and often yields better energy savings. A well-designed schedule typically includes four periods:
- Wake: The temperature adjusts 30–60 minutes before you wake up so your home is comfortable when you get out of bed.
- Leave: The temperature shifts to an energy-saving setpoint shortly after you leave for work or school.
- Return: The temperature returns to a comfortable setpoint before you arrive home.
- Sleep: The temperature adjusts for sleeping — typically cooler in winter (the Sleep Foundation recommends 60–67°F for optimal sleep quality) and warmer in summer.
The chart above illustrates a key principle endorsed by the U.S. Department of Energy: the longer you can maintain a temperature setback (a warmer setpoint in summer or a cooler setpoint in winter while you are away or asleep), the greater your annual savings. Even modest setbacks of 7–10°F for eight hours per day can yield meaningful reductions in energy consumption.
Advanced Energy-Saving Features
Beyond basic scheduling, smart thermostats offer several advanced features designed to reduce energy consumption:
- Adaptive recovery (smart recovery): Instead of turning on your HVAC system at a fixed time, the thermostat learns how long your home takes to heat up or cool down and starts the system at the optimal time. This prevents the system from running longer than necessary.
- Weather compensation: By pulling local weather data from the internet, your thermostat can anticipate extreme temperatures and adjust its behavior proactively. Some models will pre-cool your home before a heat wave arrives or reduce heating output during an unseasonably warm afternoon.
- Occupancy sensing: Using built-in motion sensors or remote room sensors, the thermostat can detect when a room is occupied and prioritize comfort in that space. When no motion is detected for an extended period, it reverts to energy-saving setpoints.
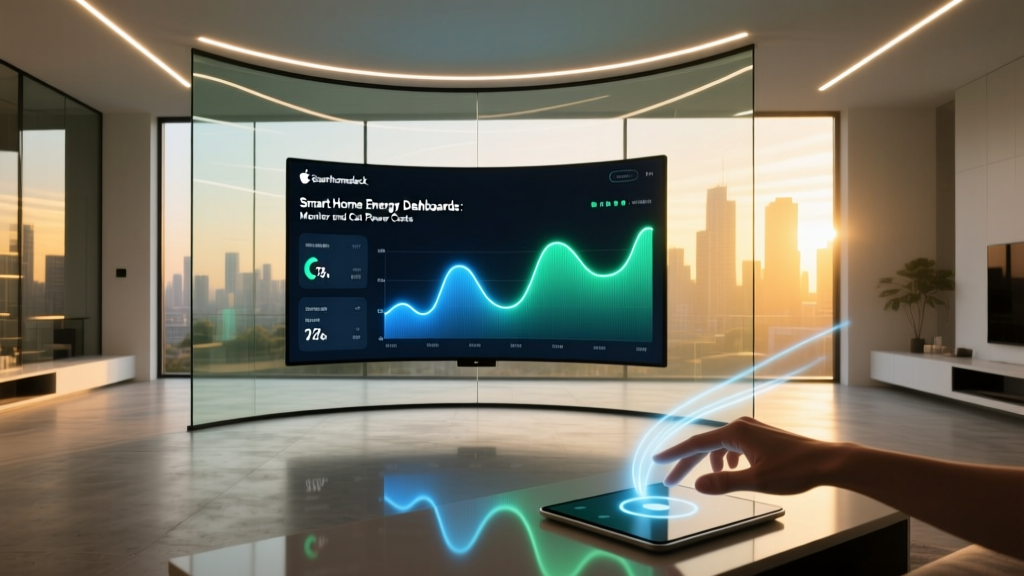
- Energy usage reports: Most companion apps provide monthly or quarterly reports showing your HVAC runtime, energy consumption trends, and comparisons to similar homes in your area. Reviewing these reports regularly helps you identify inefficiencies and adjust your schedule accordingly.
- Utility demand response programs: Many utility companies offer rebates and bill credits for enrolling your smart thermostat in demand response programs. During peak energy demand periods, the utility can make minor adjustments to your thermostat setpoint (typically 1–3°F) to reduce strain on the electrical grid. You retain the ability to override these adjustments at any time.
Room Sensors & Zoning
One of the most impactful upgrades you can add to a smart thermostat system is remote room sensors. These small, battery-powered devices measure temperature and occupancy in individual rooms and communicate that data back to your thermostat. This solves one of the most common comfort complaints in single-thermostat homes: rooms that are consistently too hot or too cold.
With room sensors, you can configure your thermostat to prioritize different rooms at different times of day. For example, you might set the thermostat to follow the bedroom sensor at night and the living room sensor during the day. Some systems support smart scheduling that automatically switches the active sensor based on detected occupancy patterns.
For homes with multiple HVAC zones — each controlled by its own thermostat — smart thermostats can often be grouped within the companion app for centralized management. This allows you to adjust the entire home's temperature with a single command or create coordinated schedules across zones. Learn more about multi-zone strategies in our climate control optimization guide.
Voice Control, Integrations & Smart Home Automation
A smart thermostat's value multiplies when it becomes part of a larger smart home ecosystem. This section explores how to connect your thermostat to voice assistants, smart home platforms, and automation routines.
Voice Assistant Integration
Most smart thermostats support integration with at least one major voice assistant:
- Amazon Alexa: Link your thermostat account through the Alexa app's Skills section. Once connected, you can say things like "Alexa, set the thermostat to 72 degrees" or "Alexa, what's the current temperature?"
- Google Assistant: Connect through the Google Home app by adding your thermostat as a device. Google Assistant supports the same temperature commands and can include your thermostat in Google Home routines.
- Apple HomeKit / Siri: Thermostats that support HomeKit can be added directly through the Home app on your iPhone or iPad. Siri commands work similarly, and the thermostat can participate in HomeKit scenes and automations.
Voice control is particularly useful when your hands are full — cooking, carrying groceries, or settling into bed. It also provides accessibility benefits for household members with mobility or vision limitations.
Smart Home Platform Integration
Beyond voice assistants, smart thermostats can integrate with broader smart home platforms and protocols:
- IFTTT (If This Then That): Create custom automations such as turning on a smart fan when the thermostat detects a temperature above a certain threshold, or sending a push notification when your HVAC system has been running for more than two hours continuously.
- Samsung SmartThings: Add your thermostat to the SmartThings ecosystem for integration with hundreds of compatible devices, including smart vents, window sensors, and presence detectors.
- Matter & Thread: Newer smart thermostats are beginning to support the Matter protocol, which promises universal interoperability across smart home ecosystems. If you are purchasing a new thermostat, Matter support is a feature worth looking for to ensure long-term compatibility.
Automation Routines & Scenes
One of the most powerful — and underutilized — features of smart thermostat integration is the ability to include climate control in broader automation routines. Here are a few examples of effective routines:
- "Good Morning" routine: Your smart lights gradually brighten, the thermostat adjusts to your wake temperature, and your smart coffee maker begins brewing — all triggered by a single voice command or a scheduled time.
- "Leaving Home" routine: When your smart lock is engaged from the outside, the thermostat switches to Eco mode, lights turn off, and your security system arms.
- "Movie Night" scene: Lights dim, the thermostat lowers by a degree or two (since a room full of people generates body heat), and your smart TV and soundbar power on.
- Vacation mode: A single automation that sets the thermostat to an extended away setpoint, pauses robot vacuum schedules, enables security cameras, and activates randomized lighting to simulate occupancy.
These automations transform your thermostat from a standalone device into an active participant in your home's intelligent behavior. The more devices you integrate, the more opportunities you have to create routines that enhance comfort, security, and energy efficiency simultaneously.
Maintenance, Troubleshooting & When to Call a Professional
Smart thermostats are remarkably reliable, but like any connected device, they occasionally encounter issues. This section covers routine maintenance tasks, common problems and their solutions, and situations where professional assistance is warranted.
Routine Maintenance
Keeping your smart thermostat in peak condition requires minimal effort, but a few regular tasks can prevent most common issues:
- Keep the display clean: Dust and fingerprints can interfere with touchscreen responsiveness and ambient light sensors. Wipe the display gently with a microfiber cloth. Avoid chemical cleaners, which can damage anti-glare coatings.
- Check sensor accuracy annually: Place a standalone digital thermometer near your thermostat and compare readings. If the thermostat's reported temperature differs by more than 1–2°F, check the app for a calibration option. Many smart thermostats allow you to apply a temperature offset.
- Monitor battery levels on remote sensors: Room sensors typically use CR2032 or AAA batteries that last 1–3 years. The companion app will usually alert you when battery levels are low, but it is a good practice to check periodically.
- Review and update your schedule seasonally: Your summer and winter schedules should differ significantly. As seasons change, revisit your schedule to ensure setpoints and timing still align with your lifestyle.
- Ensure firmware is up to date: Most smart thermostats update firmware automatically over Wi-Fi, but it is worth checking the app's settings or device information page periodically to confirm you are running the latest version. Firmware updates often include bug fixes, new features, and security patches.
Common Problems & Solutions
Problem: The thermostat display is blank or unresponsive.
Solution: First, check your circuit breaker to ensure power is reaching your HVAC system. If the breaker is fine, remove the thermostat display from its baseplate and check that all wires are securely connected. If you have a C-wire, verify it is properly seated. For battery-powered models, replace the batteries. If none of these steps work, perform a factory reset (consult your manufacturer's instructions) or contact customer support.
Problem: The HVAC system short-cycles (turns on and off frequently).
Solution: Short-cycling can be caused by a thermostat that is "power stealing" without a C-wire, drawing small amounts of current through the heating or cooling wire. This current can inadvertently trigger the HVAC relay. Installing a C-wire or a C-wire adapter usually resolves this issue. If short-cycling persists, the problem may lie with the HVAC system itself — a dirty air filter, low refrigerant, or a failing component — and a professional HVAC technician should be consulted.
Problem: The thermostat loses Wi-Fi connectivity.
Solution: Wi-Fi drops are often caused by signal interference, router changes, or network congestion. Start by rebooting your router. If the problem persists, check whether your thermostat is connected to a 2.4 GHz network. Moving your router closer to the thermostat or adding a Wi-Fi extender can improve signal strength. If you recently changed your Wi-Fi password or network name, you will need to reconnect the thermostat through its settings menu or the companion app.
Problem: The temperature reading seems inaccurate.
Solution: Thermostat placement matters. If your thermostat is installed in direct sunlight, near a heat-generating appliance, above a vent, or on an exterior wall, its readings will be skewed. If relocation is not practical, use the temperature offset feature in the app to calibrate the reading against a known-accurate thermometer. Remote room sensors can also help by providing temperature data from a more representative location in your home.
Problem: Geofencing does not trigger when leaving or arriving home.
Solution: Geofencing relies on location services being enabled on all household members' smartphones. Verify that location permissions are set to "Always Allow" (not just "While Using the App") for the thermostat's companion app. Also check that the geofence boundary in the app is set to an appropriate radius — typically 1–3 miles from your home. If multiple household members share the thermostat, ensure all users have been added to the geofencing group so the system waits for the last person to leave before activating Away mode.
When to Call a Professional
While most smart thermostat issues can be resolved through the steps above, some situations require professional expertise:
- Your HVAC system does not respond to thermostat commands at all. This could indicate a wiring error, a blown fuse on the furnace control board, or a transformer failure.
- You want to install a smart thermostat with a complex HVAC system (dual-fuel, geothermal, multi-stage with humidity control, or radiant floor heating). These systems often require specific thermostat models and professional configuration.
- You need to run a new C-wire and are not comfortable working inside your furnace or air handler.
- Your energy bills have increased significantly after installing a smart thermostat, suggesting a configuration error or an underlying HVAC problem that the thermostat is making more apparent.
For additional guidance on maintaining your broader smart home setup, check out our smart home maintenance tips to keep every connected device running smoothly.
Frequently Asked Questions
Can I install a smart thermostat myself, or do I need an electrician?
Most homeowners can install a smart thermostat themselves in under 30 minutes. The process involves turning off power, labeling and disconnecting wires from the old thermostat, mounting the new baseplate, reconnecting wires, and powering on. The most common complication is the absence of a C-wire, which can often be resolved with an adapter kit. However, if you have a high-voltage heating system (such as electric baseboard heaters), a complex multi-stage HVAC system, or are uncomfortable working with electrical wiring, hiring a licensed HVAC technician or electrician is the safer choice.
How much money can a smart thermostat actually save on energy bills?
The actual savings depend on your climate, home insulation, HVAC efficiency, and — most importantly — how you use the thermostat. The U.S. Department of Energy estimates that turning your thermostat back 7–10°F for eight hours a day can save up to 10% annually on heating and cooling costs. Smart thermostats make these setbacks automatic through scheduling, geofencing, and occupancy detection. Independent studies by ENERGY STAR have found that certified smart thermostats save an average of 8% on heating and 10% on cooling compared to homes that keep a constant temperature. For a household spending $2,000 per year on heating and cooling, that translates to roughly $160–$200 in annual savings — meaning the thermostat often pays for itself within one to two years.
What happens to my smart thermostat during a power outage or internet outage?
During a power outage, your smart thermostat will shut down along with your HVAC system. When power is restored, the thermostat will reboot and resume its previous schedule and settings — all configuration data is stored in non-volatile memory, so nothing is lost. During an internet outage, your thermostat continues to operate normally using its locally stored schedule. You will lose the ability to control it remotely via the app, and features that depend on cloud connectivity (such as weather compensation and some geofencing implementations) will be temporarily unavailable. Once your internet connection is restored, the thermostat reconnects automatically and syncs any data that was generated while offline.
Are smart thermostats compatible with all HVAC systems?
Smart thermostats are compatible with the majority of residential HVAC systems, including forced-air furnaces (gas, oil, and electric), central air conditioning, heat pumps (including dual-fuel configurations), and most radiant systems with low-voltage control wiring. However, there are notable exceptions. High-voltage systems (240V electric baseboard heaters, wall heaters, and some radiant floor systems) require specialized smart thermostats designed for line-voltage applications. Some proprietary communicating HVAC systems from manufacturers like Carrier, Trane, and Lennox use digital communication protocols that are incompatible with standard smart thermostats — in these cases, you may need the manufacturer's own smart thermostat or a gateway adapter. Always check the thermostat manufacturer's compatibility checker (usually available on their website) before purchasing.
How do I choose between a learning thermostat and a manually programmed smart thermostat?
The choice depends on your lifestyle and preferences. A learning thermostat (such as the Google Nest Learning Thermostat) is ideal if you have a relatively predictable routine and prefer a hands-off approach. Over the first one to two weeks, it observes your manual adjustments and builds a schedule automatically. After the learning period, it manages your home's temperature with minimal input from you. A manually programmed smart thermostat (such as many Ecobee and Honeywell Home models) is better if your schedule varies frequently, if you have strong preferences about specific temperatures at specific times, or if you simply enjoy granular control. These models let you create detailed schedules from day one and typically offer more advanced features like room sensor prioritization and detailed energy reports. Many smart thermostats offer both modes — you can start with manual programming and enable learning features later if desired.
Understanding your smart thermostat goes far beyond setting a temperature and walking away. By taking the time to properly install, configure, and maintain your device — and by integrating it thoughtfully with the rest of your smart home — you unlock a level of comfort, convenience, and energy efficiency that traditional thermostats simply cannot match. Whether you are fine-tuning your seasonal schedule, adding room sensors to eliminate cold spots, or building automation routines that coordinate your entire home, the knowledge in this manual gives you the foundation to get the most from your investment.
Ready to explore more ways to optimize your connected home? Browse our full library of smart home learning resources for guides, comparisons, and expert tips on every aspect of home automation.